When it comes to water damage, you have to move fast. There's a critical window—the first 24 to 48 hours—where your actions will determine whether you're dealing with a simple water cleanup or a full-blown mold infestation. Acting with urgency is your best defense.
The goal is to stop the water source immediately, get all standing water out, and then aggressively dry everything that got wet. This isn't just about mopping up a puddle; it's about creating an environment where mold simply can't get a foothold.
Your First 48 Hours After Water Damage

Whether it's a burst pipe, a failed water heater, or a leaky roof, the moments after a water event are chaotic. It’s natural to feel overwhelmed, but what you do in these first two days makes all the difference. Get things dry, and get them dry fast.
Before you grab a single towel, take a deep breath and run through a quick safety check. Here's a checklist to keep you focused and safe.
Immediate Action Checklist After Water Damage
| Priority | Action Item | Reason |
|---|---|---|
| 1. Safety | Turn off electricity to affected areas. | Water and electricity are a deadly mix. Avoid the breaker if you have to walk through water. |
| 2. Safety | Check for structural hazards. | Saturated drywall and ceilings are extremely heavy and can collapse without warning. |
| 3. Safety | Identify the water source. | Clean water is manageable; "black water" from a sewer line is a biohazard requiring professionals. |
| 4. Mitigation | Stop the source of the water. | Find the main shut-off valve to prevent more water from causing further damage. |
| 5. Mitigation | Remove standing water immediately. | Use a wet/dry vac, mops, and buckets to extract as much water as possible, fast. |
Once you've run through these crucial first steps, you can shift your focus from emergency response to proactive drying.
Prioritize Safety Above All Else
It can't be stressed enough: your safety comes first.
Before you start any cleanup, go to your breaker box and shut off the power to any room that has water in it. If the breaker box is in a flooded basement or you'd have to wade through water to reach it, stop. Call an electrician immediately.
Next, look up. A ceiling saturated with water is incredibly heavy and can come crashing down. If you see sagging drywall or bulging walls, stay out of that area.
Finally, know your water. Is it from a clean supply line? Or is it from a backed-up toilet or sewer drain? Contaminated water, or "black water," is filled with dangerous bacteria and requires professional handling and specialized personal protective equipment (PPE). Don't risk your health.
Stop the Source and Begin Extraction
With the area secured, your next mission is to stop the flow of water. Find your home's main water shut-off valve or the specific valve for the leaking appliance and turn it off. This single action prevents a small problem from turning into a disaster.
Now, get that standing water out. This is not a job for paper towels. You need heavy-duty tools like a wet/dry vacuum, mops, and buckets to make a real dent. The more water you can physically pull out of the space now, the less work your fans and dehumidifiers have to do later.
Create an Environment Hostile to Mold
Mold needs one thing to survive: moisture. By taking aggressive drying action, you make your home an inhospitable place for it. Remember, mold spores are everywhere, just waiting for the right conditions. They can start growing in as little as 24 to 48 hours after getting wet.
Pro Tip: Don't just look at the puddle on the floor. Water is sneaky. It wicks up inside drywall, travels under baseboards, and soaks into the carpet padding beneath. That musty smell you might notice a day or two later? That’s often your first clue that moisture is hiding somewhere you can't see it. If you want to understand what that scent means, check out our guide on how to know if that musty smell is mold.
By focusing on safety, stopping the source, and starting the extraction and drying process immediately, you're not just cleaning up a mess. You're actively preventing a much bigger, more expensive mold problem down the road.
The Art and Science of Drying Your Home
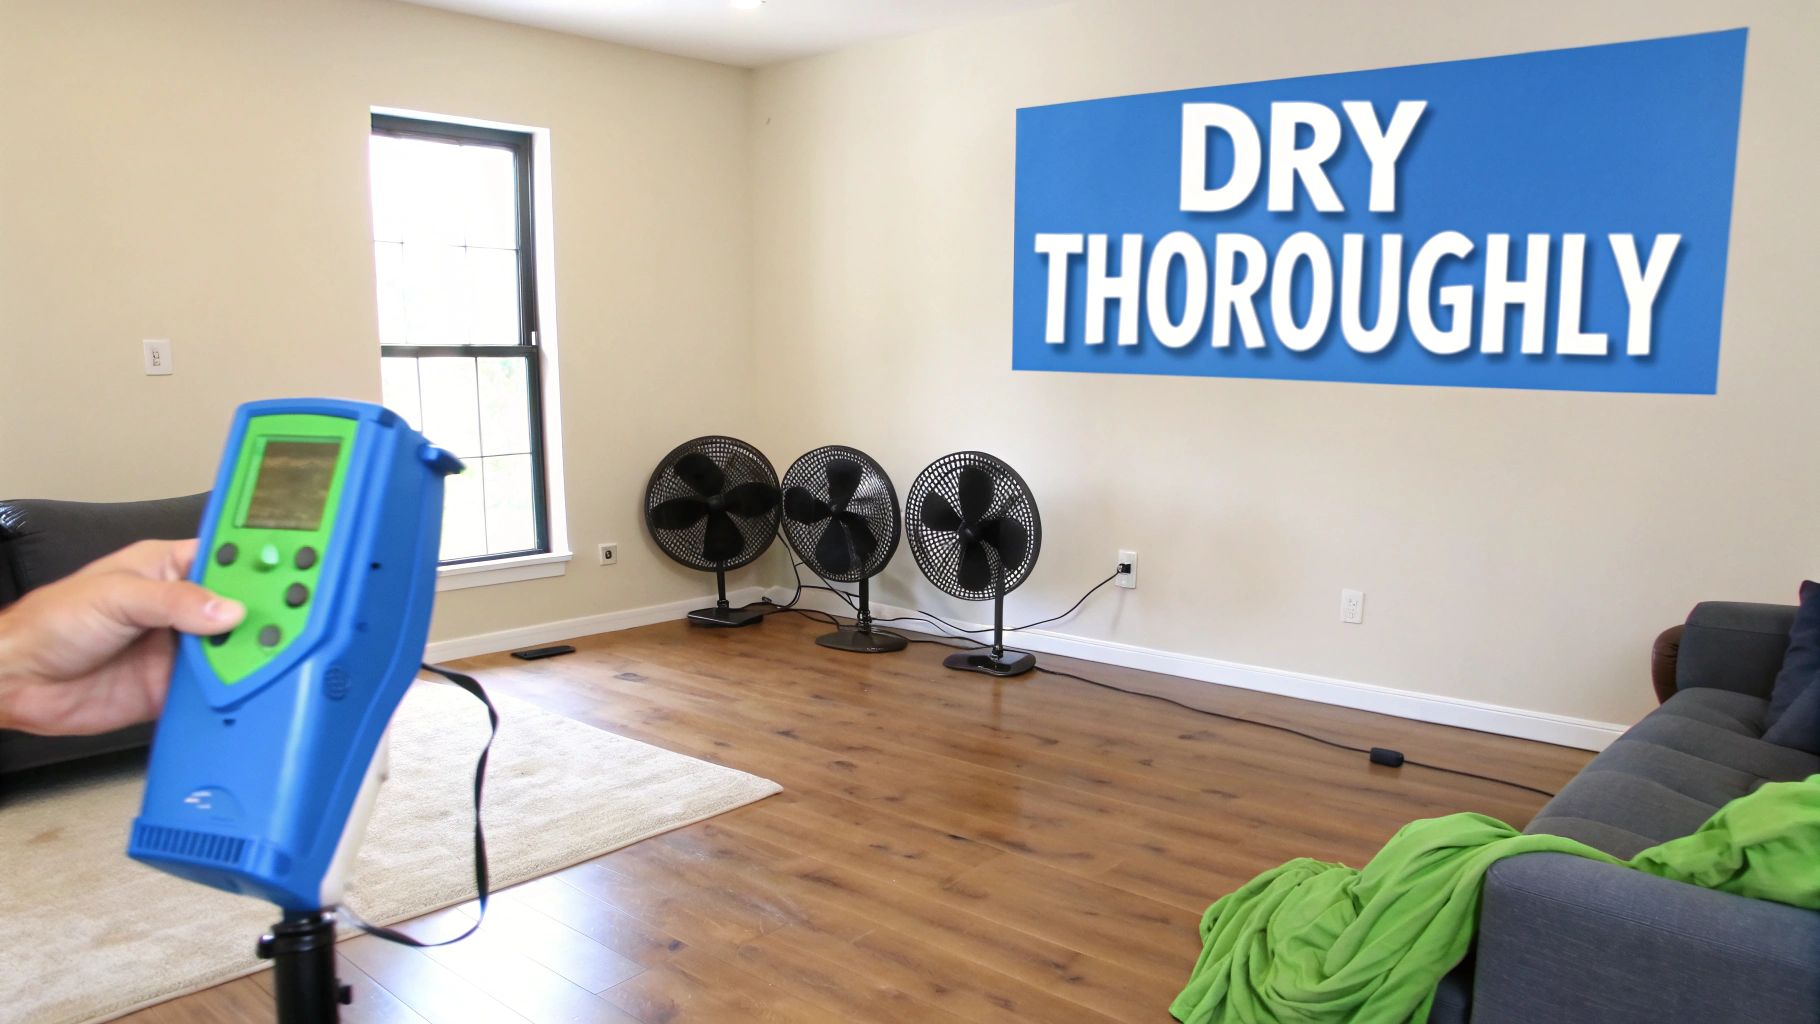
Once you’ve gotten rid of the standing water, the real work begins. A lot of people think pointing a household fan at a damp wall is enough, but that’s a surefire way to end up with a mold problem. Proper drying is an active, methodical process. It's about combining intense air movement with aggressive dehumidification to win the race against mold.
The mission is to create an environment so hostile to moisture that it has no choice but to evaporate and get pulled out of the air. We’re not just talking about surface-level dryness. You have to yank that hidden moisture out from deep inside drywall, subflooring, and wooden beams before mold gets a foothold.
Harnessing the Power of Air Movement
Think of high-powered fans as your first line of offense. I’m not talking about your average box fan. You need high-velocity air movers—the kind professionals call "snail fans"—to do the job right. They’re designed to shoot a concentrated sheet of air across a surface, literally shearing moisture off and forcing it airborne.
But it’s not just about raw power; it’s about strategy. Don't just aim fans at the biggest puddle. You need to create a "drying vortex" in the room.
- Get the Angle Right: Position your fans at a 45-degree angle to the walls. This sends the airflow right along the baseboards where moisture loves to hide.
- Create a Cyclone: Set up multiple fans around the room's perimeter, all pointing in the same direction (either clockwise or counter-clockwise). This generates a powerful, circulating wind that continuously dries every surface.
- Don't Forget Hidden Spots: Make sure to aim fans into closets, under cabinets, and inside any other nooks where air can get trapped.
This constant, powerful airflow is what kicks the evaporation process into high gear, and it's the critical first step to getting things properly dry.
Choosing Your Dehumidification Tools
Okay, so the moisture is now floating in the air. What next? You have to capture it. That’s where dehumidifiers come in—they are essentially powerful moisture magnets. They suck water vapor right out of the air and trap it. For home use, you’ll typically run into two main types.
Refrigerant Dehumidifiers
These are the workhorses you’ll see most often. They function a lot like a small refrigerator, pulling in damp air, cooling it down to condense the water out, and then pushing the now-drier air back into the room.
- Best For: Warmer conditions, usually anywhere above 60°F.
- How They Work: They thrive in the moderate indoor temperatures typical of most homes.
- Pro Tip: For anyone in Santa Barbara and Ventura, where coastal humidity is always a factor, a solid refrigerant unit is your best bet after a leak.
Desiccant Dehumidifiers
These use a special moisture-absorbing material (a desiccant) to chemically strip water from the air. You see professionals use these more often, especially in tricky situations.
- Best For: Colder spaces, like a chilly garage or an unheated basement during the winter.
- How They Work: Their big advantage is that they work efficiently in much lower temperatures than refrigerant models.
For most homeowners dealing with water damage, a high-capacity refrigerant dehumidifier is the right call. Stick it in the middle of the room and make sure you’re emptying the tank frequently—or better yet, run a drain hose to a nearby sink so it can run continuously.
Finding Hidden Pockets of Moisture
Water is sneaky. It seeps into places you’d never expect—behind baseboards, under vinyl flooring, and deep inside wall cavities. Just touching a surface to see if it feels dry is one of the biggest mistakes you can make.
This is exactly why professionals rely on moisture meters. These tools give you a hard number, telling you precisely how much moisture is locked inside a material.
- Pin-Type Meters: These use two small prongs that poke into the material for an exact reading.
- Pinless Meters: These use an electromagnetic sensor to scan an area without leaving holes.
By taking readings in a dry, unaffected part of your home, you establish a "dry standard." Then, you can methodically test the damp areas until they return to that baseline. It takes all the guesswork out of the process. These meters are especially critical for checking places like crawl spaces, where dampness can go undetected for years. If you're worried about that area, it's a good idea to know the common signs of mold in a crawl space.
The science is settled on this: to stop mold, you have to get things dry within 24-48 hours and keep the indoor humidity between 30-50%. Sticking to this timeline is vital for avoiding the serious health problems linked to indoor dampness, a fact backed by extensive research. You can read more about the study on indoor dampness and health to understand just how critical rapid drying is.
Deciding What to Keep and What to Throw Away

After the initial shock of a flood or major leak wears off, you're left with one of the most gut-wrenching tasks: sorting through your belongings. It's a tough, emotional process, but making the right call on what to keep and what to toss is absolutely critical for preventing a future mold nightmare.
I've seen it happen time and again—homeowners try to save a beloved rug or a piece of furniture, only to find they've accidentally invited a hidden mold problem to move in. It’s not worth the risk.
Porosity: The Key to Smart Decisions
The secret to making these calls comes down to one word: porosity. It’s simply how easily an item soaks up and holds onto water. Understanding this concept is your best tool for navigating the mess.
Think of it in three simple categories:
- Non-Porous: These are the easy ones. Materials like glass, metal, hard plastics, and sealed ceramics don’t absorb water. Your dinner plates and metal lamps are good examples.
- Semi-Porous: These materials absorb a bit of water but not as deeply as a sponge. Think solid wood furniture, unsealed concrete, and some vinyl flooring.
- Porous: This is the high-risk group. These materials act like sponges, soaking up water and trapping it deep inside. We’re talking about drywall, carpet, insulation, and that particleboard bookshelf.
Once you can categorize an item, you know exactly what you’re up against.
The "No-Brainer" Discard Pile
Let's start with the things that, unfortunately, have to go. No questions asked. Certain materials are just too good at hiding moisture and feeding mold to take a chance on.
Drywall and Insulation
The moment drywall gets wet, its paper backing turns into a five-star meal for mold. It's virtually impossible to dry out the inside of a wall cavity before growth starts. The same goes for wet insulation—it not only loses its ability to insulate but becomes a perfect, fluffy home for mold spores.
Carpet and Padding
While you might think you can save the carpet, the real enemy is the padding underneath. It’s a thick sponge that can secretly hold moisture for weeks, creating the ideal dark, damp environment for mold to thrive unseen. Always get rid of saturated carpet padding.
Key Takeaway: If a porous material can't be dried completely within 24 to 48 hours, it needs to be discarded. The risk of hidden moisture and a long-term mold problem is just too high.
What You Can (Probably) Save
Now for the good news. Many non-porous and some semi-porous items can be fully restored if you move quickly and work smartly.
High-Success Items (Non-Porous)
These are your easiest wins. Anything made of glass, metal, or hard plastic has a great chance of survival. The key is thorough cleaning. You'll need to wash them with a good detergent solution first, then follow up with an appropriate disinfectant to kill any lingering spores. Make sure they are 100% dry before bringing them back into your home.
Conditional Saves (Semi-Porous)
This is where things get tricky. Solid wood pieces, like an heirloom dining table or your hardwood floors, fall into this category. Their fate really depends on how fast and how well they can be dried. Professionals use specialized equipment to gently pull moisture out without causing the wood to warp, crack, or split. For valuable pieces, calling in a restoration expert is a wise investment.
When you're trying to figure out what's salvageable, a quick reference can make all the difference. Here’s a simple table to guide your decisions.
Salvage vs. Discard Guide for Common Household Materials
| Material Type | Salvage Potential | Required Action |
|---|---|---|
| Glass, Metal, Hard Plastic | High | Clean with detergent, disinfect, and dry completely. |
| Solid Wood Furniture | Conditional | Must be dried rapidly by a professional to prevent warping. |
| Hardwood Floors | Conditional | Professional drying and moisture monitoring are essential. |
| Upholstered Furniture | Low | Very difficult to dry completely. Usually must be discarded. |
| Mattresses & Box Springs | Very Low | Impossible to dry the interior. Must be discarded. |
| Drywall & Insulation | Very Low | Becomes a food source for mold. Must be removed and replaced. |
| Carpet Padding | None | Acts like a sponge. Always discard when saturated. |
| Particleboard Furniture | None | Swells, disintegrates, and harbors mold. Always discard. |
Making these tough choices is a huge step in taking control of the situation. It’s not just about cleaning up the mess—it’s about strategically removing every potential threat to ensure your home is safe and healthy for the long run.
If you have an item you're on the fence about, getting it tested can give you the final answer. You can find more info on how to pick the best mold test kit for home use to check questionable items and get some much-needed peace of mind.
Cleaning and Disinfecting to Prevent Mold
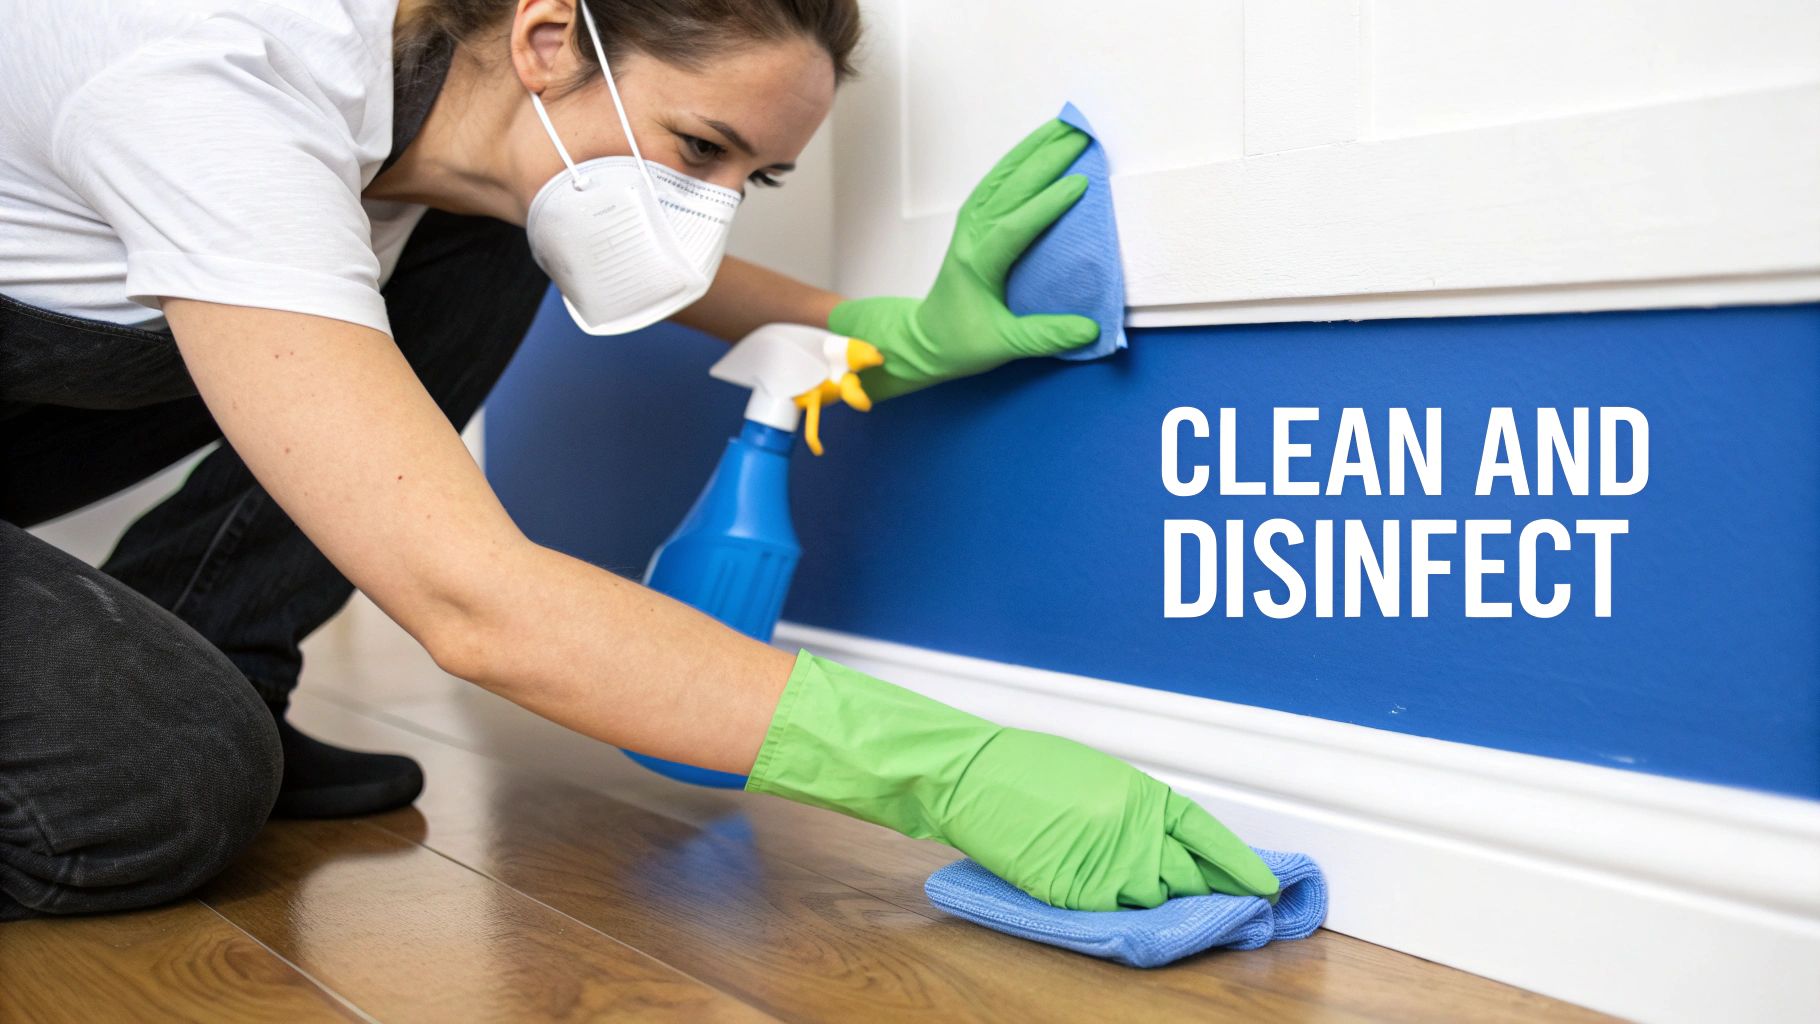
Once everything is finally, truly dry, it might feel like the hard part is over. But this next phase—thorough cleaning and disinfecting—is where you win the war against mold.
This isn’t just about wiping down surfaces. It's about methodically eliminating any microscopic spores left behind that are just waiting for the next hint of moisture to spring to life.
Before you touch a single thing, gear up. Personal Protective Equipment (PPE) isn't optional, it's essential. At a minimum, you need:
- An N95 Respirator: This protects you from inhaling airborne mold spores, which get kicked up during cleaning.
- Safety Goggles: Keep spores and cleaning solutions out of your eyes.
- Waterproof Gloves: Protect your hands from both contaminants and harsh cleaning agents.
Working in a water-damaged environment without this basic gear exposes you to potential respiratory issues and skin irritation. Safety first, always.
Debunking the Bleach Myth
One of the most common—and dangerous—myths in mold cleanup is that bleach is the ultimate solution. While bleach can kill surface mold on non-porous materials like tile or glass, it's a terrible choice for porous surfaces like drywall and wood.
Here’s why: the chlorine in bleach can't penetrate these materials to kill the mold’s roots (its hyphae). Instead, the water component of the bleach soaks into the material, effectively feeding the mold that's still alive deep inside. You might get a temporarily clean-looking surface, but you've just given the underlying problem a drink.
Expert Insight: For porous materials, physical removal is almost always better than trying to kill the mold. For cleaning salvageable items, start with a simple solution of household detergent and water for the initial scrub-down, then follow up with an appropriate disinfectant.
The Right Tools for the Right Surfaces
Your cleaning strategy has to adapt to the material you’re treating. There's no one-size-fits-all answer here.
For Hard, Non-Porous Surfaces (Tile, Metal, Glass)
This is where your efforts will be most successful. Start by washing every surface with a non-ammonia detergent and warm water. This physical scrubbing removes the bulk of the dirt, grime, and mold spores. After cleaning, you can apply a disinfectant to kill what's left.
For Semi-Porous Materials (Solid Wood, Concrete)
These require a bit more finesse. After a thorough cleaning with detergent, you might use a gentler solution. A 50/50 mix of white vinegar and water can be effective, as the vinegar's acidity helps break down mold. Hydrogen peroxide is another option for certain materials; it fizzes on contact with mold spores and helps lift them from the surface. Always test any solution on a small, hidden area first.
Think Beyond the Water Line
Water wicks and travels. That visible water line on your wall is just the starting point. Moisture can easily travel a foot or more higher inside the drywall.
When cleaning, you must be aggressive and clean beyond the visible damage. A good rule of thumb is to clean at least 12-24 inches above the highest point where you saw water damage or detected moisture.
Don’t forget the hidden spots where moisture and dust accumulate, creating a perfect habitat for mold:
- Inside wall cavities (once drywall is removed)
- Under and behind baseboards
- Behind cabinets and built-in furniture
- Within HVAC ductwork that was exposed to water
These areas must be meticulously vacuumed with a HEPA-filtered vacuum and then wiped down. If a musty smell lingers after you think you’re finished, it’s a tell-tale sign that you missed something.
If you suspect mold is hiding, our guide on how to test for toxic mold can help you confirm your suspicions and decide on the next steps.
The scale of this issue is significant; the global mold remediation market was valued at around USD 1.23 billion in 2023 and is expected to grow. This growth is driven by water damage from aging infrastructure and severe weather—highlighting why effective prevention is so critical to avoid becoming part of that statistic. You can find more details in this mold remediation market report.
Knowing When to Call in the Pros
Handling a small pipe leak or a minor toilet overflow can feel pretty manageable. Grab a wet/dry vac, set up a few fans, and it seems like you've got it covered. But one of the most important skills in stopping mold before it starts is knowing when you’re in over your head.
Hesitating to pick up the phone can be a costly mistake. A situation that seems contained can quickly spiral into a massive, expensive mold problem that compromises your home and your health.
The decision isn't just about making things easier; it's about making sure the job is done right. Professional restoration crews bring specialized training and industrial-grade equipment to the table. They have a deep understanding of how water moves and hides within a building’s structure. They can see what you can't and dry what you can't reach—and that's often the difference between a successful cleanup and a hidden mold nightmare.
Red Flags That Scream "Call a Professional"
Some situations are immediate deal-breakers for a DIY approach. If you run into any of these, your very next move should be to call a certified water damage restoration company. Don't wait.
-
The Damage is Widespread: A good rule of thumb in the industry is the 10-square-foot rule. If the water damage covers an area bigger than roughly 3 feet by 3 feet, it's too much for a homeowner to handle safely. The sheer volume of water and saturated materials is just too much for household fans and shop vacs.
-
Water Has Soaked In for Over 48 Hours: Remember that critical 48-hour window before mold takes hold? If you get back from a weekend away and find a leak that’s been running for days, the clock has already run out. You have to assume mold growth has already started inside your walls, under flooring, and in other hidden spots.
-
Contaminated Water is Involved: This one is non-negotiable. If the source of the water is a sewer backup, an overflowing toilet with feces, or overland flooding, it’s considered Category 3 or "black water." This stuff is a serious biohazard, crawling with bacteria and pathogens. Trying to clean it yourself is a major health risk.
-
Your HVAC System Got Wet: Water in your heating or air conditioning ducts is a huge problem. Your HVAC system is the perfect superhighway for spreading mold spores to every single room in your house. What started as a small problem in the basement can become a full-blown, whole-home contamination event. You need pros to properly clean and sanitize the ductwork.
Restoration Experts vs. Mold Inspectors
When you realize you need help, it’s good to know who to call for what. You'll likely come across two different specialists, and they each play a crucial, distinct role.
Water Damage Restoration Company
These are your first responders. Their job is to get in there and stop the bleeding. They’ll extract standing water, tear out ruined materials like soggy drywall and carpet padding, and set up an army of high-powered fans and dehumidifiers to dry everything out. Their entire focus is mitigation—stopping the damage in its tracks.
Certified Mold Inspector
A mold inspector is a different animal altogether. They are an independent, third-party consultant whose job is to assess, test, and verify. You might hire one before a big cleanup to figure out how bad the problem is, or you might bring one in after the restoration company is done to make sure they got it all. They give you unbiased, scientific data.
A reputable mold inspector will never perform the remediation work themselves. This is a critical separation that prevents a conflict of interest. Their job is to give you the unvarnished facts, not to sell you a big cleanup job.
Knowing who to trust with your home is everything. For a deeper look at what a professional assessment entails, you can learn more about the specifics of our mold inspection services and what you should demand from any qualified expert. Recognizing the signs that you’re out of your depth is your best defense against a small water issue turning into a giant mold headache.
Still Have Questions About Mold Prevention?
Even after the fans are off and the floors feel dry, a few nagging questions usually stick around. It’s totally normal. Dealing with the fallout from water damage is stressful, and you want to be sure you’ve done everything right to protect your home and family.
Let’s tackle some of the most common questions we hear from homeowners around Santa Barbara and Ventura. These are the things people ask us every day, so you're not alone in wondering.
How Long Does It Really Take for Mold to Grow After a Leak?
This is the big one, because the answer shows why moving fast is so critical. Under the right conditions—a bit of moisture, a food source like drywall, and our mild coastal temperatures—mold can start growing in as little as 24 to 48 hours.
We're not just talking about a major flood, either. A slow, hidden leak behind a bathroom vanity or a patch of carpet that never quite dried out is the perfect invitation for mold spores to take hold. That tiny window of time is exactly why everything you do in those first two days is so important. When you start the drying process immediately, you're literally taking away the one thing mold needs to survive.
Can I Just Use Bleach to Kill All the Mold?
This is probably the most common—and dangerous—myth we have to bust. While bleach works fine on a non-porous surface like a bathtub or tile, it's completely ineffective and often makes things worse on porous materials like drywall, wood, or ceiling tiles.
Here’s why: the chemistry just doesn't work. The chlorine in bleach can't soak into porous surfaces to kill the mold's "roots" (its hyphae). Instead, only the water from the bleach soaks in, which can actually feed the mold that survived underneath. You might get rid of the ugly surface stain for a little while, but you could be fueling a much bigger problem behind the scenes.
A Better Approach: For materials like drywall, the only way to be 100% sure the mold is gone is to cut out and remove the contaminated section. For surfaces you can save, a good scrub with a detergent solution, followed by a proper EPA-registered biocide, is worlds more effective than reaching for the bleach.
What Should the Humidity Level Be in My House to Prevent Mold?
Thinking about humidity is your best long-term defense, even when you aren't dealing with a leak. To make your home an unwelcome place for mold, you want to keep the indoor relative humidity (RH) somewhere between 30% and 50%.
You don’t have to guess, either. A cheap digital hygrometer from the hardware store will tell you the exact level. If you start seeing your home’s humidity consistently creeping above 60%, that’s a red flag. That much moisture in the air is enough for mold to start growing, especially in stuffy closets or bathrooms. A good dehumidifier and always running your exhaust fans when you shower or cook are your best tools here.
Is It Safe to Stay in My House After Water Damage?
Your safety always, always comes first. The right answer here really depends on the specifics of the situation.
-
When It Might Be Safe: If the damage is small, contained to one room, and came from a clean water source (like a burst supply line under the sink), you can probably stay. Just make sure you can block off the area and get the drying process started right away.
-
When to Evacuate: You need to leave immediately if you're facing any of these issues:
- The water is contaminated. This means gray water (from a dishwasher or washing machine) or black water (from a sewage backup).
- There’s any risk of electrical shock from submerged outlets or appliances.
- The home's structure feels compromised—think sagging ceilings or buckling floors.
Anyone with asthma, allergies, or a compromised immune system should be extra careful and probably find somewhere else to stay until everything is professionally cleaned and dried. When in doubt, play it safe.