When you discover water damage, the clock starts ticking. You've got about 48 hours to get ahead of mold growth. Your first move should always be to safely stop the water source, then shift into detective mode and document everything for your insurance claim. Often, the first clues aren't visual—it's that distinct musty smell or subtle signs like peeling paint that tell you a bigger problem is brewing.
Your Immediate Actions After Finding Water Damage
Finding a leak or a full-blown flood sends a jolt of panic through any homeowner, but staying methodical in those first few hours is your best defense against mold. It only takes 24 to 48 hours for mold to take hold in damp conditions, escalating a water problem into a serious contamination issue. Right now, your job isn't to clean mold; it's to create an environment where it simply can't start.
Stop the Source and Secure the Area
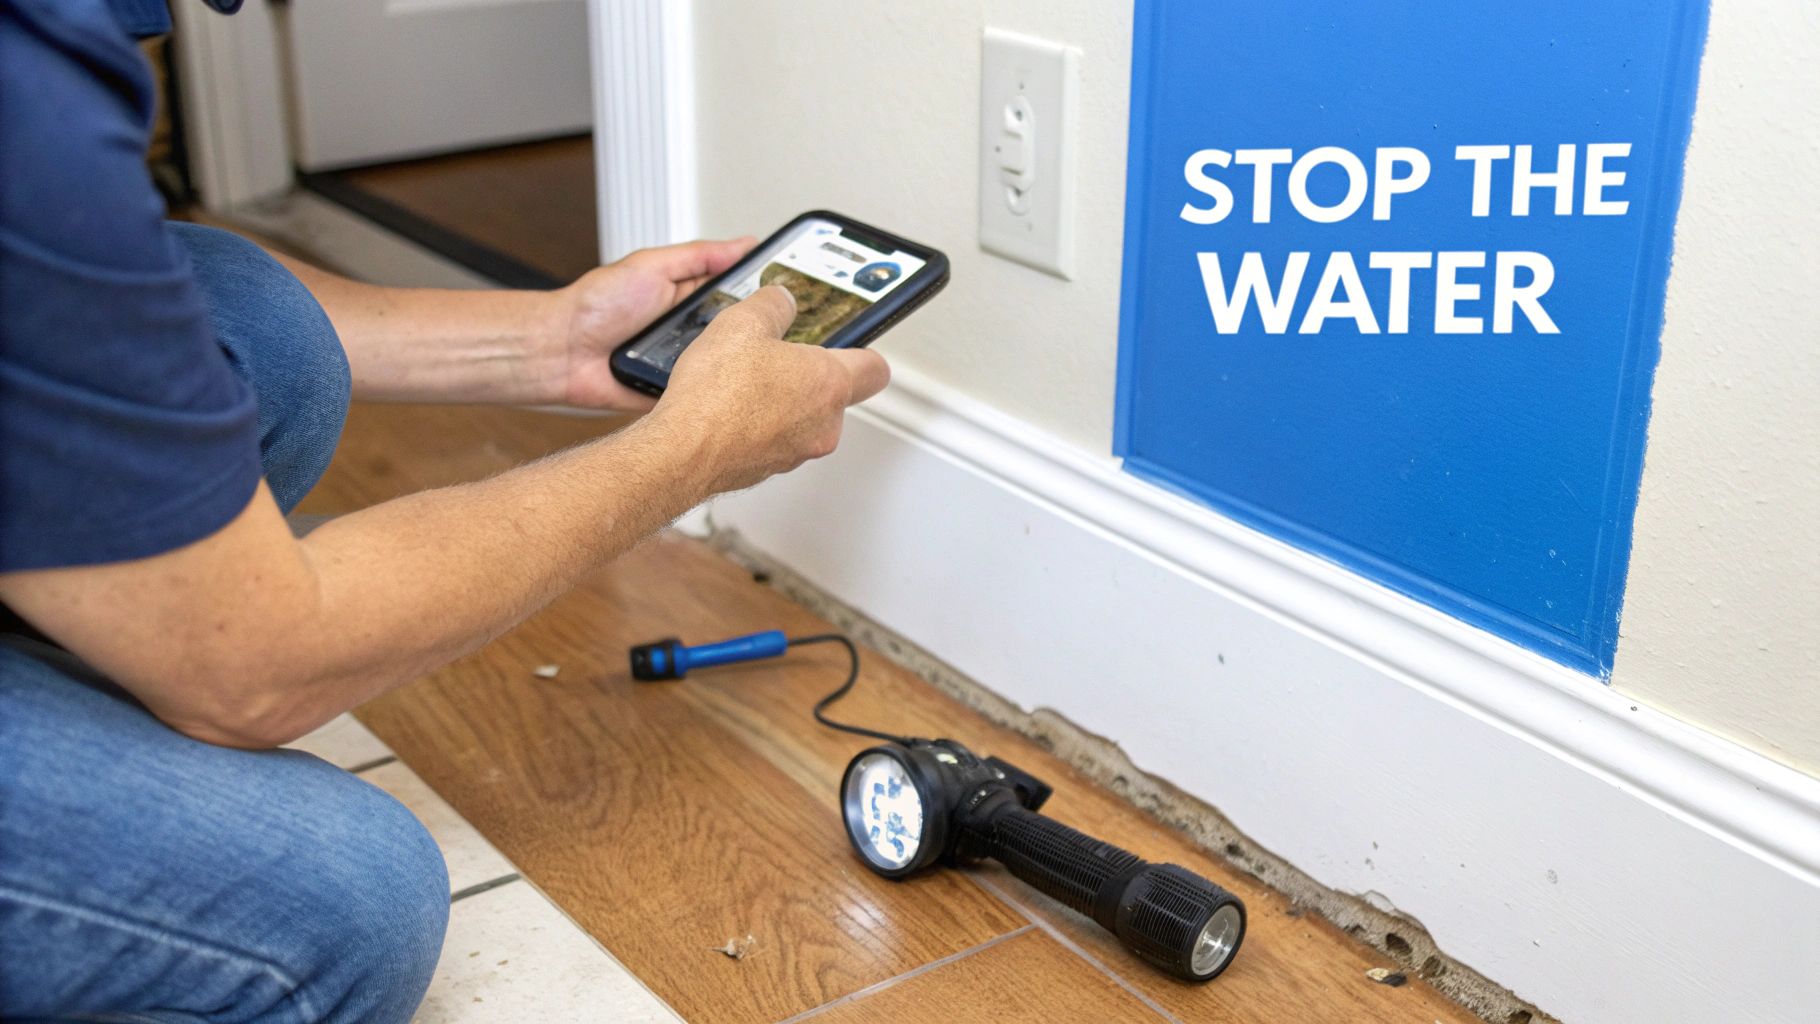
Before anything else, you have to shut down the source of the water. If it’s a burst pipe under the sink, turn off the main water valve to your house. If you can't immediately find the source, you may need a plumber, but stopping the flow is non-negotiable.
With the water contained, your next thought must be safety. Is there standing water near outlets or appliances? Head straight for the breaker box and cut the power to that area. And please, don't use your regular household vacuum to suck up water—only a wet/dry vac is built for that job.
Become a Meticulous Documentarian
Now, put on your detective hat. Before you move a single thing, thoroughly document the full extent of the damage. This is the evidence your insurance company needs, and it's absolutely critical.
- Take Photos and Videos: Use your phone to get wide shots of every affected room, then zoom in for close-ups of damaged furniture, soaked drywall, and saturated floors.
- Make a Detailed List: Write down every single item that got wet, from the big-ticket electronics to your personal belongings.
- Note the Water Line: Look closely at the walls and furniture to see how high the water rose. This gives professionals a clear picture of just how far the saturation spread.
This detailed record is your proof for the insurance adjuster. It helps streamline the claim and ensures you get fairly compensated. So many homeowners rush this step in their hurry to clean up, but its importance can't be overstated.
Key Takeaway: Fight the urge to start cleaning right away. Your first priorities are to stop the leak, make the area safe, and capture detailed photographic evidence. This disciplined approach is the foundation for a successful recovery and keeping mold at bay.
Trust Your Senses for Early Warning Signs
Long before you see any fuzzy black spots, your own senses can alert you that a mold problem is beginning. As mold grows, it releases microbial volatile organic compounds (mVOCs), which carry a very distinct smell.
- Follow Your Nose: Do you smell something musty, earthy, or like a pile of damp socks? That odor is a classic red flag for hidden mold growth, and it often shows up well before any visual signs. Don't dismiss it, even if the area looks dry.
- Look for Subtle Visual Cues: Scan the water-damaged areas for the early indicators. They're often subtle and easy to miss. Keep an eye out for peeling or bubbling paint, slight discoloration on drywall (often yellowish or brown), or warping along baseboards and floors.
These early warnings are your signal to investigate further. While these first steps are vital, they're really just the beginning of protecting your home. For a complete game plan, check out our guide on how to prevent mold after water damage. It will give you the framework to move from immediate response to long-term protection.
Arming Yourself: The Tools You Need to Uncover Hidden Moisture
After you’ve done an initial sweep with your eyes and nose—following strange smells and looking for obvious discoloration—it’s time to dig a little deeper. The real problem with mold is that it loves moisture the naked eye can’t see, hiding inside materials that feel perfectly dry to the touch.
This is where a few simple tools become your best friends. Think of yourself as a detective building a case. You need solid evidence, and that evidence is moisture. Luckily, you don't need a forensics lab to start gathering clues.
The Power of a High-Intensity Flashlight
Never, ever underestimate what a good, bright flashlight can reveal. The normal lighting in a room can easily hide the subtle signs of water intrusion. But a powerful LED flashlight lets you see things from a whole new angle.
By shining the beam almost parallel to a surface (a pro technique called "raking light"), you can expose tiny imperfections that are otherwise invisible.
Use your flashlight to scan for:
- Subtle Texture Changes: Drywall that’s been wet and then dried often gets a faint, bubbly, or uneven texture.
- Faint Water Stains: The focused light can highlight minor discoloration or faint water rings on ceilings and walls.
- Minor Sheen Differences: Some surfaces reflect light differently where moisture has been, revealing the outline of the affected area.
Get in close and point that beam into dark corners—inside cabinets, under sinks, behind furniture, and along baseboards. What looks like a simple shadow in normal light might just be the start of a serious mold issue.
Mastering the Moisture Meter
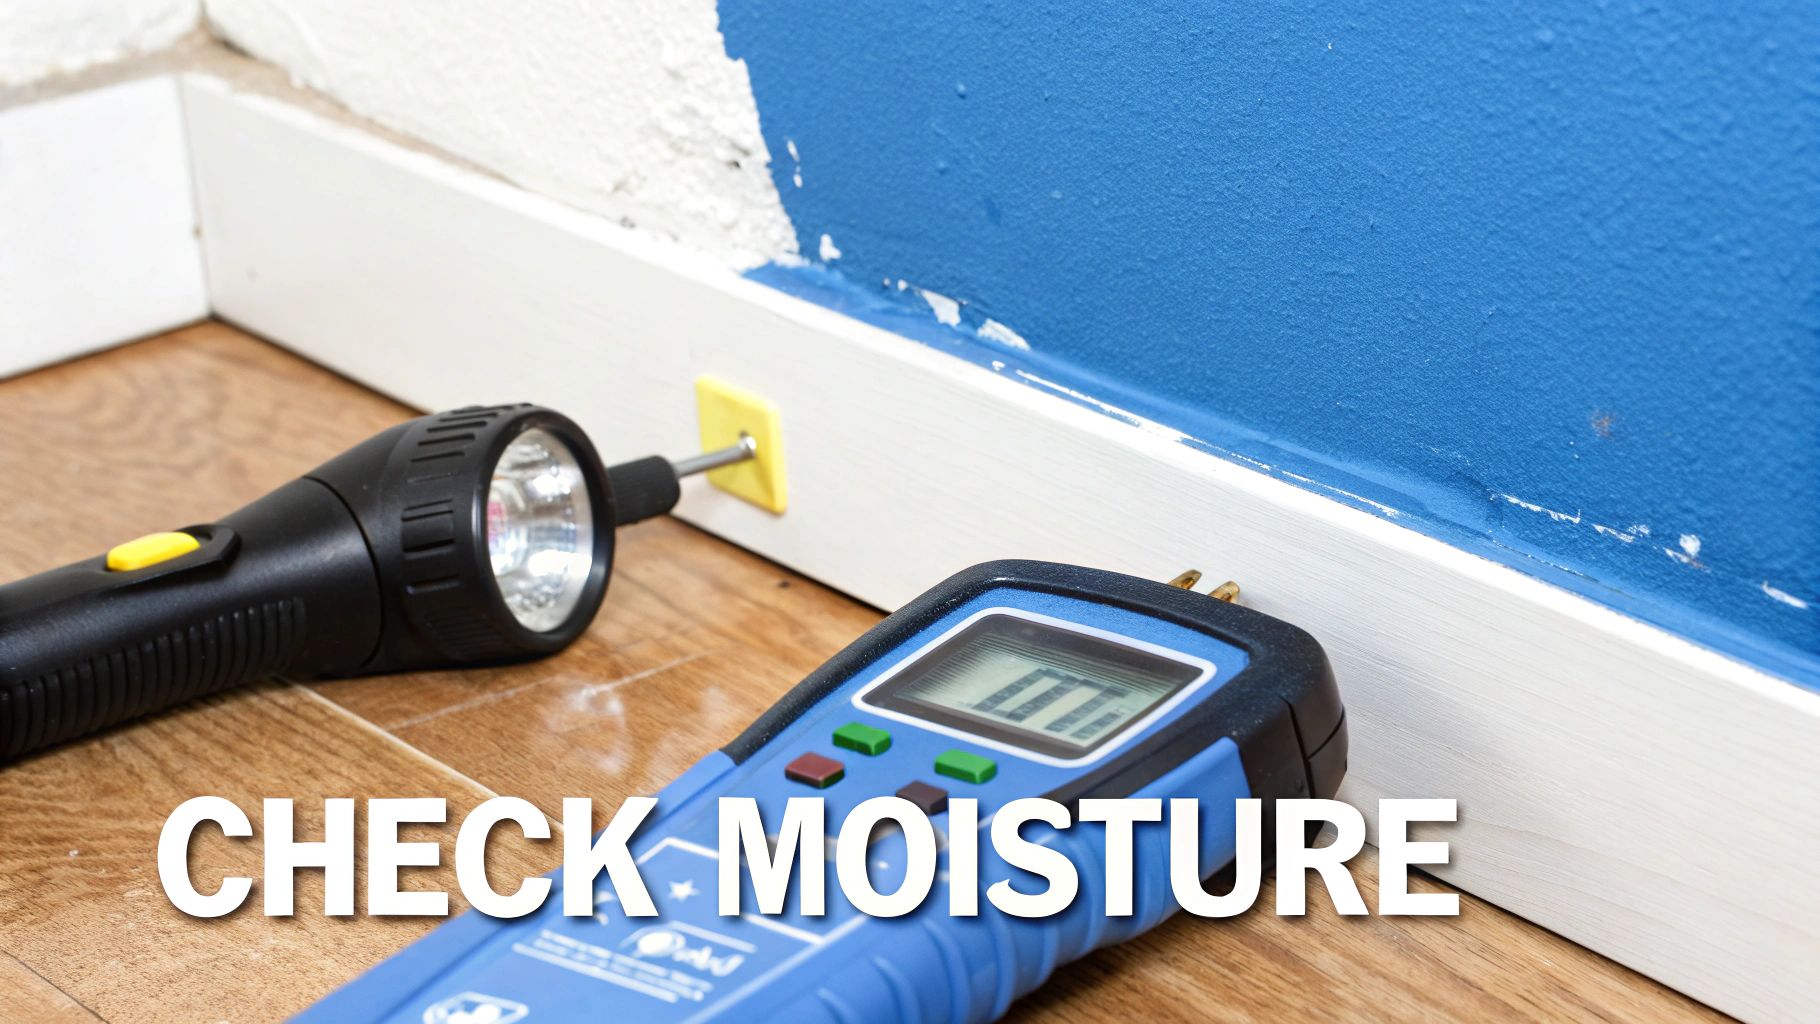
If the flashlight is your magnifying glass, the moisture meter is your lie detector. This little handheld device is, without a doubt, the single most important tool for a homeowner trying to figure out the real extent of water damage. It tells you exactly what you can’t see or feel: the moisture content inside your home's building materials.
Using one is simple. Pin-type meters have two small prongs you gently press into the material, while pinless meters just need to be laid flat against the surface. Either way, you get a clear reading, usually as a percentage.
Expert Tip: Don't just test the spot that looks wet. First, find an area of the same material that you know is dry and take a "baseline" reading. This gives you a control number to compare everything against as you map out the wet zones.
Move the meter methodically, testing a new spot every foot or two. You’ll be shocked at how far water can travel from the original leak. This "moisture mapping" process is critical because it defines the true boundaries of your problem. Every professional inspection includes this, and you can learn more about this detailed approach in our guide to the mold inspection process in Santa Barbara.
Interpreting Your Moisture Meter Readings
So, what do all those numbers actually mean? While the exact "safe" level can vary by material, here are some solid guidelines to help you make sense of your readings.
| Material | Safe Moisture Level | Concerning Moisture Level |
|---|---|---|
| Drywall | 5-12% | Above 17% |
| Wood | 6-10% | Above 20% |
| Carpet | Under 12% | Above 16% |
If your readings are consistently in that "concerning" range, you've got an active problem. At these levels, the material isn't just damp—it's saturated enough to be a breeding ground for mold. This data is gold because it tells you exactly which materials need to be dried immediately or, in more serious cases, torn out and replaced.
Monitoring Ambient Humidity with a Hygrometer
Finally, a simple digital hygrometer gives you the bigger picture of your home’s overall environment. This device measures the relative humidity (RH) in the air. For a healthy home, your indoor RH should stay between 30% and 50%.
If your hygrometer is consistently reading above 60%, the air itself has enough moisture to fuel mold growth on surfaces, even without an active leak. This is especially important after a major water event when evaporation can cause indoor humidity to spike for days. Firing up a dehumidifier to get that number back in check is a crucial preventative step.
Finding Mold in Common Hiding Spots
Mold’s most frustrating trait? It loves to grow where you can’t see it. After you’ve dealt with water damage, the surfaces might look and feel bone-dry, but moisture loves to get trapped inside walls, under flooring, and in other out-of-the-way places. These spots become perfect breeding grounds for mold to flourish completely undetected.
Simply checking the obvious areas just isn't going to cut it. You have to know where mold loves to hide. This is a critical step because what you can’t see can often cause the biggest headaches down the line. A systematic search of these common hotspots is the only way to know the true extent of the problem before it spirals out of control.
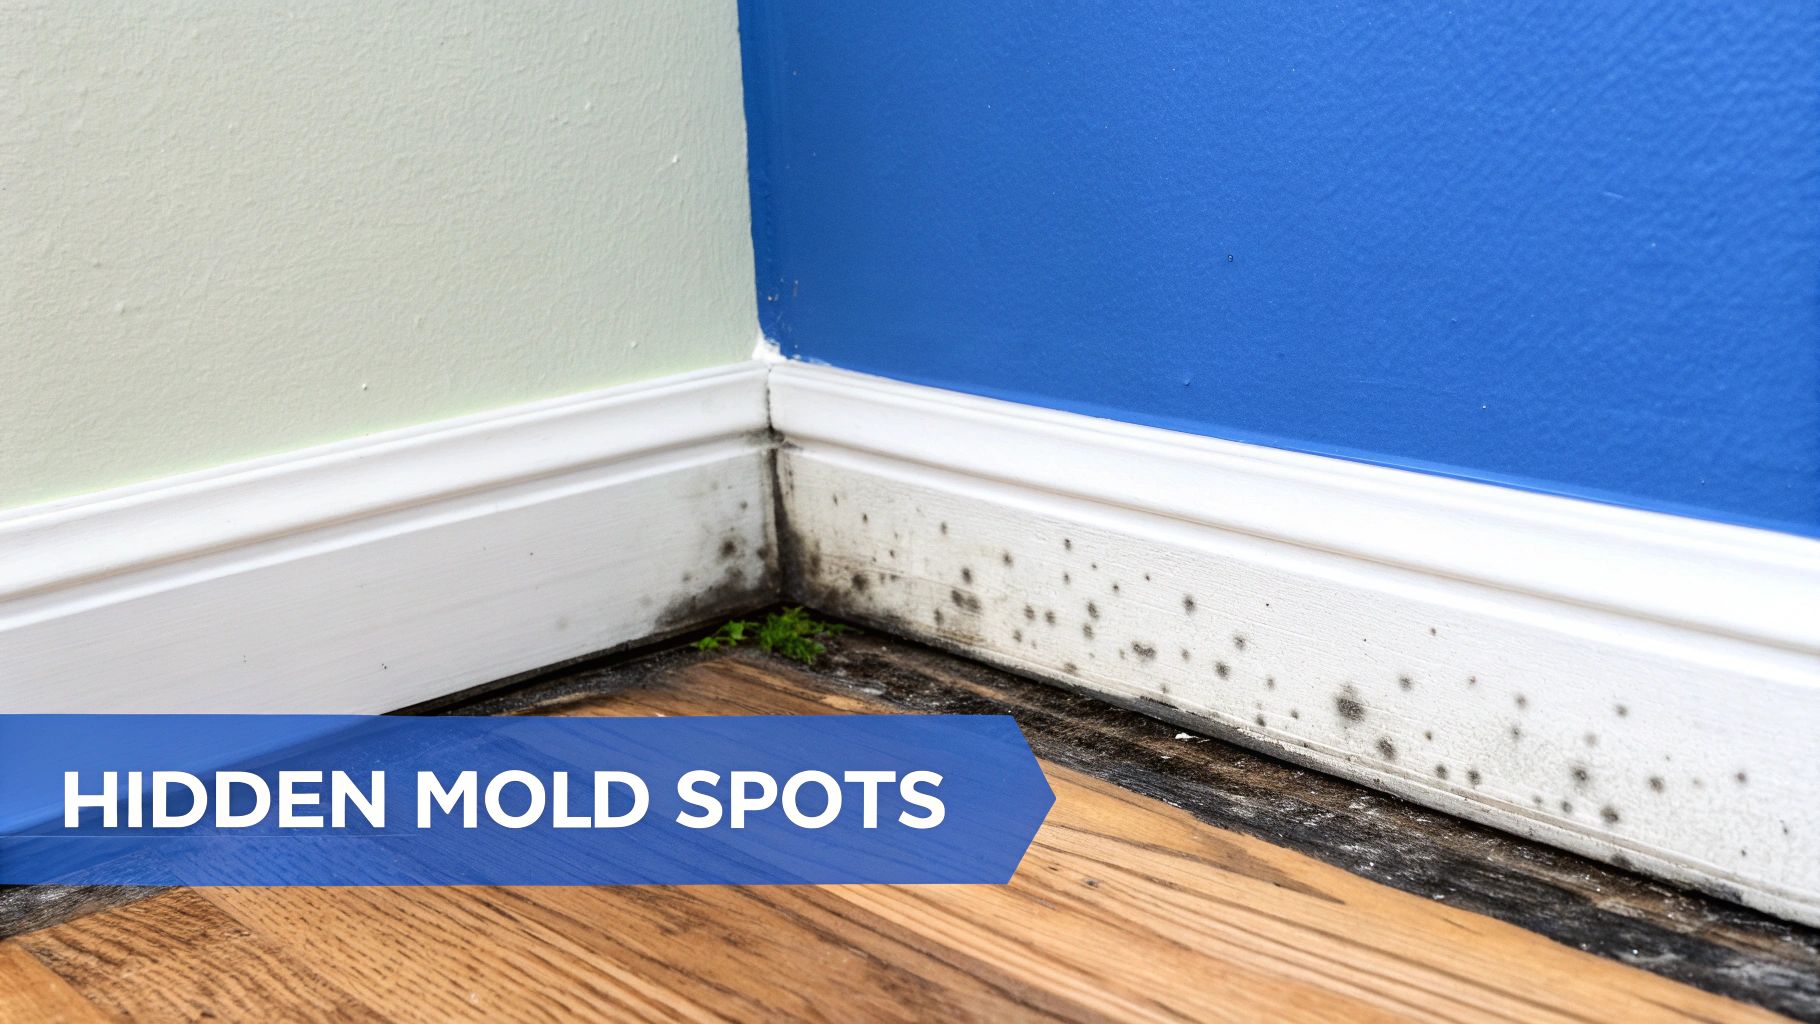
Behind Baseboards and Inside Walls
Wall cavities are, hands down, one of the most common hiding places for mold. The moment drywall gets wet, its paper backing becomes a feast for mold spores. Add in the dark, stagnant space behind it, and you've got a perfect incubator. Even if the outside of the wall feels dry to the touch, moisture can be trapped inside for weeks.
Keep an eye out for these subtle but telling clues that point to trouble inside your walls:
- Warping or Bubbling: If you see paint or wallpaper starting to peel, bubble up, or warp, that's a classic sign the drywall behind it is holding onto moisture.
- Staining: Faint, yellowish or brownish stains that seem to appear out of nowhere are often caused by water seeping through from the inside.
- Soft Spots: Gently press on the drywall in the areas you suspect were affected. If it feels soft, spongy, or crumbles under pressure, there’s almost certainly significant water damage and potential mold growth.
A musty smell that gets stronger when you put your nose near an electrical outlet can be a dead giveaway for mold inside a wall cavity. The outlet provides a direct path for odors to escape from that hidden space.
The reality of water intrusion is pretty sobering. A foundational study by the U.S. EPA found that a staggering 85% of office buildings had experienced past water damage, and 45% were dealing with ongoing leaks. These numbers show just how often water gets into buildings, creating a constant risk for hidden mold. You can find more data on this from the Global Indoor Health Network.
Underneath Flooring and Carpet Padding
Flooring often takes the direct hit from a leak or flood, but the real danger is what's lurking underneath. Water easily slips through carpet, laminate, and even hardwood floors to the subfloor below, where it can stay trapped for a long, long time.
Carpet padding is the worst offender—it acts like a giant sponge. It can hold an incredible amount of water and is extremely difficult to dry out completely. Once mold gets a foothold in the padding, it can spread across the subfloor without you ever knowing, at least until the problem becomes severe. When you're checking your floors, look for any warping, discoloration, or a spongy feeling underfoot. If you can, carefully pull back a corner of the carpet in the affected area to get a direct look at the padding and subfloor.
Crawl Spaces and Attics
These "out of sight, out of mind" areas are prime real estate for mold. Poor ventilation, condensation, and slow, sneaky roof leaks can create the kind of chronically damp conditions that mold colonies dream of.
In a crawl space, you'll want to inspect the insulation, wooden support beams, and the underside of the subfloor for any dark staining or fuzzy growth. These spots are especially vulnerable to moisture wicking up from the ground. Recognizing the early indicators is key, which is why we've put together a detailed guide covering the common signs of mold in a crawl space.
It's a similar story in the attic. Check for dark stains on the underside of the roof sheathing, look for damp or compressed insulation, and inspect any areas around vents or pipes that go through the roof. A small, persistent leak can cause widespread damage over time without you ever realizing it.
After a water leak or flood, you want answers—fast. You've probably seen those DIY mold test kits at the hardware store, and the promise of a quick, cheap solution is definitely tempting. But before you grab one, it's important to understand what those kits can actually tell you, and more importantly, what they can't.
The science behind proper mold sampling is a lot more involved than just setting out a petri dish. A real assessment involves choosing the right method for the job.
- Air Samples: These are crucial for understanding what you're breathing. We capture airborne spores to see what types of mold are present and if the indoor concentration is higher than what's naturally outside.
- Surface Samples: When we see a suspicious spot on the drywall, a quick swab or tape lift can identify the exact type of mold growing right there.
- Bulk Samples: Sometimes, we need to go deeper. This means taking a small piece of the affected material—like carpet, insulation, or wood—for a detailed analysis at the lab.
An experienced inspector knows exactly which tool to pull out of the toolbox depending on the situation.
The Big Problem with DIY Mold Kits
Here’s the hard truth: those DIY kits often create more confusion than clarity. Most of them have you open a petri dish, let it sit for a while, and see what grows. The problem? Mold spores are literally everywhere, inside and out. Your kit is almost guaranteed to grow something.
But that result doesn't mean much on its own. It won't tell you if the spore count is dangerously high, if the species growing are the kind that indicate serious water damage, or where the source of the problem is hiding. These kits are notorious for causing false alarms or, even worse, giving you a false sense of security.
If you're still curious, our guide on the best mold test kits for your home breaks down the pros and cons in more detail.
Key Takeaway: A DIY mold kit will confirm that mold spores exist in your home—which we already know. It can't provide the real data or expert interpretation needed to protect your property and your family's health.
Homeowners are catching on. The professional mold and moisture assessment industry is valued at around $5 billion in 2025 and is only expected to grow as people demand accurate, reliable data. This has pushed the industry to develop better, faster assessment technologies that leave DIY kits in the dust. You can read more about these industry trends and discover insights into the mold assessment market.
DIY Mold Kits vs Professional Testing
To make it simple, let's break down the key differences between grabbing a kit from the store and calling in a professional.
| Feature | DIY Mold Test Kits | Pacific Mold Pros Professional Testing |
|---|---|---|
| Accuracy | Often misleading; can't quantify mold levels or identify the source. | Provides precise, quantitative data from an accredited lab. |
| Interpretation | None. You're left to guess what the results mean. | Includes a detailed report from a certified inspector explaining the findings. |
| Context | Fails to compare indoor vs. outdoor spore counts, a critical diagnostic step. | Establishes a baseline by comparing indoor air quality to the outdoor environment. |
| Cost | Low upfront cost ($10-$50), but often requires extra fees for lab analysis. | Higher initial investment, but provides a complete and conclusive assessment. |
| Credibility | Not accepted for legal, real estate, or insurance purposes. | Legally defensible reports are accepted by lenders, insurers, and courts. |
| Peace of Mind | Can create unnecessary panic or a false sense of security. | Delivers clear, actionable answers and a reliable path forward. |
Ultimately, while a DIY kit might satisfy a bit of curiosity, it's no substitute for the certainty that comes from a professional inspection.
When You Absolutely Need a Pro
While a DIY kit might seem fine for a minor curiosity, some situations are just too important for guesswork. In these cases, the accuracy, detail, and legal standing of professional lab testing are non-negotiable.
You need to call a professional in these scenarios:
- Real Estate Transactions: Whether you're buying or selling, you need unbiased, definitive proof of a home's condition. A professional report is a powerful tool at the negotiating table.
- Legal or Insurance Disputes: If you're dealing with a difficult landlord or a complex insurance claim, certified lab results are the hard evidence you need to support your case.
- Health Concerns: When someone in your family has unexplained allergies, respiratory issues, or a compromised immune system, knowing the specific mold types and concentrations is critical for their doctor.
- Post-Remediation Verification: After a mold cleanup, professional "clearance testing" is the only way to be 100% sure the job was done right and the space is safe again.
In these high-stakes moments, investing in a professional inspection isn't just a smart move—it's the only responsible one.
Knowing When to Call a Mold Professional
Tackling a small patch of mildew in the shower is one thing. Confronting the aftermath of a burst pipe or a leaky roof is a whole different ballgame. While the DIY spirit is something we admire, there are clear moments when it's time to put down the tools and bring in a certified expert.
Knowing the difference between a minor cleanup and a major contamination threat is absolutely key to protecting your property and your family's health. Too many homeowners underestimate just how fast a "manageable" water issue spirals into a serious mold problem. Trying to handle a large-scale cleanup without the right training or equipment often makes things worse, spreading spores throughout your entire home.
Red Flags That Demand a Professional's Eye
Some situations are just non-negotiable. These are the red flags that tell you the problem has grown beyond a safe and effective DIY project. Ignoring these signs can lead to lingering health issues and far more expensive repairs down the road.
Keep an eye out for these definite triggers:
- Widespread Mold Growth: If you find a patch of mold that’s bigger than 10 square feet (think a 3-foot by 3-foot area), it's officially a large-scale problem. The EPA strongly advises against homeowners tackling jobs of this size themselves.
- Contaminated Water Source: Did the water damage come from a sewage backup, an overflowing toilet, or floodwaters? You're dealing with Category 3 "black water." This water is teeming with dangerous bacteria, and the resulting mold requires specialized safety protocols to handle.
- That Stubborn Musty Smell: You've dried everything out, but that strong, earthy odor just won't go away. This is a classic sign that mold is thriving somewhere you can't see it—inside a wall, under the subfloor, or deep in the insulation.
The HVAC System Game Changer
One of the most critical red flags involves your heating, ventilation, and air conditioning (HVAC) system. If you notice that musty smell only when the AC or furnace kicks on, or if you spot visible growth on the vents, it’s an immediate "stop and call a pro" situation.
Once mold takes root in your ductwork, your HVAC system becomes a giant spore-spreading machine. Every time it runs, it blows mold spores into every single room of your house. This turns a localized issue into a whole-home contamination event, which is much more complex and costly to fix. Only professionals have the specialized tools to safely decontaminate an entire HVAC system.
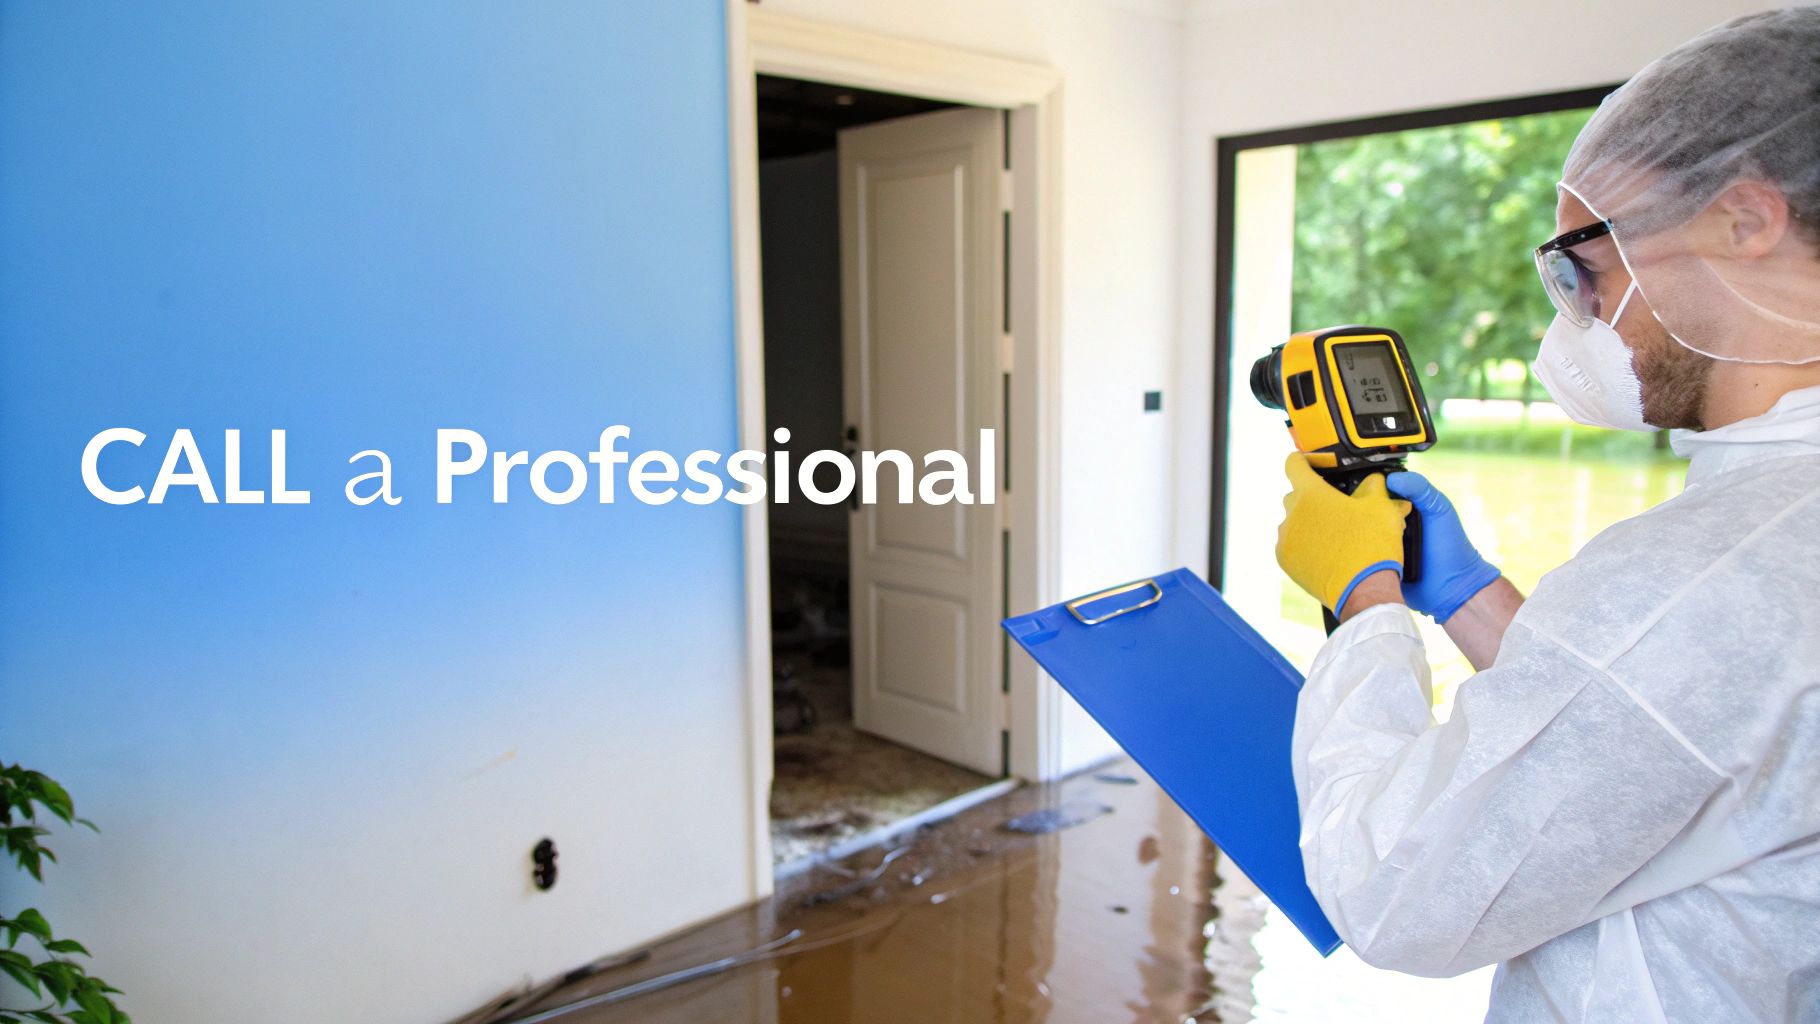
The Real Value a Pro Brings to the Table
Calling a professional isn't giving up; it's upgrading your strategy with years of expertise and advanced technology. Certified inspectors use tools like thermal imaging cameras to spot temperature differences behind walls, revealing trapped moisture that a standard meter would completely miss. It’s a crucial part of a truly thorough assessment, and you can see what's involved by reviewing our mold inspection services.
The reality is, mold contamination after water damage is a massive issue. It has fueled a growing mold remediation service market valued at around USD 1,234.6 million in 2023, and it's only expected to keep growing. This trend shows just how seriously people are taking the health risks tied to mold exposure.
A professional gives you a clear, definitive remediation plan based on scientific data, not guesswork. They set up containment zones to stop cross-contamination, use commercial-grade air scrubbers to clean the air, and perform tests after the job is done to prove the space is safe again. This level of thoroughness delivers something invaluable: genuine peace of mind.
When you're staring at the mess left by a water leak, your mind starts racing. The initial shock gives way to a flood of questions, and frankly, it can feel just as overwhelming as the water itself. Getting straight, honest answers is the first step to getting back on your feet.
Here are the questions our team at Pacific Mold Pros hears every single day from homeowners just like you, along with the no-nonsense answers you need.
How Quickly Can Mold Really Start Growing After a Leak?
It happens scary fast. All mold needs is a little moisture, a food source (like your drywall or wood framing), and a decent temperature. Give it that, and it can start growing in as little as 24 to 48 hours.
That tiny window is exactly why we stress immediate and thorough drying. What starts as invisible spores can erupt into a visible, full-blown colony in under a week. The exact timing can shift based on things like how humid your house is or what materials got soaked, but the lesson is always the same: don’t wait.
I Heard I Can Just Use Bleach to Clean Mold. Is That True?
This is probably one of the most common—and most dangerous—myths out there. Bleach is a fantastic disinfectant on hard, non-porous surfaces like your bathtub or a tile floor. But on porous materials like drywall, wood, or insulation? It's completely ineffective and often makes the problem worse.
Here’s why: the chlorine in bleach kills surface mold, but it evaporates quickly. What's left behind is the main ingredient of bleach—water. That water soaks into the drywall or wood, feeding the mold's deeper root system (called mycelia) and basically giving it the fuel it needs to grow back even stronger. It’s a classic case of a quick fix backfiring.
Expert Insight: Think of using bleach on drywall like mowing over a weed. You’ve lopped off the top part you can see, but you haven't touched the roots. Worse, you've just watered them, guaranteeing that weed is coming back with a vengeance.
Is Black Mold Really as Dangerous as They Say?
The term "black mold" usually refers to Stachybotrys chartarum, a specific species that can produce mycotoxins. This has led to a widespread belief that the color of the mold tells you how dangerous it is.
The reality is much more complicated. Lots of different mold species can look black or dark green. On the flip side, some lighter-colored molds can be just as irritating for people with allergies or asthma. The truth is, any mold, no matter the color, can cause health issues. The only safe approach is to treat all visible mold growth as a potential hazard that needs to be handled properly. Getting fixated on color can either create needless panic or give you a false sense of security.
If I Don't See or Smell Mold, Am I in the Clear?
Not necessarily, and that's the tricky part. Mold is an expert at hiding out of sight and out of mind—inside your walls, under the floorboards, or deep in your attic insulation. You’d never know it was there until the problem gets big.
We see this scenario all the time. A family calls us because they've been dealing with mysterious, nagging allergy symptoms—congestion, headaches, fatigue—that seem to magically get better whenever they leave the house for a while. That's a huge red flag for a hidden mold issue. If your home has a history of water damage (even if it was years ago) and you're experiencing symptoms like these, it’s a strong sign you need to find out what you’re really breathing.