That musty smell drifting up from your floors isn't just unpleasant—it's your home sending out an SOS from its foundation. Getting a handle on crawl space moisture control is about more than just clearing the air. It’s one of the most important things you can do to protect your home from structural damage, bad indoor air quality, and seriously expensive repairs down the road.
Why a Damp Crawl Space Threatens Your Entire Home
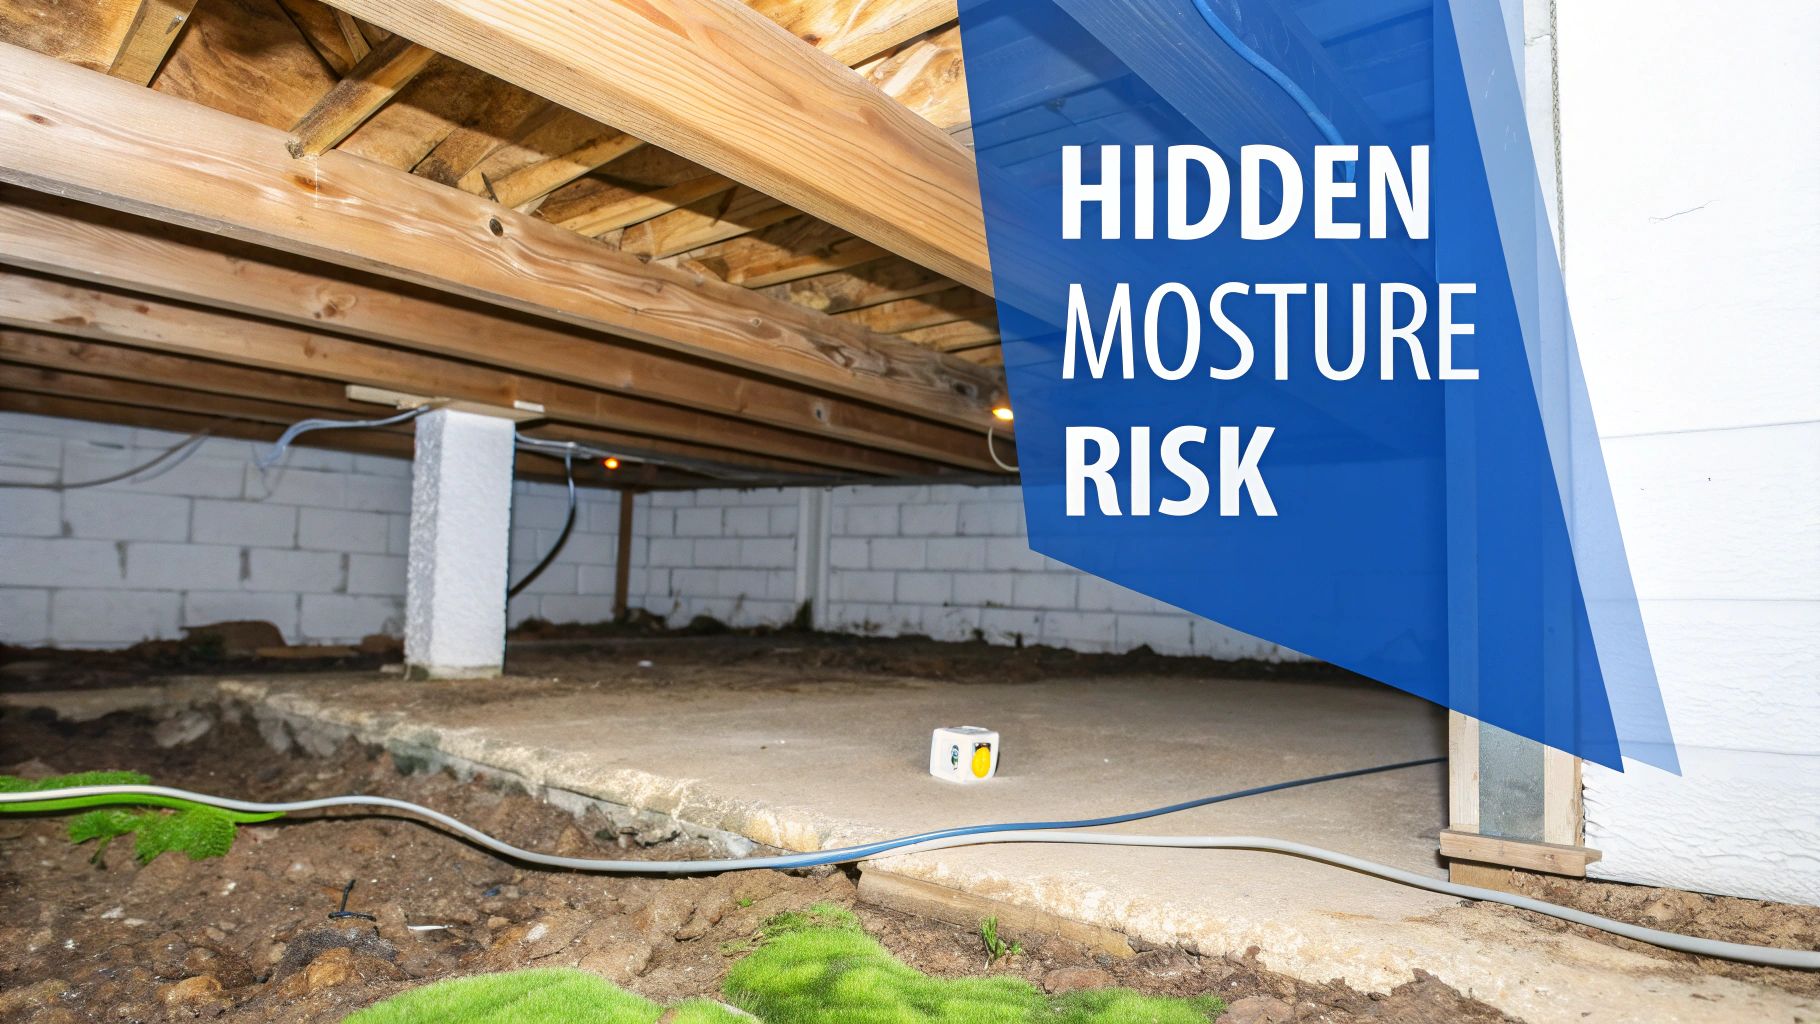
It’s easy to ignore what you can't see, and that’s the biggest danger with a damp crawl space. Out of sight, moisture quietly becomes a breeding ground for problems that work their way up into your living room, bedrooms, and kitchen. By the time you notice something is wrong, the damage is often already done.
This hidden dampness is the perfect recipe for mold, mildew, and wood-destroying fungi. These aren't just smelly nuisances; they actively eat away at the wooden joists and beams holding up your floors. Left unchecked, this can lead to sagging floors, a compromised foundation, and repair bills that make your head spin.
The Crawl Space-to-Living Room Connection
The air you and your family breathe is directly tied to what's happening in your crawl space. It’s all thanks to a process called the "stack effect," where air naturally flows from the lower levels of a house upward. What this means is that a huge portion of your indoor air starts its journey right there, under your feet.
This is why controlling that moisture is so critical. Once the humidity in a crawl space climbs above 60%, you’ve created an all-inclusive resort for mold, bacteria, and dust mites. And since roughly 50% of the air inside your home comes from that crawl space, all those allergens and pollutants get a free ride upstairs. You can learn more about the science behind this at Target Specialty Products.
This constant circulation can trigger a host of issues:
- Worsening allergy and asthma symptoms.
- A stubborn musty odor that clings to furniture and clothes.
- An overall drop in your home's air quality.
It's More Than Just Mold and Must
Beyond the obvious health concerns, uncontrolled moisture in your crawl space opens the door to a whole range of other problems. High humidity can make your beautiful hardwood floors cup and buckle. It can ruin anything you have stored down there. It also sends out a welcome mat for pests like termites, spiders, and rodents who absolutely love damp, dark places.
On top of all that, your wallet takes a hit. Moist air is much harder to heat and cool, forcing your HVAC system to work overtime just to keep you comfortable. This translates directly to higher energy bills, month after month. It quickly becomes clear that crawl space moisture control isn't just a good idea—it's essential home maintenance. Our team specializes in pinpointing and fixing these complex problems with proven moisture intrusion solutions.
A dry crawl space isn't a luxury; it's the foundation of a healthy, stable, and energy-efficient home. Ignoring moisture below is like ignoring a slow leak in the roof—the damage only gets worse over time.
How to Diagnose Your Crawl Space Moisture Problems
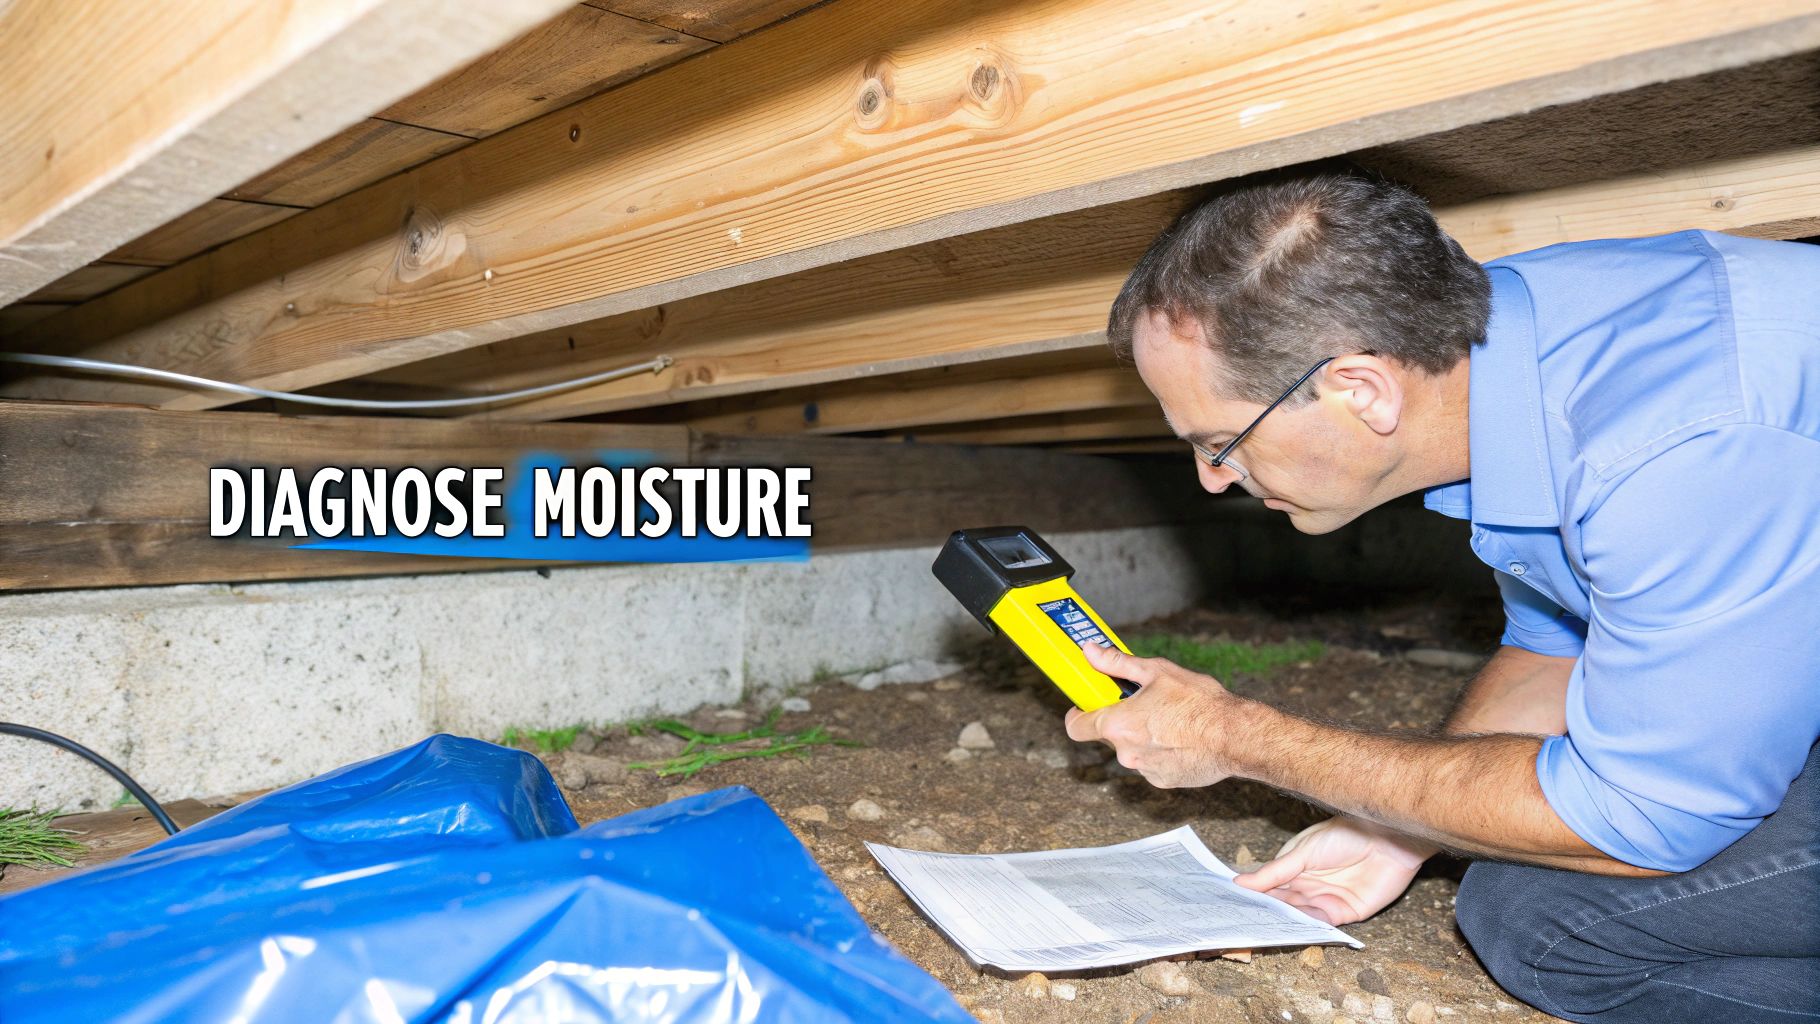
Before you can even think about fixing a damp crawl space, you have to put on your detective hat. Guessing at the source of the problem is a recipe for wasted time, money, and a lot of frustration. A proper inspection is your roadmap, pointing you directly to the root causes so you can create a plan that actually works.
The good news is that you can uncover a ton of evidence on your own with a few simple tools and a bit of patience. Your mission is to figure out how and why moisture is getting in. Is it seeping up from the ground? Leaking from outside? Condensing from the humid air? Or is a leaky pipe the secret culprit? Let’s break down how to find the answers.
Your Initial Visual Inspection
First things first, you need to get in there. Gear up with some old clothes you don't mind getting dirty, a good mask, and gloves. Armed with a powerful flashlight and your phone for photos, head into the crawl space to look for the most obvious red flags.
You’re hunting for clues like:
- Standing Water or Mud: Puddles or soggy, muddy soil are the clearest signs of a major water intrusion issue. Make a note of exactly where you see them.
- Efflorescence: See any chalky, white, crystalline stuff on the foundation walls or piers? That’s efflorescence. It’s a mineral deposit left behind when water seeps through concrete and evaporates, and it’s a dead giveaway of a persistent leak.
- Dark Stains or Rot on Wood: Shine that light on the wooden joists, subfloor, and support posts. Any dark, discolored wood is a sign of high moisture content and could be a precursor to serious wood rot.
- Damp or Fallen Insulation: Look up at the insulation between the floor joists. If it’s damp, sagging, or has fallen to the ground, it’s not only useless, but it’s also trapping moisture right against your subfloor.
This initial sweep gives you a solid overview of the situation. Take plenty of pictures to document what you find—they'll be invaluable later when you're planning your attack.
Simple DIY Diagnostic Tests
With the obvious signs noted, it’s time to dig a little deeper with a couple of easy tests. These methods help you distinguish between different moisture sources, which is absolutely key to choosing the right solution.
One of the most effective and cheapest DIY tools is the plastic sheet test. Just tape a 2×2 foot square of clear plastic sheeting flat against the dirt floor. Seal all four edges down with duct tape and leave it alone for 24-48 hours. When you come back, check the plastic:
- Water droplets on the underside of the plastic? That means moisture is evaporating up from the ground below. A vapor barrier is going to be your best friend.
- Water droplets on the top of the plastic? This points to high humidity and condensation forming from the air. You'll likely need a dehumidifier or better ventilation.
Another fantastic tool is an inexpensive moisture meter you can grab at any home improvement store. Use it to check the wood in your crawl space—the floor joists, rim joists, and support beams. A reading above 20% moisture content is a major red flag. That’s the magic number where wood-destroying fungi start to party.
Professional Tip: Don't just take one reading. Keep a log of your moisture meter readings in different areas of the crawl space. Creating this "moisture map" can help you pinpoint specific problem zones, like the area directly below a leaky shower drain or near a crack in the foundation.
To help you connect the dots, here’s a quick guide to what you might be seeing.
Common Moisture Sources and How to Identify Them
| Moisture Source | Telltale Signs | DIY Identification Method |
|---|---|---|
| Groundwater Seepage | Puddles, muddy soil, efflorescence on lower foundation walls. | The plastic sheet test shows moisture on the underside of the plastic. |
| Plumbing Leaks | Damp spots directly under bathrooms/kitchen, dripping pipes, high water bills. | Visually inspect all pipes for drips. Use a moisture meter on wood below plumbing fixtures. |
| High Humidity/Condensation | Dampness on all surfaces (pipes, ducts, wood), musty smells. | The plastic sheet test shows moisture on the top of the plastic. An inexpensive hygrometer shows high relative humidity. |
| Exterior Water Intrusion | Dampness or stains along the perimeter foundation walls, especially after rain. | Check for clogged gutters, short downspouts, and negative grading outside. |
This table should help you start narrowing down the primary cause, which is the most critical step in finding a permanent solution.
Looking Outside for Clues
Believe it or not, many crawl space moisture problems don't actually start in the crawl space. Often, the real culprit is right outside your home’s foundation. Before you wrap up your diagnosis, take a walk around the perimeter of your house.
Pay close attention to these common issues:
- Clogged Gutters: If your gutters are overflowing, they’re dumping gallons of water right next to your foundation with every storm.
- Short Downspouts: Downspouts need to extend at least 4-6 feet away from the house to get that water moving away from your foundation.
- Improper Grading: The ground should always slope away from your foundation. If it slopes toward it, you're basically funneling rainwater directly into your crawl space.
For those tricky issues that aren't visible to the naked eye, like hidden leaks inside walls or floors, a professional approach can make all the difference. To see how experts pinpoint these hidden moisture sources, you can learn more about the power of a thermal imaging house inspection. Combining your own hands-on investigation with advanced diagnostics gives you the complete picture you need to move forward with confidence.
First-Response Fixes for Immediate Moisture Reduction
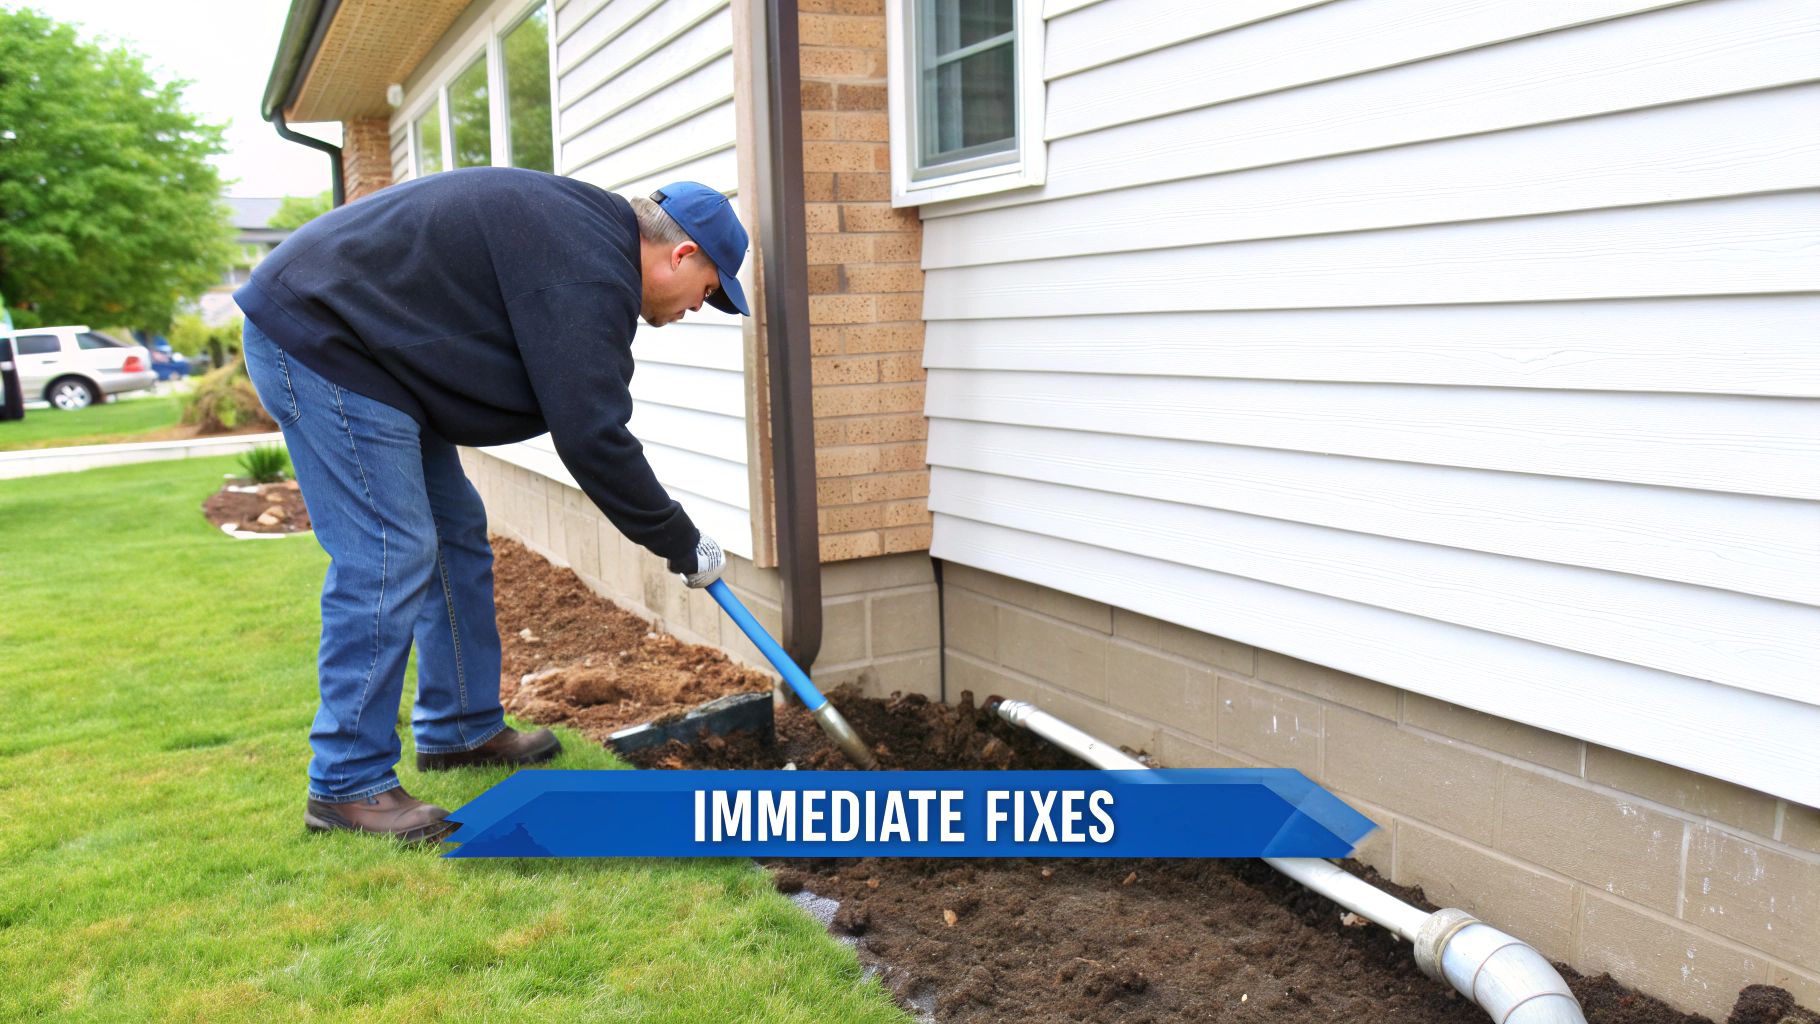
Once you’ve pinpointed where the moisture is coming from, it’s time to act. You don't need a huge budget or a professional crew to start seeing a real difference. There are a handful of powerful, low-cost fixes you can tackle yourself that will immediately reduce the moisture load on your crawl space.
Think of these first steps as your home's first line of defense. It's all about controlling water outside before it ever gets a chance to sneak in. By managing rainwater and surface runoff, you solve a huge piece of the puzzle and pave the way for bigger, long-term crawl space moisture control solutions.
Master Your Rainwater Runoff
One of the most common culprits I see is rainwater getting dumped right next to the foundation. When gutters and downspouts aren't working properly, they're essentially creating a moat around your house. That water saturates the soil and easily seeps through foundation walls.
Luckily, this is one of the easiest problems to solve. Start with a couple of simple but critical tasks.
- Extend Your Downspouts: Make sure your downspouts discharge water at least 4 to 6 feet away from your foundation. If you have the space, 10 feet is even better. You can find inexpensive extensions and elbows at any home improvement store to get this done.
- Clean Your Gutters: Clogged gutters are completely useless. Get in the habit of clearing out leaves and debris twice a year, especially after the fall. An overflowing gutter is like turning on a faucet right next to your foundation.
Just these two actions can stop thousands of gallons of water from threatening your crawl space every year.
Your home's gutter system is its primary water-management tool. Ensuring it functions correctly is the single most impactful first step you can take to protect your foundation and crawl space from water intrusion.
Correcting Negative Soil Grading
Next, walk around your home and look at the ground. Does the soil slope towards your foundation? We call that negative grading, and it’s a huge problem. It basically funnels rainwater directly into your crawl space.
Fixing the grade takes a bit of sweat, but it’s a crucial step. The goal is to create a gentle slope that directs water away from your house.
You’ll need to add soil—a dense, clay-based fill works best—around the foundation to build it up. You're aiming for a drop of at least six inches over the first ten feet away from the house. This lets gravity do the work, sending surface water out into the yard where it belongs.
Seal Obvious Entry Points
While you’re outside, keep an eye out for any obvious cracks or gaps in the foundation walls. Even small, non-structural cracks are open invitations for moisture, pests, and humid air. Sealing them is a quick win.
For small cracks in concrete or masonry, hydraulic cement is a fantastic DIY solution. It actually expands as it cures, forming a watertight seal that you can apply even on damp surfaces.
Don’t forget to check around any pipes or utility lines that enter your home. You can easily seal gaps here with a high-quality exterior caulk or an expanding foam sealant. This simple step not only blocks moisture but gives your home's energy efficiency a nice little boost.
If water has already found its way through these weak spots, knowing how to prevent mold after water damage is critical to stopping a much bigger problem before it starts.
Building a Long-Term Moisture Defense System
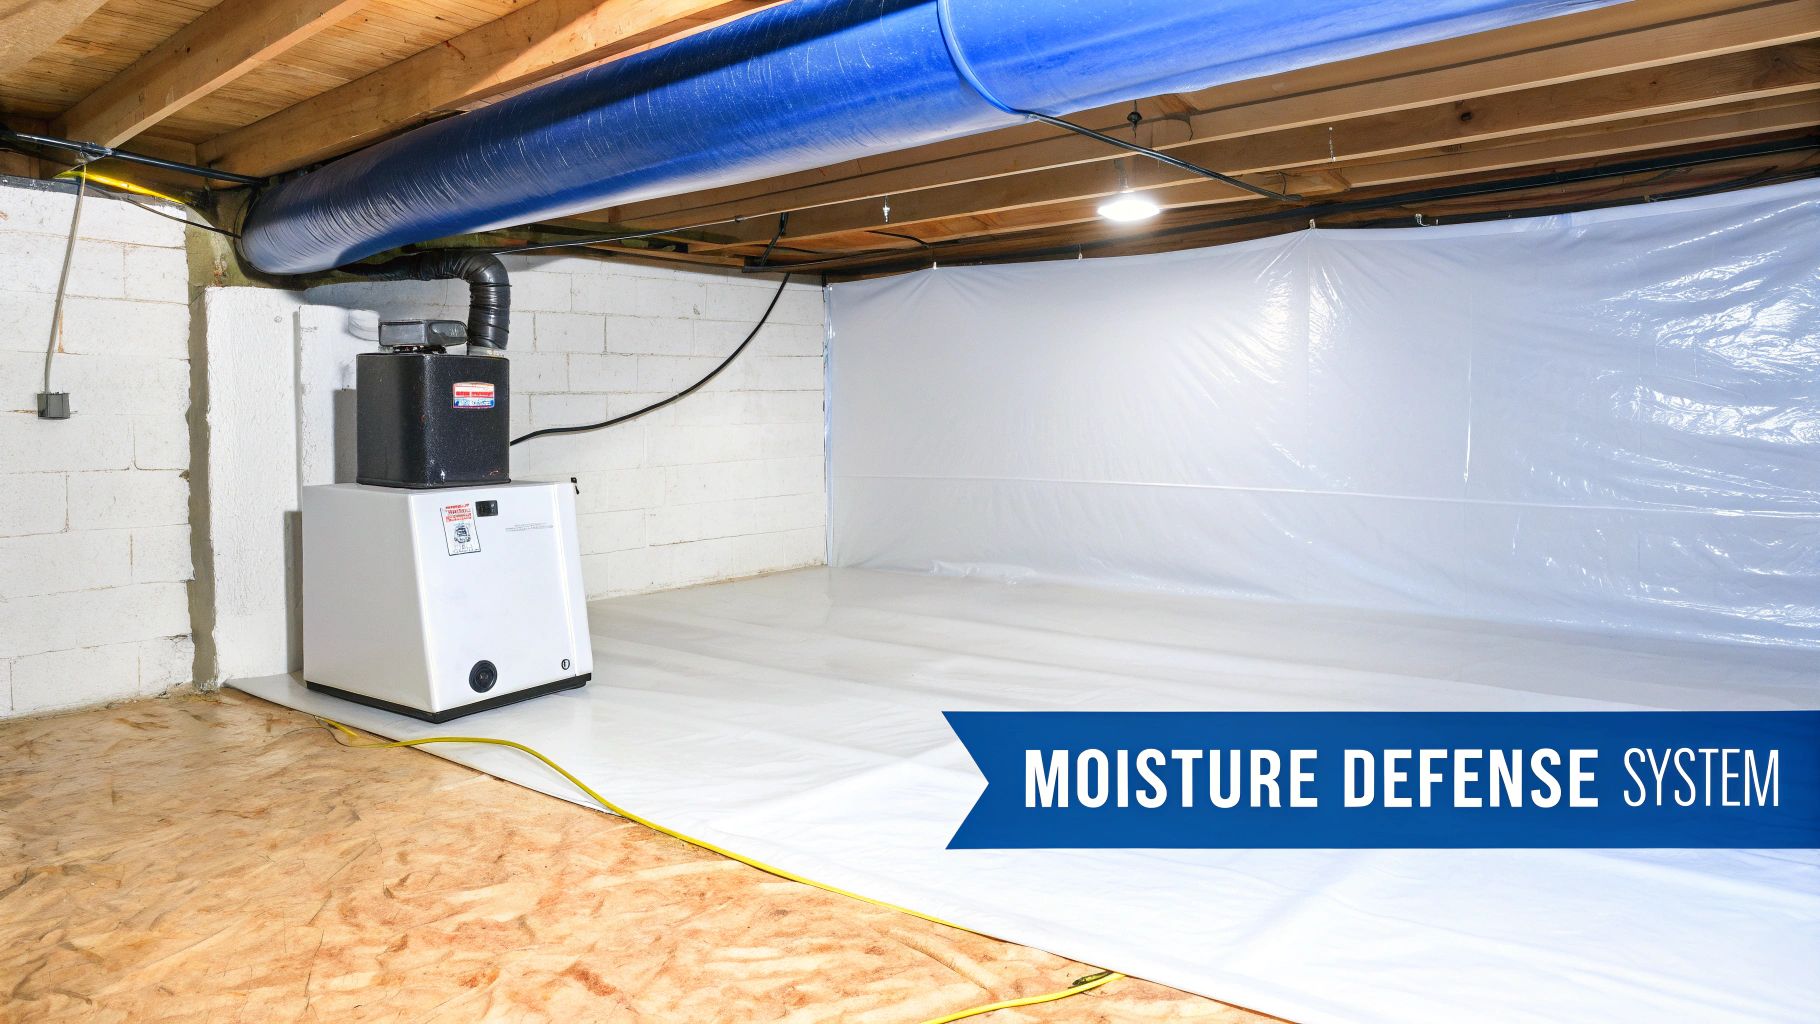
While quick fixes like sealing cracks and re-grading the soil are great first moves, they're mostly playing defense. To get your crawl space truly and permanently dry, you need to think bigger. It's time to build a robust, multi-layered system designed for lasting crawl space moisture control.
This means shifting your mindset from reactive repairs to a proactive strategy. The goal is to tackle moisture from every angle—from the damp earth below, the humid air outside, and any water that still finds a way in. By combining a few powerful solutions, you can transform that damp, musty space into a clean, dry, and stable part of your home's foundation. It’s an investment that pays you back with better structural integrity, healthier air, and serious peace of mind.
The Cornerstone of Control: Crawl Space Encapsulation
Without a doubt, the single most effective long-term solution is crawl space encapsulation. Think of it like creating a clean room underneath your house. The process involves completely sealing the entire crawl space from the exposed ground and outside air by lining the floor and foundation walls with a heavy-duty vapor barrier.
This isn’t just some plastic sheeting you toss on the ground. A professional job uses a thick, durable liner—usually 12 to 20 mil thick—that's tough enough to resist punctures and stop water vapor dead in its tracks. The whole point is to isolate your crawl space from the two biggest moisture culprits: evaporation from the soil and humid outdoor air.
More and more homeowners are catching on to the benefits. In fact, the global crawl space encapsulation market, currently valued at around USD 839 million, is expected to nearly double by 2032. It's a trend driven by a growing focus on indoor air quality. You can dig into the data over at Verified Market Research.
Installing a Vapor Barrier the Right Way
A vapor barrier is only as good as its installation. For it to actually work, it has to be a continuous, perfectly sealed system.
- Total Coverage is a Must: The barrier has to cover 100% of the dirt floor. No exceptions.
- Climb the Walls: It needs to extend up the foundation walls, stopping just a few inches below the sill plate so you can still do termite inspections.
- Seal Every Seam and Hole: All seams between the liner sheets must be overlapped (by 6-12 inches) and sealed with special waterproof tape. Every pipe, pier, or support column poking through has to be meticulously sealed as well.
When it's done right, the vapor barrier completely stops the constant migration of moisture from the soil, which can easily release gallons of water vapor into your crawl space every day.
A properly installed encapsulation system does more than just stop moisture; it creates a conditioned space that becomes a true extension of your home's envelope, leading to improved energy efficiency and healthier air.
Managing Water with Interior Drainage and Sump Pumps
Okay, so encapsulation blocks ground vapor. But what happens if you get actual, liquid water intrusion from a high water table or a torrential downpour? That’s where an interior drainage system becomes your next line of defense. A classic and highly effective option is an interior French drain.
This system involves digging a small trench along the inside perimeter of your crawl space foundation. A perforated pipe goes into the trench, gets surrounded by gravel, and is then connected to a sump pit.
Here’s the play-by-play:
- Any water seeping through the foundation walls or bubbling up from the ground gets intercepted by the French drain.
- Gravity does its thing, guiding the water through the pipe and straight into the sump pit, which is just a basin installed at the lowest spot in the crawl space.
- Inside that pit sits a sump pump. When the water rises to a certain level, a float switch kicks the pump on automatically, shooting the water out of the crawl space and far away from your foundation.
This one-two punch ensures your crawl space stays free of standing water, even when the weather gets wild.
The Final Polish: A Crawl Space Dehumidifier
You've sealed the ground and managed any liquid water. The last piece of the puzzle is tackling the moisture in the air itself—the relative humidity. This is absolutely critical in coastal climates like we have in Santa Barbara and Ventura, where damp marine air loves to creep into crawl spaces.
A standard household dehumidifier from a big-box store just won't cut it down here. You need a commercial-grade, crawl space dehumidifier built to handle cooler temperatures and run continuously. These machines are workhorses, powerful enough to keep the relative humidity below 50%—the magic number where mold and dust mites can’t survive.
The dehumidifier gets installed inside the newly sealed space, where it constantly monitors and conditions the air. A built-in humidistat means it only runs when it has to, keeping it energy-efficient. It’s the final touch that creates a truly controlled, healthy environment under your home. If you're fighting humidity in other parts of your house, our guide on humidity control in homes has some great strategies.
By bringing encapsulation, drainage, and dehumidification together, you create a powerful, self-regulating system. This long-term defense doesn't just manage moisture; it eliminates the conditions that let it become a problem in the first place, protecting your home for years to come.
Budgeting Your Project and Knowing When to Call a Pro
Let's talk about the two things that drive any home project: time and money. When you're facing a damp crawl space, figuring out the real-world costs and timelines is the first step toward a smart, lasting fix for your home’s health. Whether you’re ready to get your hands dirty or you’d rather leave it to the experts, knowing the financial side helps you plan without any surprises.
The costs can swing wildly depending on how big your crawl space is, how bad the moisture problem is, and which solution you choose. A simple DIY vapor barrier might only set you back a few hundred dollars in materials. On the other hand, a full professional encapsulation with new drainage and a dehumidifier can easily run into the thousands.
Breaking Down the Costs and Timelines
So, what can you actually expect to spend? If you're a hands-on homeowner, buying a quality vapor barrier, the right seam tape, and a few basic tools might run you between $500 to $1,500 for a typical crawl space. This approach saves a ton on labor, but be prepared for a serious time commitment—it's often a full weekend (or more) of tough, dirty work.
Bringing in the pros, of course, means you’re paying for expertise and efficiency. In humid regions, professional services are in high demand for a reason. Take the Southeastern U.S., where the crawl space encapsulation market was valued at a staggering $722.3 million because of the relentless humidity and older homes. This just goes to show how valuable a professional job is for fighting off mold and pests for good. You can read more about these market trends over at Archive Market Research.
To give you a clearer picture for budgeting, here’s a rough breakdown:
- DIY Vapor Barrier (Materials Only): Expect to pay about $0.50 – $1.50 per square foot.
- Professional Encapsulation: This usually lands between $3 – $7 per square foot and includes the barrier, sealing vents, and taping all seams.
- Sump Pump Installation: Typically costs $1,000 – $2,500. This is one of those jobs best left to the pros, especially with the electrical work involved.
- Crawl Space Dehumidifier: A professional-grade unit will run from $1,000 – $2,000.
To help you weigh your options, here’s a table comparing the most common solutions.
Estimated Cost and Timeline for Moisture Control Solutions
| Solution | DIY Cost Range | Professional Cost Range | Estimated Timeline |
|---|---|---|---|
| Vapor Barrier Installation | $500 – $1,500 | $2,000 – $6,000 | DIY: 2-4 days |
| Pro: 1-2 days | |||
| Full Encapsulation | Not Recommended | $5,000 – $15,000+ | Pro: 2-5 days |
| Sump Pump Installation | $600 – $1,200 (Unit + Parts) | $1,000 – $2,500 | DIY: 1-2 days |
| Pro: 4-8 hours | |||
| Dehumidifier Installation | $1,000 – $2,000 (Unit Cost) | $1,500 – $3,000 | DIY: 2-4 hours |
| Pro: 1-3 hours |
As you can see, going the DIY route can save you money upfront, but the time and effort required can be substantial. For more complex jobs like full encapsulation or sump pump installation, the expertise and speed of a professional team are often worth the investment to ensure the job is done right the first time.
Recognizing When a Project Is Beyond DIY
Honestly, the most important skill any homeowner can have is knowing their limits. Some tasks are perfectly fine to tackle yourself, but there are certain red flags that scream "call a professional." Pushing ahead on a complex issue on your own can quickly turn a small problem into a massive, expensive headache.
Ignoring the signs of a serious problem doesn't make it go away; it just makes the eventual repair more complex and costly. A professional assessment provides a clear roadmap, saving you from guesswork and potential mistakes.
Be honest with yourself. If you run into any of the following, it’s a clear signal that you need an expert eye.
Red Flags That Demand a Professional
You should stop what you’re doing and call a certified professional immediately if you find any of these:
-
Widespread Mold Growth: If you see more than a few small patches of mold (think anything bigger than a 10-square-foot area), don't touch it. Trying to clean a large mold colony yourself can send a cloud of spores straight into your home's air, creating a serious health risk. To get a better handle on what a professional assessment entails, read our guide on the cost of a mold inspection.
-
Signs of Structural Damage: Are the wooden floor joists or support beams feeling soft, spongy, or visibly rotting? This is a huge red flag for advanced decay that could be compromising your home's structural integrity. This requires an immediate evaluation by a structural engineer or a specialized crawl space contractor.
-
Significant Standing Water: Puddles that never seem to dry or water that keeps coming back point to a major water intrusion issue, like a high water table or cracks in the foundation. This isn't a DIY fix; it almost always requires a professionally installed sump pump and drainage system.
-
A Strong, Persistent Musty Odor: That powerful musty smell that you can't get rid of is the classic sign of a long-term moisture problem. It means there’s likely extensive mold or mildew growth hiding somewhere, even if you can’t see it all.
In the end, effective crawl space moisture control is about matching the right solution to your home's needs and your own skill level. Budgeting smart and knowing when to tag in a professional are the keys to a successful project that will protect your home for years to come.
Your Crawl Space Moisture Questions, Answered
Even with a solid game plan, questions always pop up when you're tackling a big project like crawl space moisture control. Getting straight, honest answers is the key to moving forward with confidence and making sure you’re doing right by your home and your budget. This section cuts through the noise to answer the most common things we hear from homeowners.
Think of this as your go-to guide for those nagging "what if" and "how does that work" moments. We’ll demystify a few core concepts and give you the practical insights you need to finalize your strategy.
Is It Enough to Just Lay Some Plastic on the Ground?
This is one of the first questions almost everyone asks: can I just grab a roll of plastic from the hardware store, lay it on the dirt, and call it a day? While it's definitely a step up from a bare earth floor, it’s almost never a complete fix. That standard, thin plastic sheeting just isn't designed to be a true vapor barrier.
Here’s why a simple plastic sheet usually falls short:
- It's Flimsy: Thin plastic (often 6-mil or less) gets punctured and torn easily. Just crawling around during installation can create holes, and every single one becomes a new entry point for moisture.
- The Sealing is Incomplete: Without taping every seam and sealing the liner tight against the foundation walls and support piers, moisture vapor will just sneak out around the edges. It completely defeats the purpose.
- It Doesn't Control Airflow: A liner on the floor does absolutely nothing to stop humid air from pouring in through your vents. Here in coastal Santa Barbara, that outside air is a massive source of moisture.
A real vapor barrier is just one part of a complete system. To actually work, the liner needs to be thick and tough (we recommend at least 12-mil) and sealed meticulously to create a continuous shield against ground moisture.
Will a Dehumidifier Work Without Encapsulation?
Trying to run a dehumidifier in an open, vented crawl space is like trying to air-condition your backyard on a hot day. It’s an expensive, endless, and unwinnable battle. For a dehumidifier to do its job, it needs a sealed, contained space.
Without encapsulation, that dehumidifier is fighting a war on two fronts. It works hard to pull moisture from the air, but more damp air immediately rushes in through the vents and seeps up from the ground. This forces the machine to run 24/7, sending your energy bills through the roof without ever hitting the target humidity level.
A dehumidifier is only a smart investment when it's installed inside a fully sealed system.
Can I Just Close Off My Crawl Space Vents?
Blocking your crawl space vents seems like a logical first step to stop humid air from getting in. But if that's the only thing you do, it can seriously backfire. The old building codes that required vents were based on the idea that a cross-breeze would dry things out. We know better now—that breeze often just pulls in more damp air, leading to condensation.
When you seal the vents without first dealing with the massive amount of moisture coming up from the ground, you're just trapping all that humidity inside. This can actually speed up mold growth and wood rot.
The right way to do it—the modern, recommended approach—is to seal the vents as part of a full encapsulation. First, you stop the ground moisture with a proper vapor barrier. Then you seal the vents to keep outside air from getting in. This creates a clean, controlled space that you can easily manage with a dehumidifier. This one-two punch is the foundation of effective crawl space moisture control.