A moisture meter reading is simply a number—usually a percentage—that you compare against a known dry standard for whatever material you're testing. For wood, anything under 12% is generally considered safe and dry. Once you start seeing readings over 16%, you're entering the high-risk zone for mold and rot.
The biggest takeaway here is that context is everything. A number that’s perfectly fine for wood could spell disaster for drywall. You have to know what you're measuring.
Why Accurate Moisture Readings Matter
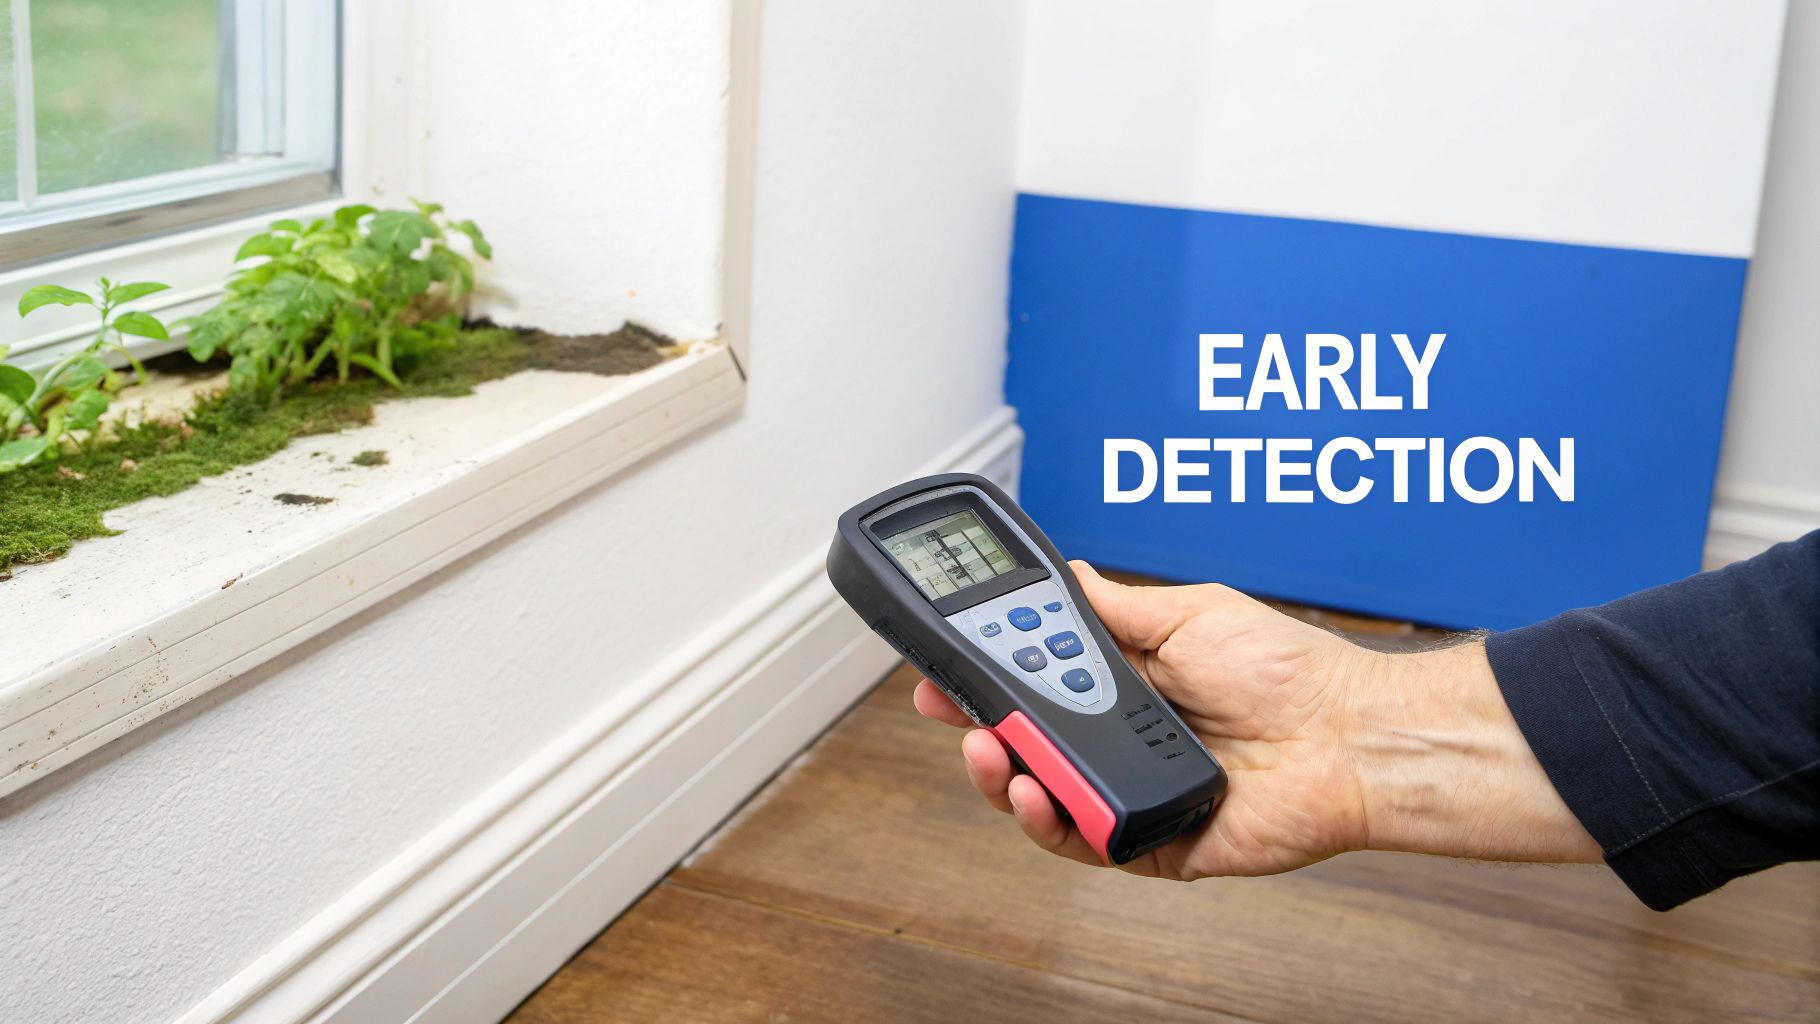
After a long, wet winter, that faint musty smell can be a real worry. We see it all the time—hidden moisture is the number one cause of mold, especially here on the coast where the marine layer can keep everything perpetually damp. This is where a moisture meter becomes your best friend, turning vague suspicions into hard data.
Let's say you’ve spotted some minor discoloration on the drywall near a window in your Santa Barbara home. It looks like nothing, but is it a sign of something bigger? Instead of just watching and waiting for it to get worse, you can grab a moisture meter. This simple tool lets you check the spot yourself, giving you an instant reading that tells you if the material is actually wet behind the paint.
Your First Line of Defense Against Mold
Early detection is the name of the game. By the time you can see mold or feel a damp wall, the problem has likely been brewing for a while. A meter can flag elevated moisture long before it becomes visible, potentially saving you a fortune in repairs down the road. It’s the fastest way to start pinpointing the source of a leak, whether it's a bad window seal, a slow-dripping pipe, or a problem with the roof.
Getting comfortable with moisture meter readings gives you direct control over your home's health. It’s not just about finding water; it's about understanding the exact conditions that allow mold to take hold. High humidity is a huge piece of this puzzle, and you can learn more about at what humidity does mold grow to get a complete picture.
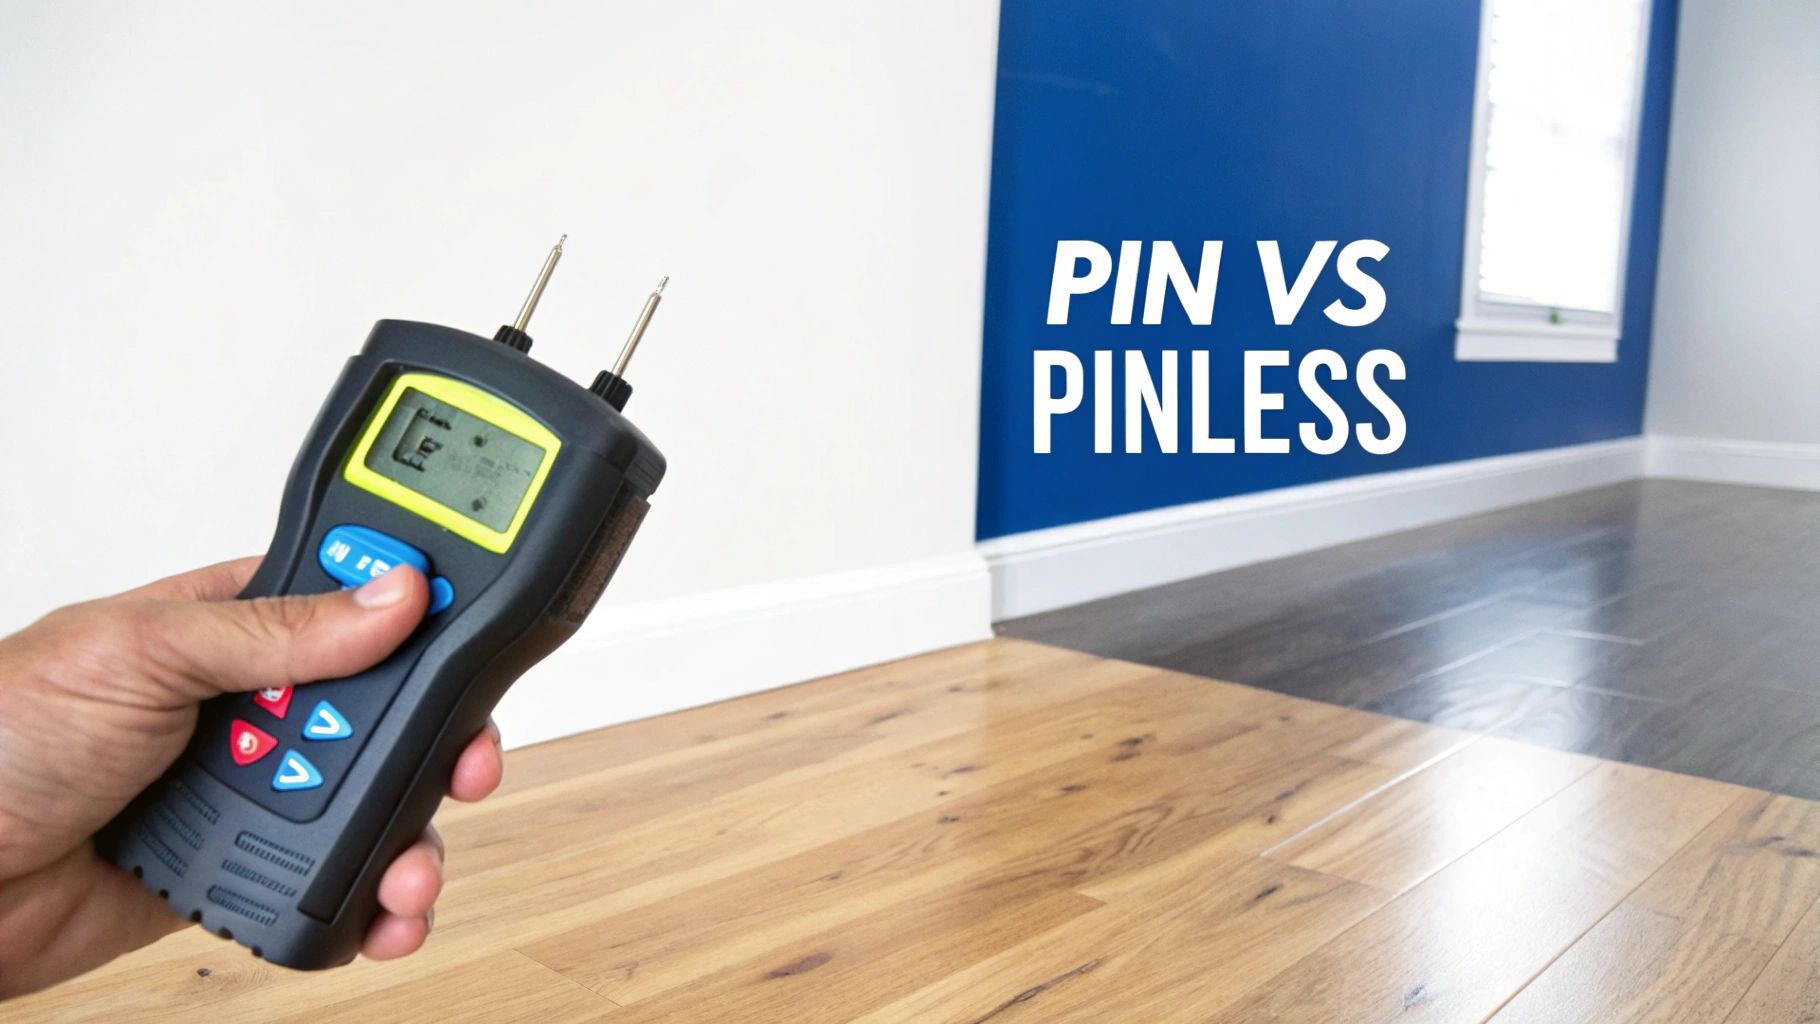
You'll generally run into two main types of meters:
- Pin Meters: These have two small metal probes that you physically push into the material. They measure electrical resistance between the pins to determine moisture content and are fantastic for getting precise, deep readings in materials like wood or drywall.
- Pinless Meters: These use an electromagnetic sensor pad that you just place on the surface. They scan a larger area without leaving any marks, making them perfect for quickly checking finished surfaces like hardwood floors, tile, or cabinetry.
By learning to interpret the numbers from these tools, you're no longer just a homeowner; you're an informed guardian of your living space. This guide will give you the practical skills to do just that.
Decoding the Numbers on Your Moisture Meter
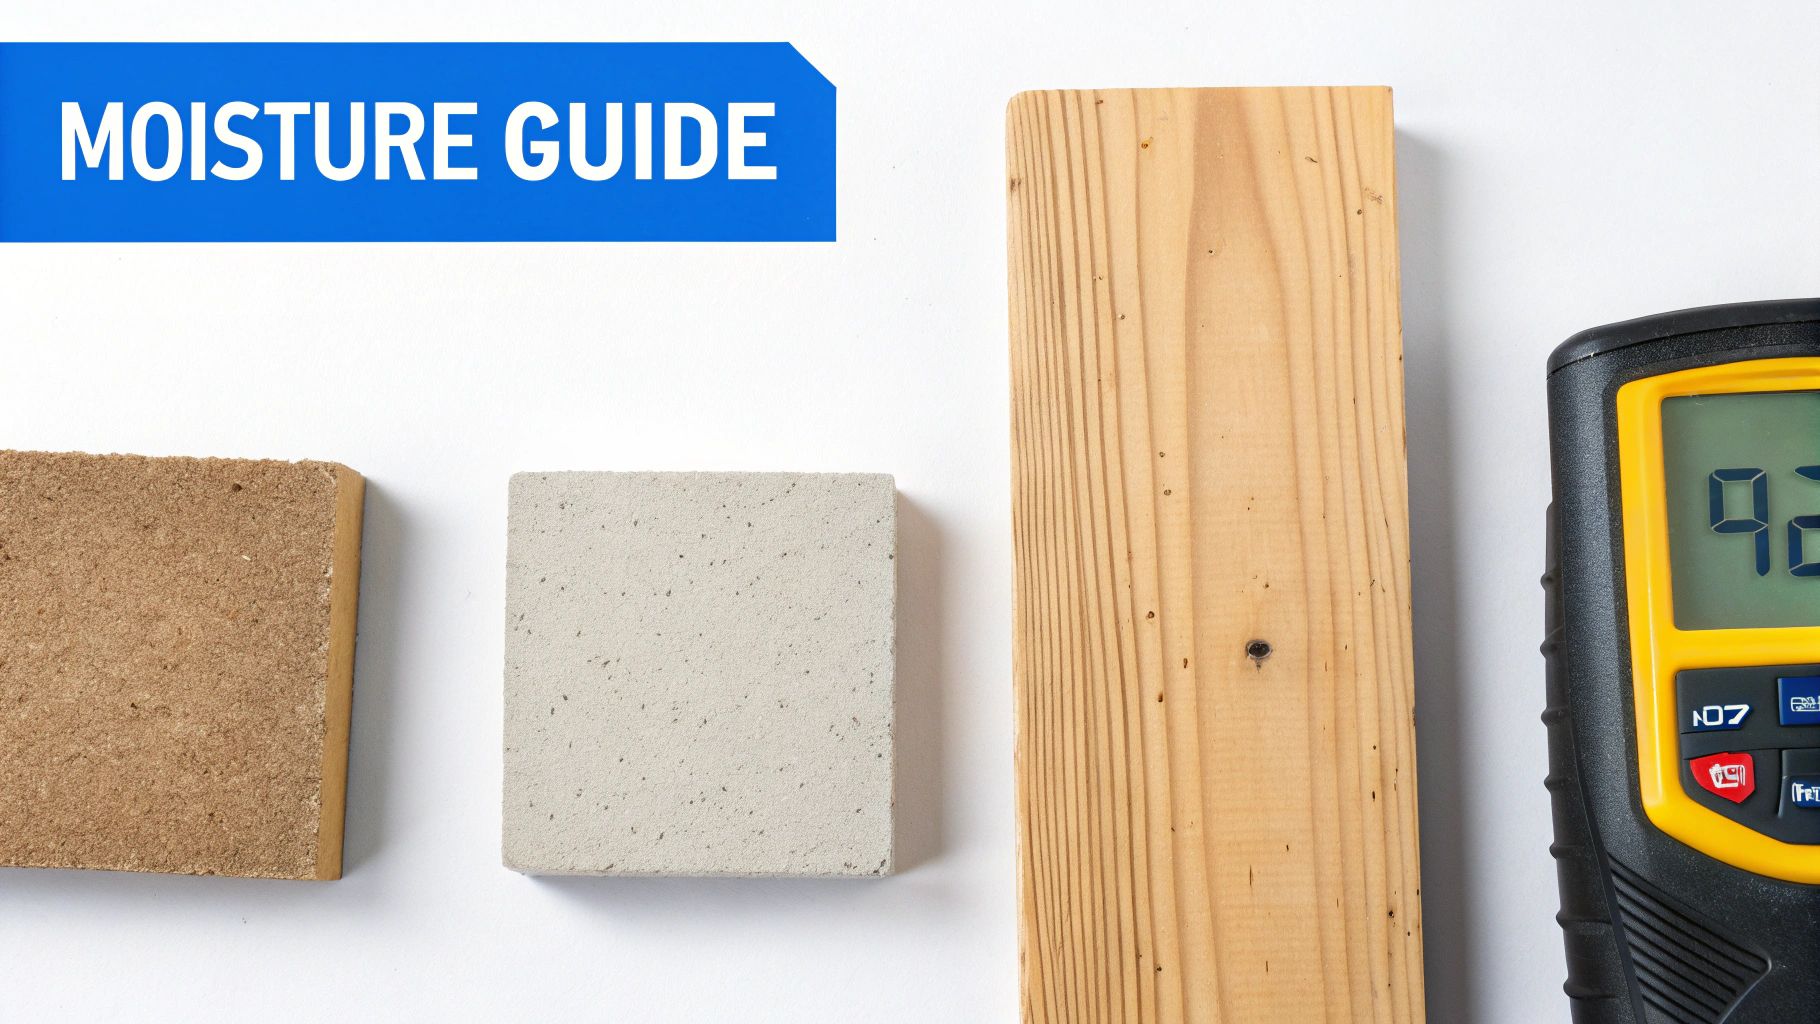
So your meter is flashing a number—but what does it actually mean? That reading is the Moisture Content (MC), shown as a percentage of the material's weight. The key to how to read moisture meter readings isn't about finding one magic number that applies to everything. It’s about knowing what that number means for the specific material you're testing.
A number that signals a serious problem in your drywall might be completely fine for the concrete slab underneath it. Context is everything. Understanding this helps you make a clear-headed assessment without jumping to the worst-case scenario.
What's a Bad Reading for Wood?
Let's say you're a homeowner in Santa Barbara checking your attic after a season of heavy rains. You point the meter at a structural beam, and it blinks '18%.' Is it time to panic?
For common structural wood, anything under 12% is considered safely dry. Once you creep into the 12% to 16% range, you're in a borderline zone where you need to keep a close eye on things. Your reading of 18%, however, is a definite red flag. At that level, the wood is officially wet enough for mold to start growing.
Thresholds for Drywall and Concrete
Drywall is a completely different beast. Think of it like a sponge—it soaks up water fast, and once its internal structure is compromised by moisture, there's usually no saving it.
While a perfectly dry wall will read under 1%, anything up to 12% is generally considered acceptable. But if your meter shows 17% or higher, that section of drywall is almost certainly compromised and will need to be replaced.
Concrete plays by its own rules. Since it's naturally porous and holds a lot of water, its readings are often interpreted on a relative humidity (RH) scale.
- Below 75% RH: This is considered dry and safe for installing flooring over the top.
- 75% to 90% RH: This is a caution zone. You’ll want to investigate further before covering it with a finish.
- Over 90% RH: This is too wet for most flooring or finishes and indicates a significant moisture issue.
Your meter gives you data, but the material tells you the story. Always compare your reading to the specific acceptable range for the material you're testing to get a clear picture of what's going on.
To help you out, here’s a quick-reference guide we use in the field.
Moisture Reading Thresholds for Common Materials
This table gives you a straightforward breakdown of what to look for when testing the most common building materials in your home.
| Material | Safe Reading (Dry) | At-Risk Reading (Monitor) | High-Risk Reading (Action Needed) |
|---|---|---|---|
| Wood | Below 12% MC | 12% – 16% MC | Above 16% MC |
| Drywall | Below 1% MC (Ideal) Up to 12% MC (Acceptable) |
13% – 16% MC | 17% MC and above |
| Concrete | Below 75% RH | 75% – 90% RH | Above 90% RH |
These numbers are a solid starting point for any homeowner. If you're getting consistently high readings in any of these "high-risk" zones, it’s a strong sign of a bigger problem that needs a closer look. To get more context on where these issues can lead, it helps in understanding mold test results and seeing how they connect back to moisture levels.
Mastering Pin and Pinless Meter Techniques
Getting a reliable reading hinges entirely on your technique. I can't stress this enough. A great meter used incorrectly will give you bad data, leading to a false sense of security or, just as bad, unnecessary panic. Both pin and pinless meters are excellent tools, but they require different approaches to get results you can trust.
Knowing how to properly use each type is fundamental to how to read moisture meter readings effectively. It’s the difference between a random guess and a confident, data-backed assessment of your home’s condition. So, let's get into the nitty-gritty for each one.
Pin Meter Best Practices
Using a pin meter feels pretty straightforward—just push the pins in and get a number, right? Well, the details of how and where you insert them make all the difference.
Imagine you're checking a wooden floor joist in your crawl space. The most important rule is to always insert the pins parallel to the wood grain. If you go against the grain, you can actually break the wood fibers, creating tiny air gaps that will throw off your reading, usually making it seem drier than it really is.
The type of pin matters, too, especially for thicker materials. Standard, non-insulated pins measure the wettest point along their entire length. This is a problem if you have surface condensation, as it can give you a false high reading.
- Use Insulated Pins for Sub-Surface Checks: These are a game-changer. They only measure at their very tips, allowing you to bypass surface moisture and get an accurate reading of the wood’s core. This is critical for figuring out how deep a moisture problem really goes.
- Apply Firm, Steady Pressure: Don't just jab the pins in. A consistent, firm push ensures good contact without damaging the material more than necessary.
Pinless Meter Best Practices
Pinless meters are fantastic for scanning large areas quickly without leaving a single mark. They work by sending out a low-frequency electromagnetic signal, creating a field that detects moisture beneath the surface. For this to work as intended, your technique has to be spot-on.
Let’s say you’re checking drywall around a window after a big storm. Your goal is to find the boundaries of the dampness. A pinless meter is perfect for this, but only if you follow one crucial rule: maintain firm, flat contact with the surface at all times.
The sensor pad must sit completely flush against the wall or floor. If you tilt it even slightly, you'll disrupt the electromagnetic field and get a wildly inaccurate—usually low—reading. Slide the meter smoothly across the surface, keeping an eye on the display for any jumps.
A single high reading is just a starting point, not the final answer. The real power of a pinless meter is its ability to quickly scan an entire wall, helping you map out the size and shape of a moisture problem before you do anything else.
And accuracy does vary between meter types. A comprehensive 2016 study found that high-quality pinless meters correlated 98% to the oven-dry gold standard. In contrast, pin meters could be off by up to 3% if not properly adjusted for temperature. Uncalibrated meters can even misread drywall in nearly half of all cases, which leads to big problems being missed.
Professionals often pair these tools with other tech to get the full picture. You can learn more about how we get precise results by exploring the use of thermal imaging in house inspections, which often complements moisture meter data perfectly.
Real-World Example: Putting It All Together
Okay, let's apply this. You've had a leak from the dishwasher and you're checking the hardwood floor.
First, start with the pinless meter. Begin in a dry area, away from the visible damage. Scan toward the wet spot, keeping the meter flat on the floor, to see exactly where the readings start to climb. This helps you define the perimeter of the moisture.
Next, confirm with the pin meter. Once you've mapped the area, grab your pin meter to get precise readings at the wettest spots you identified. Insert the pins with the grain in a discreet location (like between floorboards) to confirm the highest moisture content percentage.
Using this two-step method gives you both the big picture and the specific data you need for a truly accurate assessment.
How to Create a Moisture Map of Your Home
Finding one high reading on your moisture meter is just the first clue. It’s a starting point, not the whole story. This is probably the biggest lesson when you’re learning how to read moisture meter readings like we do in the field.
The real professionals don’t just spot-check. We perform systematic moisture mapping—a technique that turns a few confusing numbers into a clear picture of what’s really going on inside your walls and floors. It helps you trace the moisture's path right back to the source.
First, Establish Your Dry Standard
Before you even touch a suspicious spot, you need a baseline reading. We call this establishing a "dry standard," and it’s a non-negotiable first step if you want accurate results.
Find an area of the exact same material that you know is dry. For example, if you're worried about drywall beneath a leaky window, take your baseline reading from a piece of drywall on an interior wall in the same room. That number is now your control—it's what "normal" looks like for that material in your home today.
A dry standard is all about context. If your baseline is 7% and the problem area is hitting 20%, you have solid proof of a moisture problem. Without that baseline, you’re just guessing.
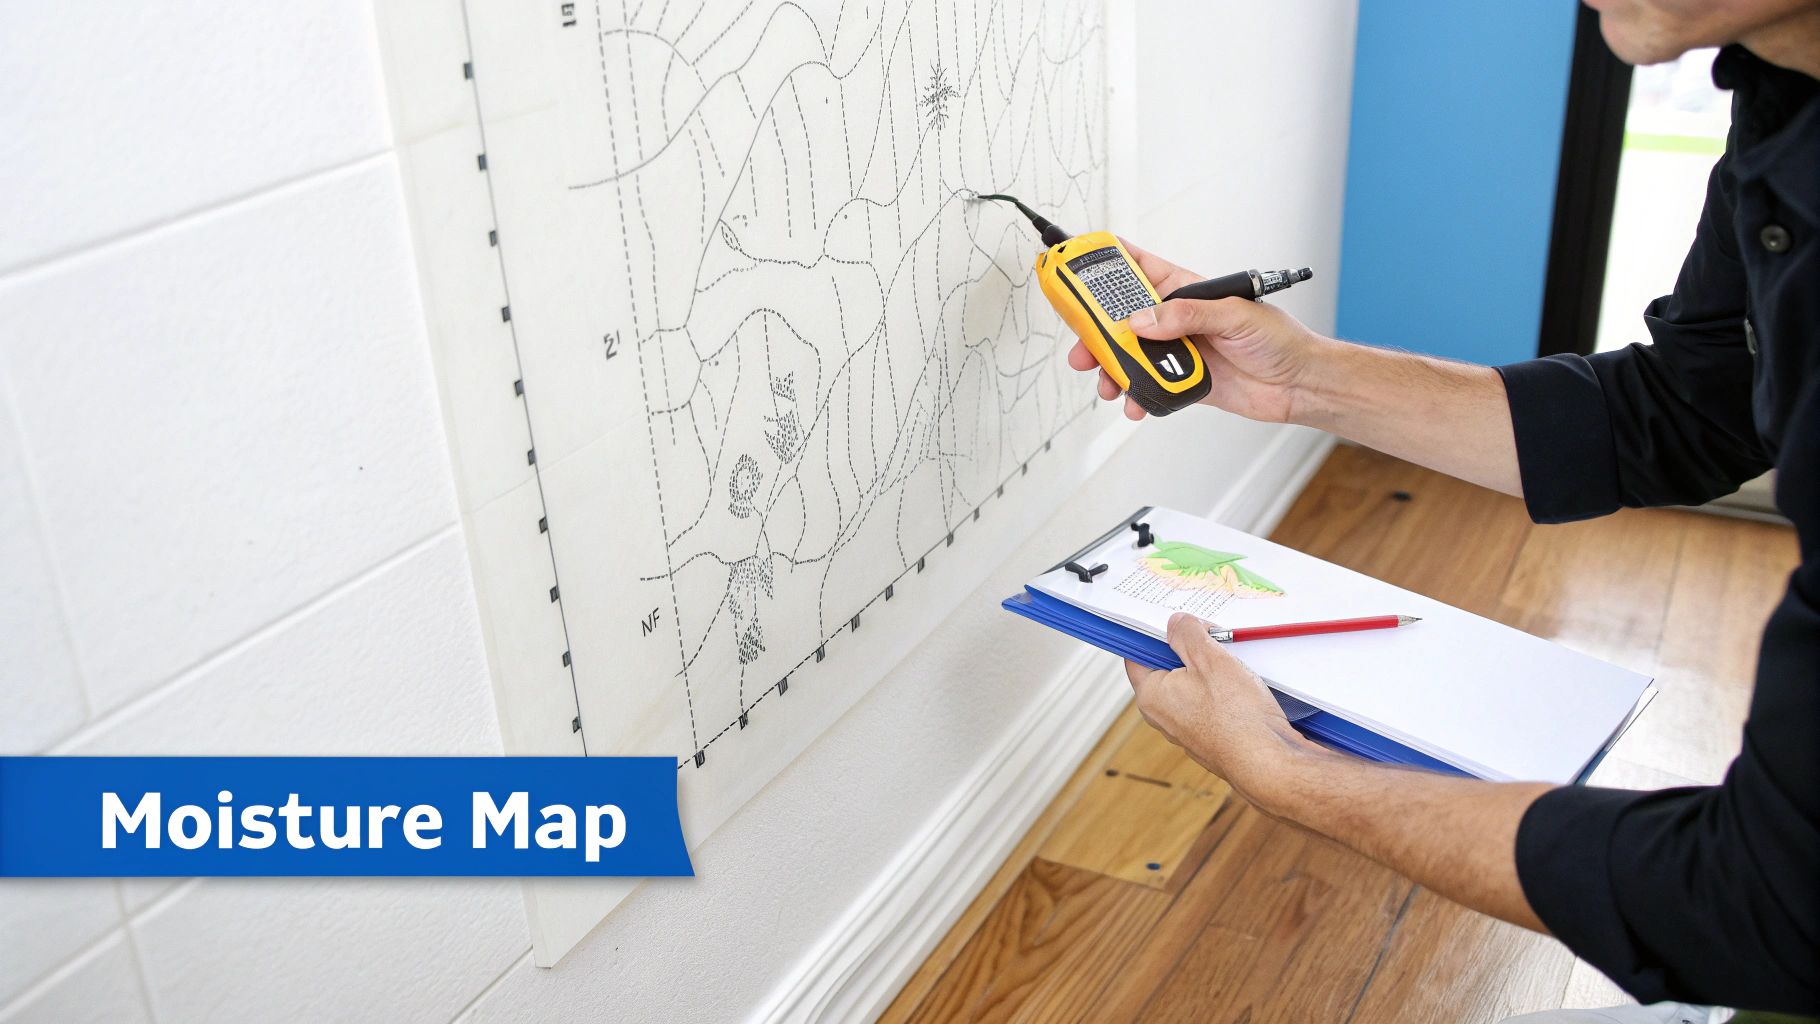
Next, Build Your Moisture Grid
Got your dry standard? Great. Now you can map out the problem area. This isn't as complicated as it sounds. All you need is your meter, a pencil, and maybe some painter's tape if you want to keep things neat.
Let's imagine you suspect a leak from the ice maker line behind your fridge. Here’s how you'd map it out:
- Define Your Area: Start by testing the spot you're most concerned about. Confirm it has a higher reading than your dry standard.
- Move Outward: From that first point, start taking readings in a grid pattern. Move up, down, left, and right about six inches at a time.
- Record Every Reading: Lightly write the percentage from your meter directly on the wall at each test point. You'll start to see a pattern emerge almost immediately.
- Find the Boundaries: Keep testing outward in all directions until the readings drop back down to your dry standard. This shows you exactly where the water has stopped spreading.
This simple grid method lets you visually outline the entire affected zone. You'll clearly see the spot with the highest moisture concentration—likely near the source of the leak—and understand just how far the problem extends.
An accurate map gives you the power to make an informed decision. Pinpointing the source is the most critical step, as ongoing water issues often require professional moisture intrusion solutions to fix for good.
Common Mistakes and Environmental Factors
Getting a number from your moisture meter is the easy part. Knowing whether you can trust that number? That takes a bit more finesse. Your home isn't a sterile lab, and all sorts of environmental conditions and hidden materials can throw off your readings, turning a helpful tool into a source of confusion. Learning how to read moisture meter readings correctly means learning to account for all these variables.
One of the most common blunders we see is forgetting about the room's climate. If you bring a cold meter in from your truck and immediately stick it on a warm, humid wall, condensation can form right on the sensors. That'll give you a falsely high reading every time. Always give your meter at least 30 minutes to acclimate to the room's temperature before you start poking around.
Watch Out for False Positives
A sky-high reading on a wall that looks perfectly dry can be alarming, but don't call in the demolition crew just yet. Pinless meters, especially, are notorious for picking up on things other than moisture. Their electromagnetic fields are great at what they do, but they can't tell the difference between water and metal.
Before you jump to conclusions about a hidden leak, think about what might be lurking behind that drywall:
- Metal Fasteners: Every drywall screw, nail, or metal corner bead will light up your meter like a Christmas tree.
- Wiring and Plumbing: It's no surprise that electrical conduits and copper pipes will give you a false positive.
- Metal Lath: Found in older plaster walls, this wire mesh backing can make an entire wall appear saturated to a pinless meter.
When you hit a suspicious hot spot, test a few other areas in a grid pattern around it. A real moisture problem will show a gradient of readings—wetter in the middle and drier as you move away. A hidden nail? That’ll just be a single, isolated spike.
How Your Environment Changes the Numbers
Ambient conditions play a huge role in your readings. Here in California, homes along the coast are constantly bathed in a marine layer that can raise the baseline moisture content of all the building materials. Even the thermal swing between a cool morning and a warm afternoon can cause readings to fluctuate by as much as 3%.
Your meter's reading is just a snapshot in time, heavily influenced by its surroundings. A good inspector doesn't just take the number at face value; they stop and ask why the number is what it is.
The material itself also matters immensely. Different wood species have different densities and chemical makeups, which changes how they interact with the meter. A reading on a dense piece of oak will be totally different from one on soft pine, even if their actual moisture content is identical. If your meter has a species correction setting, use it.
Research backs this up. High salinity in concrete, which is common in coastal construction, can throw off readings by as much as 7%. Another study found that simply taking three to four readings per 1,000 square feet can slash reporting errors by 40%. This really drives home the need for thorough moisture mapping instead of relying on single-spot checks. If you want to dive deeper into this, you can learn more about getting the best data from moisture meters.
When It’s Time to Stop Testing and Call a Professional
A moisture meter is a fantastic first step. It’s the tool that takes your gut feeling about a damp spot and gives you actual numbers to work with. But that’s its primary job—to be a screener, not the final word.
Knowing how to read moisture meter readings is one thing, but knowing when those readings are a red flag telling you to call for backup is just as important. Think of your meter as an early warning system. It can tell you there’s smoke, but you need a pro to find the source of the fire and put it out safely.
The moment your DIY hunt starts turning up confusing or consistently high numbers is your signal to hit pause. If you’re getting readings above 17% in drywall or 16% in wood and you can't trace it back to a simple, obvious cause like a recent spill, you're likely bumping into a much bigger problem. This is often where hidden plumbing leaks, foundation issues, or roof problems begin to reveal themselves, and those aren't surface-level fixes.
Clear Signs You Need Expert Help
There are a few clear indicators that your DIY testing has done its job and it's time to hand things over. These are the red flags that demand a deeper, more thorough investigation to protect your home and your health. Don't brush them aside.
- That Persistent Musty Smell: If your home has that stubborn, earthy odor that just won't go away no matter how much you clean or air it out, listen to your nose. It's the classic sign of hidden mold growth that your eyes can't see yet.
- Visible Mold or Staining: Seeing any mold—even a small spot—or noticing dark, water-like stains on walls, ceilings, or along baseboards means the problem is already well underway. You've moved past simple moisture detection and into full-blown assessment territory.
- Widespread High Readings: Did your moisture map light up a huge, vague area instead of a small, contained spot? A large moisture footprint almost always points to a significant and active source that needs to be found.
When your meter leaves you with more questions than answers, it's the perfect time to switch from DIY mode to professional analysis. An expert doesn't just find moisture; they interpret what it means for your home's entire system.
The Pacific Mold Pros Advantage
A certified inspector shows up with more than just a meter. We bring advanced tools like thermal imaging cameras that can "see" temperature differences behind walls—a dead giveaway for hidden moisture. We also conduct professional air quality testing to measure mold spore concentrations, giving us a complete picture of your home’s health.
Instead of guessing, you get a definitive, lab-verified report that tells you exactly what type of mold you're dealing with and how severe the contamination is. This is the critical data needed to build a safe and truly effective remediation plan.
If you're seeing any of the warning signs we've talked about, it’s time to get a professional evaluation. You can learn more about our comprehensive mold inspection services and see how we provide the clear answers you and your home deserve.