That damp, sticky feeling you get in your coastal home is more than just uncomfortable—it's a warning sign. High humidity isn't just a minor annoyance; it can quietly set the stage for much bigger problems down the road. The good news is that you can get ahead of it by improving ventilation, fixing sneaky leaks, and using the right appliances to create a healthy, balanced indoor environment.
Getting this right is the key to protecting both your home and your health.
Why Coastal Homes Get So Humid
Living in beautiful Santa Barbara or Ventura County comes with a unique challenge that homeowners further inland rarely face: the persistent marine layer. This coastal phenomenon pushes cool, moisture-heavy air onshore, especially in the mornings, wrapping our homes in a blanket of dampness.
When that humid air finds its way inside, it gets trapped. Your house essentially becomes a sponge.

This constant battle with airborne moisture is exactly why learning how to reduce humidity in your house is so critical for us coastal residents. Without proper management, all that excess moisture can lead to a host of issues that compromise your home’s structure and your family’s well-being.
Spotting the Telltale Signs of High Humidity
Before you can tackle the problem, you need to know what to look for. High humidity doesn’t always scream for attention; often, the clues are pretty subtle. Keeping an eye out for these indicators is the first step toward getting your home's environment back in balance.
Common signs of too much moisture include:
- Window Condensation: Fog, sweat, or water droplets forming on the inside of your glass panes.
- Musty Odors: A persistent damp or earthy smell, often strongest in basements, crawl spaces, or closets.
- Visible Mold or Mildew: Dark spots popping up on walls, ceilings, or in the corners of your bathroom.
- Peeling Paint or Wallpaper: When moisture seeps into walls, it can cause the finishes to bubble up and peel away.
- A Sticky, Clammy Feeling: That general sense of dampness in the air that makes surfaces feel slightly tacky or wet to the touch.
These symptoms are your home's way of telling you that its Relative Humidity (RH) is too high. That’s simply a measure of how much moisture is in the air compared to the maximum it could hold at that temperature.
A quick reference can help you understand what your RH levels mean for your home.
Ideal vs Problematic Indoor Humidity Levels
| Relative Humidity (RH) Level | What It Means for Your Home | Potential Risks |
|---|---|---|
| Below 30% | Too dry. Can feel uncomfortable and may damage wood. | Dry skin, irritated sinuses, static electricity, cracking wood furniture/floors. |
| 30% – 50% | The Ideal Zone. Comfortable, healthy, and safe for your home. | Minimal risk. This is the sweet spot for preventing mold and dust mites. |
| 50% – 60% | Getting humid. Starting to create a welcoming environment for pests. | Dust mites thrive. Early signs of condensation or musty smells may appear. |
| Above 60% | Problematic. The prime breeding ground for mold and mildew. | High risk of mold growth, structural damage, peeling paint, and respiratory issues. |
As you can see, keeping your home in that 30% to 50% range is crucial for preventing a whole host of problems before they start.
The Dangers of Unchecked Moisture
Ignoring those warning signs can lead to some serious consequences. In fact, public health guidance from the U.S. EPA recommends keeping indoor relative humidity below 60% and, ideally, between 30% and 50% to stop mold and dust mites in their tracks.
That’s a tough target to hit here on the coast. In Santa Barbara and Ventura Counties, the outdoor RH can easily climb above 70% during those foggy marine-layer mornings. This puts poorly ventilated interiors, crawl spaces, and attics at extremely high risk. EPA training materials even call out crawl spaces with high RH as one of the most common sites for hidden mold, since moisture from bare soil evaporates right into the air.
High humidity creates the perfect breeding ground for mold, which loves to grow in damp, dark areas. This not only destroys drywall, wood, and insulation but also releases spores into the air that can trigger allergies and respiratory issues.
Proactively managing moisture is one of the most important things you can do for your home. By learning how to prevent mold growth, you can safeguard your property's value and create a much healthier space for everyone inside. The following sections will walk you through the practical, actionable steps to measure and control the humidity in your home effectively.
Get the Facts: Tracking and Understanding Your Home's Humidity
You can't fix a problem you can't measure. When it comes to humidity, just guessing often means you're either using the wrong solutions or, even worse, ignoring a serious moisture issue until it’s already caused damage. To really get a handle on how to reduce humidity in your house, you have to stop guessing and start getting real data.
The first step is grabbing a simple, inexpensive tool: a digital hygrometer.
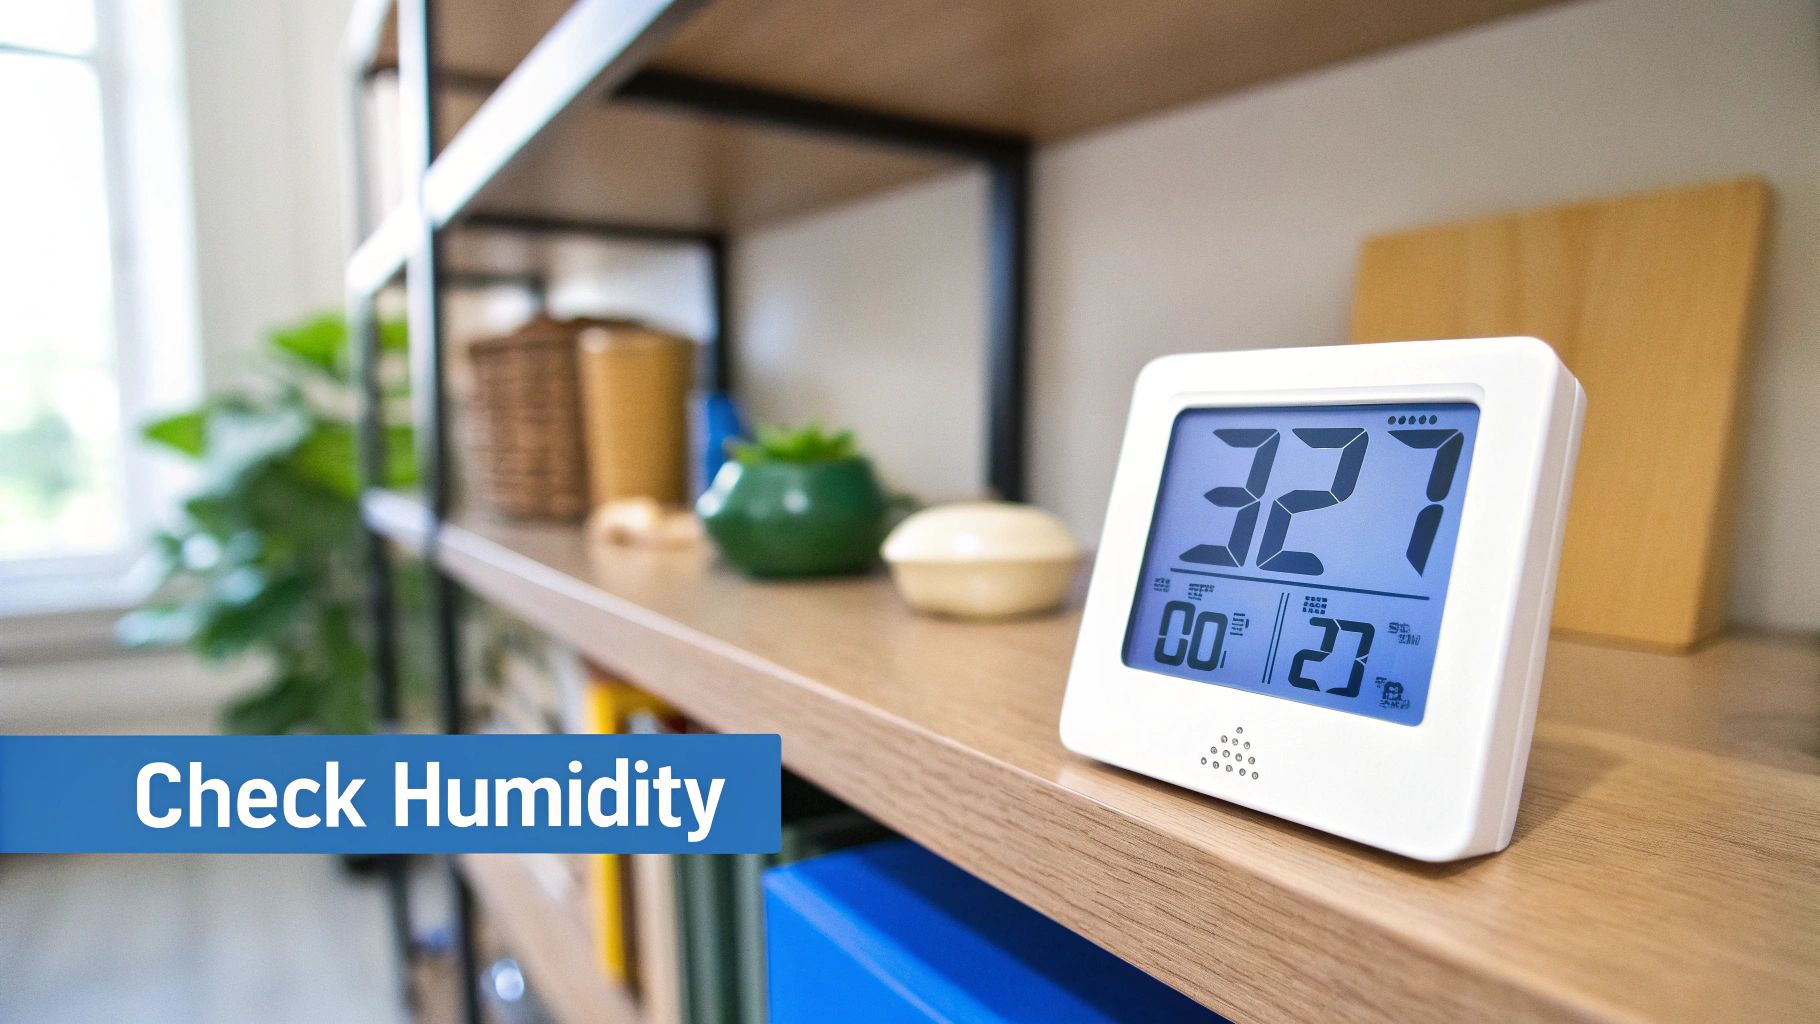
A hygrometer is just a small device that measures the amount of water vapor in the air, giving you a precise Relative Humidity (RH) reading. Getting this number is the critical first step to taking back control from that damp, sticky feeling in your home.
Where to Place Your Hygrometer for Accurate Readings
Here's a pro tip: just sticking one hygrometer on your living room coffee table won’t cut it. Humidity levels can be drastically different from one room to the next, especially in a multi-level home. To get the full picture, you need to think like an inspector.
Pick up a few cheap hygrometers and place them in these key trouble spots:
- The Basement or Crawl Space: These below-ground areas are notorious moisture traps. They're often the ground zero for a home's humidity problems.
- The Bathroom: Especially one without a good window or a weak exhaust fan. Bathrooms see huge spikes in humidity after every single shower.
- The Kitchen: Think about all the steam from boiling pasta or simmering soup. That moisture has to go somewhere.
- A Bedroom Closet: Closets often have poor airflow, which can create pockets of damp air, leading to musty smells and even mildew on your clothes.
By monitoring these specific areas, you'll quickly start to see patterns you’d completely miss with a single reading. This isn't just about getting a number; it's about understanding your home's unique moisture profile.
Interpreting the Numbers and Finding the Pattern
Once your hygrometers are set up, start paying attention. Don't just check them once and forget it—look at them at different times of the day and during different weather conditions. Living here in Santa Barbara or Ventura, you’ll quickly see how the morning marine layer can send your RH soaring, while a sunny, breezy afternoon can bring it right back down.
Key Takeaway: Your goal is to keep your home's Relative Humidity consistently between 30% and 50%. If you see readings that are constantly above 60%, that's a major red flag. That’s the perfect breeding ground for mold and dust mites.
This data gives you a clear baseline to work from. For instance, you might discover that your bathroom humidity shoots up to 85% after a shower and takes hours to drop back down. That tells you exactly where to start: improving the ventilation in that one room. For an even deeper dive, a professional moisture meter can reveal hidden issues, and knowing how to read moisture meter readings helps you find exactly where water is collecting in your home’s walls and floors.
Consistent tracking is what turns your efforts from a shot in the dark into a targeted, effective strategy. It lets you see which of your solutions are actually making a difference. Now that you have the data, you’re ready to take action.
Improving Airflow to Expel Damp Air
That heavy, stagnant air you sometimes feel indoors? That's a classic sign of high humidity. When damp air gets trapped with nowhere to go, it settles into your drywall, furniture, and fabrics, creating the perfect environment for mold. One of the best—and easiest—ways to fight back is to simply get the air moving. You need to give that moisture an exit strategy.
This doesn't mean you need a pricey HVAC overhaul. It’s about being smarter with the tools you already have to push that humid, stale air out and pull fresh, dry air in. Getting this exchange right is a game-changer in learning how to lower the humidity in your home for good.

Put Your Exhaust Fans to Work
Your bathroom and kitchen exhaust fans are your front-line soldiers in the war against moisture from showering and cooking. The problem is, most of us don't use them correctly.
It’s a common mistake to flip the fan off the moment the shower is turned off. All that steam doesn’t magically disappear—it just hangs in the air, waiting to condense on your walls and ceiling.
Pro Tip: Let your bathroom exhaust fan run for a full 15-20 minutes after you get out of the shower. This gives it enough time to pull all that lingering water vapor out of the room and vent it outside where it belongs.
The same idea holds true in the kitchen. Boiling pasta or simmering a big pot of soup pumps a ton of steam—pure humidity—into your home. Always run the range hood fan while you cook, and maybe let it run for a few extra minutes after you’re done to clear out any remaining moisture.
Strategic Use of Windows and Fans
Simply opening a window can be incredibly powerful, especially for those of us along the coast in Santa Barbara and Ventura. The trick is all about timing. If you throw your windows open during the foggy morning marine layer, you're just inviting more damp air inside.
Instead, wait until the sun has burned off the fog and the outside air feels drier, usually by late morning or early afternoon. This is the perfect time to open windows on opposite sides of your house to create a cross-breeze, which literally flushes out the stale, humid indoor air and replaces it with fresher, drier air.
You can boost this effect with portable or ceiling fans. A ceiling fan does more than just make a room feel cooler; it prevents air from becoming stagnant and stratified. By keeping the air circulating, you stop moisture from settling in corners or behind furniture. For an even bigger impact, place a box fan in a window facing outward to actively push damp air outside.
Here are a few simple habits to get into:
- Create a cross-breeze: Open windows at opposite ends of your home for at least 15-30 minutes during the driest part of the day.
- Use fans to direct the flow: Position fans to help push humid air toward an open window or an exhaust vent.
- Keep interior doors open: This helps air move freely between rooms and prevents pockets of humid air from getting trapped in closed-off spaces.
Check Your Dryer Vent
This is a huge source of indoor humidity that people often forget about. With every load, your clothes dryer expels an incredible amount of hot, moist air. That air must be vented directly outside through a dedicated duct.
If that vent hose is disconnected, clogged with lint, or—worst-case scenario—venting into your crawl space or attic, you’re basically pumping gallons of water vapor straight into your home’s structure. Take a minute to check the connection behind your dryer and make sure the exterior vent flap is clean and opens easily when the dryer is running.
Getting your airflow right is a fundamental part of maintaining a healthy home. When you actively manage your home's ventilation, you're not just lowering humidity—you're making your entire space more comfortable. For a deeper dive into how these habits contribute to a healthier home, check out our guide on improving indoor air quality. You'd be surprised what a difference a few small changes can make.
Using Appliances to Control Indoor Moisture
Improving airflow is a huge first step, but sometimes you need to call in the big guns to pull stubborn moisture right out of the air. The good news? Your home is probably already equipped with some of the best tools for the job.
Learning how to get the most out of these appliances is the key to winning the battle against persistent dampness and truly mastering how to reduce humidity in your house.
Believe it or not, your air conditioner is a natural dehumidifier. As it cools your home, it pulls warm, humid air across cold evaporator coils. This forces the water vapor to condense out of the air, where it’s collected and drained safely outside.
Even on one of those cooler, damp Santa Barbara days when you don't need a blast of cold air, you can still run your AC on a low fan setting or use a "dry" mode if it has one. This keeps it pulling moisture from the air without turning your living room into an icebox.
Choosing and Using a Dedicated Dehumidifier
While your AC is a great multi-tasker, a dedicated dehumidifier is the specialist. It has one job and one job only: to strip excess moisture from the air with maximum efficiency. These units are absolute must-haves for targeting problem areas like basements, laundry rooms, and musty crawl spaces where humidity loves to hang out.
When you're shopping for a dehumidifier, the single most important factor is its capacity. This is measured in the pints of water it can remove from the air in a 24-hour period. If you get a unit that's too small for the space, it will run constantly without ever hitting your target humidity level—wasting energy and offering little relief.
Here’s a quick guide to help you pick the right size for the job.
Choosing the Right Dehumidifier Size
This table makes it easy to match the dehumidifier's power to your room's specific needs.
| Room Condition | Area (Square Feet) | Recommended Dehumidifier Capacity (Pints/Day) |
|---|---|---|
| Moderately Damp (Musty smell in humid weather) | 500 – 1,000 sq ft | 10-16 Pints |
| Very Damp (Damp spots on walls/floors) | 1,000 – 1,500 sq ft | 14-22 Pints |
| Wet (Visible moisture or condensation) | 1,500 – 2,000 sq ft | 20-30 Pints |
| Extremely Wet (Standing water, soaked areas) | 2,000 – 2,500 sq ft | 26-40+ Pints |
Getting the right size is crucial, but don’t forget about placement. Shoving it into a tight corner will choke its airflow. For the best results, place your dehumidifier near the center of the room, giving it at least six inches of clearance on all sides.
Everyday Habits That Make a Big Difference
Beyond the heavy-duty machines, small tweaks to your daily routine can have a surprisingly big impact on your home's overall moisture load. Take the kitchen, for instance—it's a major humidity generator. All that steam from boiling pasta, simmering soup, and washing dishes has to go somewhere.
A simple yet incredibly effective habit is to cook with lids on your pots and pans. This tiny action traps a huge amount of steam, stopping it from escaping into the air. And always, always run your range hood exhaust fan when you're cooking to vent what’s left outside.
Houseplants also add moisture to the air through a process called transpiration. If you have a jungle of indoor plants and your home feels damp, try grouping them together in one well-ventilated room instead of spreading them all over. It makes it much easier to manage the moisture they release in a single, contained area.
The consistent use of mechanical solutions—like dehumidifiers, air conditioners, and exhaust fans—is proven to reduce mold risk and improve indoor air quality. Mold thrives in temperatures between 77–86°F when moisture is available, but its growth slows dramatically when relative humidity drops below 70%.
Building professionals, including our team, strongly recommend maintaining an RH between 30–50% in vulnerable areas like basements and coastal crawl spaces. For homes here in the Santa Barbara area, where the marine layer can push damp air right into your walls, combining active humidity control with professional moisture inspections is the smartest way to keep small issues from blowing up. You can find more details in the county-level mold prevention guidelines.
Finding and Fixing Moisture Leaks
All the daily habits and appliance adjustments in the world won't make a dent if your house is actively working against you. If a hidden leak is constantly feeding moisture into your home, you'll be stuck fighting an uphill battle. This is where we shift our focus from just managing damp air to cutting off the water at its source.
Think of it like trying to bail out a boat with a hole in it. You can scoop water all day, but you won't get anywhere until you find and plug the leak. A basic moisture audit of your property is the best way to uncover these hidden problems before they snowball into serious damage.
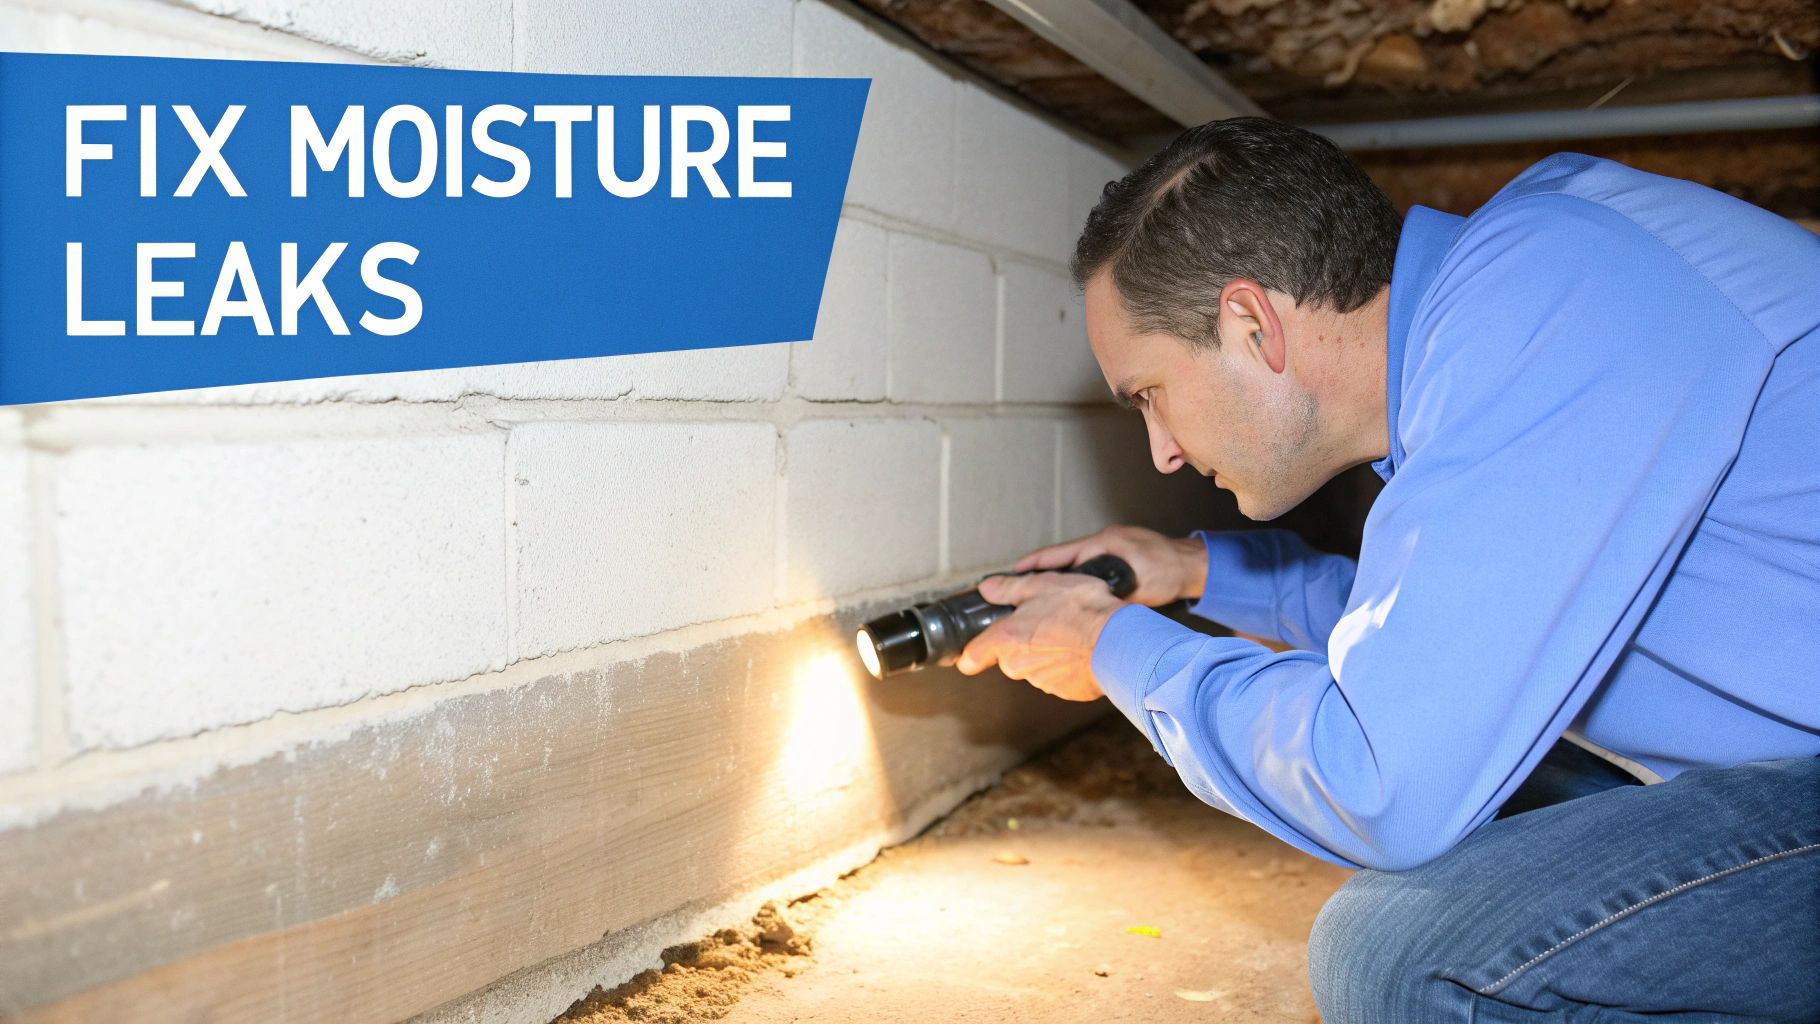
Uncovering Hidden Plumbing Leaks
Even a tiny, slow drip can introduce a shocking amount of moisture into your home's structure. That slow leak under a bathroom sink or behind the toilet can go unnoticed for months, quietly saturating the subfloor and drywall. These dark, damp spaces are prime real estate for mold growth.
Make a habit of checking these common culprits for any red flags:
- Under Sinks: Look for water stains, warped cabinet wood, or that telltale musty smell in your kitchen and bathroom vanities.
- Around Toilets: Check the base of the toilet for discoloration on the flooring or a soft, spongy feel underfoot.
- Appliance Connections: Take a look at the hoses connected to your dishwasher, washing machine, and the ice maker line for your fridge.
Sometimes the leak is inside a wall. You won't see water, but you might notice peeling paint, bubbling wallpaper, or a persistent musty odor that won't go away. This is where advanced tools come in handy. In fact, understanding what thermal imaging is used for shows how professionals can pinpoint hidden moisture without tearing your walls apart, saving you a lot of time and money.
Your Home's First Line of Defense
Many homeowners don't realize that their gutters and the ground around their house play a massive role in keeping the inside dry. When gutters get clogged with leaves and debris, rainwater has nowhere to go. It overflows and pools right up against your foundation.
That saturated soil forces water into your basement or crawl space through tiny cracks, which can dramatically spike humidity levels right below your living areas. Simply cleaning your gutters twice a year—once in the spring and again in the fall—is one of the most powerful preventative tasks you can do.
A well-maintained exterior is just as critical as a well-ventilated interior. The goal is to direct every drop of rainwater as far away from your foundation as possible, so it never has a chance to seep inside.
After checking the gutters, look at the soil itself. The ground should have a "positive grade," which just means it slopes gently away from your foundation. If you see the ground sloping inward or creating little ponds where water collects, you can often fix it by adding compacted soil to build up the grade and redirect that water flow.
Sealing Your Home from Humid Air
Leaks aren't always about water; they can also be about air. Every tiny crack and gap around your windows, doors, and where utility lines enter your house is an open invitation for humid coastal air to sneak in. On a foggy Santa Barbara morning, this infiltration alone can send your indoor RH soaring.
Sealing these air leaks is a pretty straightforward and cost-effective DIY project. Use high-quality caulk to fill gaps around window and door frames, and apply weatherstripping to the moving parts of doors and windows for a tight seal when they're closed. This one step makes every other humidity control effort—like running a dehumidifier or your AC—so much more effective because you're no longer fighting a constant influx of damp air from outside.
Knowing When to Call a Professional
You’ve tried everything. You’ve boosted ventilation, run the dehumidifier around the clock, and hunted down every potential leak. Tackling high humidity on your own can make a huge difference, but sometimes, those efforts just don't get to the root of the problem.
There are certain red flags that signal a deeper, more serious moisture issue—something hidden that needs an expert eye. Recognizing these signs isn't about giving up; it's about making a smart decision to protect your home and your family from long-term damage before it's too late.
That Persistent Musty Odor Just Won't Quit
One of the most telling signs is that musty, earthy smell that seems to linger no matter how much you clean or air out the house. This isn't just a sign of dampness; it's often the first and only clue you'll get that mold is actively growing somewhere out of sight. Think behind a wall, under the floorboards, or deep within your HVAC system.
Pay close attention. If the smell gets stronger in certain rooms or seems to pop up right after it rains, you're almost certainly dealing with an active moisture source that’s feeding a hidden colony. A professional inspector has the tools and experience to trace that scent back to its origin.
Visible Mold That Keeps Coming Back
It's a frustrating cycle. You find a patch of mold in a bathroom corner, scrub it away with a bleach solution, and breathe a sigh of relief. A few weeks later, it’s back in the exact same spot.
When mold keeps returning, it’s a clear sign you're only cleaning a surface-level symptom, not the underlying cause. There’s a constant source of moisture feeding it—maybe a slow, weeping pipe inside the wall, condensation from poor insulation, or water seeping in from the foundation. Until that water source is found and fixed, the mold will just keep coming back.
Worsening Allergies or Respiratory Issues at Home
Have you or your family noticed that your allergies, asthma, or other respiratory issues are worse at home? If you feel better when you're out and about but start sniffling, coughing, or feeling fatigued shortly after returning, your home's air quality is the likely culprit.
Mold releases microscopic spores into the air, which can trigger a whole host of allergic reactions and respiratory distress. When your best efforts to lower the humidity don't bring any relief from these health concerns, it’s a strong signal that you need professional mold testing to find out what you're breathing in.
Calling a professional isn't just about finding mold; it's about finding the hidden water that's allowing it to grow. Experts use advanced tools that go far beyond what a homeowner can see.
A certified inspector from a company like Pacific Mold Pros uses specialized equipment to see the full picture without tearing your walls apart. This includes:
- Moisture Mapping: Using highly sensitive moisture meters, they create a detailed map showing exactly where water is hiding in your walls, floors, and ceilings—even if the surfaces feel dry to the touch.
- Thermal Imaging: Infrared cameras are a game-changer. They detect subtle temperature differences in building materials caused by hidden moisture, instantly pinpointing leaks or insulation gaps without any destruction.
This kind of detailed investigation uncovers the "why" behind your humidity problem, leading to a permanent solution instead of a temporary fix. It’s the fastest and most effective way to ensure your home is truly a safe, healthy environment.
Got Questions About Home Humidity? We Have Answers.
It’s natural to have questions when you’re trying to get a handle on your home's humidity. Here are some of the most common things we hear from homeowners, with straightforward answers to help you dial in your strategy.
So, Do My Houseplants Actually Make My House More Humid?
Yes, they definitely can. Plants release moisture vapor from their leaves in a process called transpiration. While your single little succulent isn't going to cause a problem, a room full of large, leafy tropicals can absolutely raise the humidity.
If you’re a plant lover battling dampness, try grouping your plants in one well-ventilated room. This contains the moisture they release, making it much easier to manage instead of having it spread throughout the house.
How Long Do I Really Need to Run a Dehumidifier?
This is a classic "it depends" situation. The answer hinges on how damp the room is to start with, the size of the space, and your dehumidifier's power. When you first plug it in, you might need to run it continuously for a few hours or even a full day to get the Relative Humidity (RH) down to that sweet spot of 40-50%.
Once you’ve hit that target, you can usually let the machine do the thinking. Switch it to the "auto" or humidistat setting. It will then cycle on and off as needed to maintain that level, saving you energy while keeping the air comfortable and dry.
Our Pro Tip: Don't just set it and forget it forever. Use a separate hygrometer to see how long it takes to reach your ideal RH. Once you know, you can trust the machine’s built-in sensor to take it from there. The goal isn't constant operation; it's smart maintenance.
Is High Indoor Humidity Actually a Serious Health Risk?
It certainly can be. When humidity consistently stays above 60%, your home becomes a perfect breeding ground for mold, mildew, and dust mites. These are three of the biggest triggers for anyone with allergies or asthma.
As mold and dust mites thrive, their spores and waste particles become airborne, which can lead to coughing, sneezing, respiratory irritation, and other chronic issues. On top of that, damp air makes it harder for your body to cool itself, leaving you feeling sticky and sluggish. A balanced indoor environment is a cornerstone of a healthy home.
Will a Ceiling Fan Help With Humidity?
A ceiling fan is a fantastic supporting tool, but it doesn't actually remove moisture from the air like a dehumidifier. What it does do is circulate air, which is incredibly helpful.
This constant airflow helps moisture evaporate from surfaces like walls, floors, and furniture much faster. It breaks up those stagnant, damp air pockets where mold loves to get a foothold. Plus, the breeze creates an evaporative cooling effect on your skin, making a humid room feel way more comfortable. Think of it as your dehumidifier’s best friend.