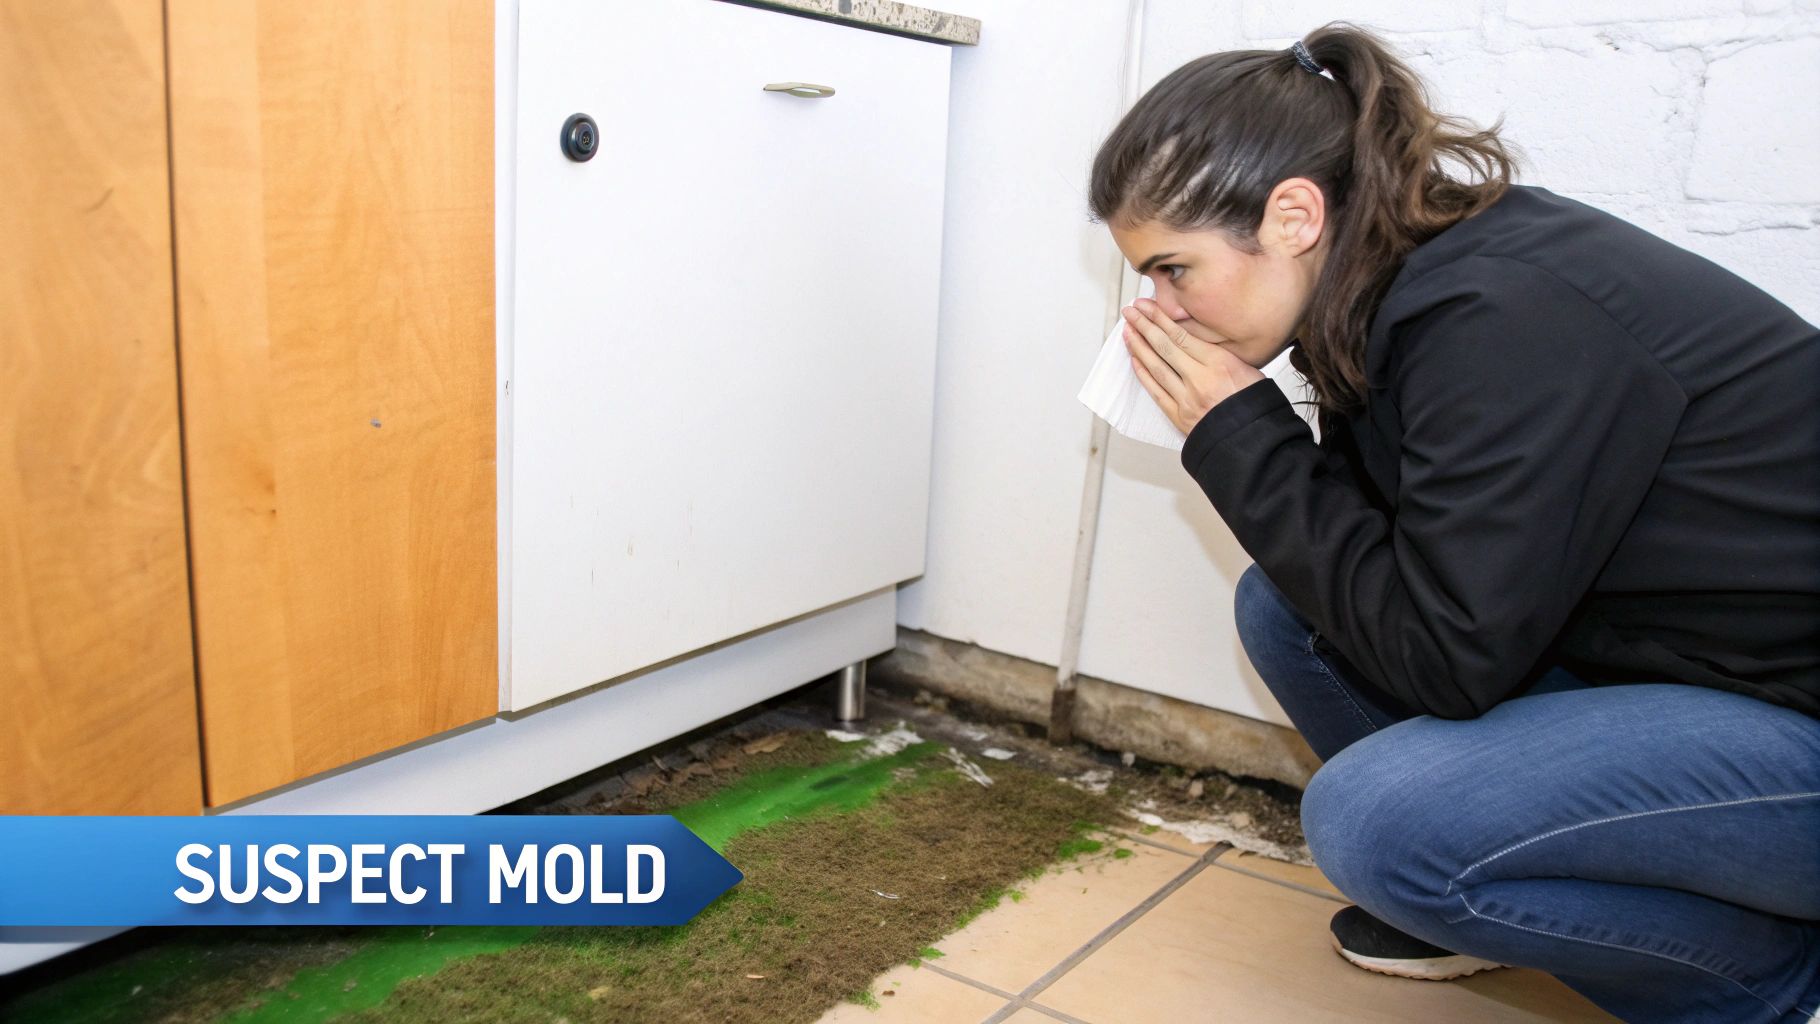
So, you're smelling something funky or spotted a suspicious patch on the wall, and now you're wondering if you have a mold problem. Good on you for trusting your gut. That musty odor or bit of discoloration is often your home’s first warning sign that something’s not right.
Testing for toxic mold isn't just about swabbing a surface; it’s a process of investigation. It starts with identifying moisture sources, moves to a detailed visual inspection, and often involves collecting samples for a professional lab to analyze. The goal is to get the full picture—what kind of mold you're dealing with, where it is, and how widespread the issue really is.
Decoding the Signs You Might Have Mold
That lingering, earthy smell in the basement or the weird discoloration you just noticed behind a dresser can be unsettling. It’s a common scenario, but figuring out which signs are just harmless quirks and which point to a real problem is the first step toward protecting your home and your health.
While not every type of mold is toxic, any significant growth means there's an underlying moisture issue that needs to be fixed. Period. The decision to test usually starts with a few key triggers. These are the clues your home gives you when it needs help.
Key Triggers for Mold Testing
The most obvious sign is, of course, seeing it. If you’ve got black, green, or white fuzzy patches growing on walls, ceilings, or baseboards, you have mold. But the tricky thing is, mold loves to hide.
A persistent musty odor, especially in damp-prone areas like basements, bathrooms, or crawl spaces, is a classic giveaway for growth you can't see. For tips on finding mold in those notoriously damp areas, you can learn more about the specific signs of mold in a crawl space.
Another huge red flag? Unexplained health issues. If someone in your family is suddenly dealing with persistent allergies, coughing, sneezing, or breathing trouble that seems to get better when they leave the house, your indoor air quality could be the culprit. These symptoms are particularly concerning because they suggest airborne mold spores are circulating.
The World Health Organization (WHO) isn't messing around here. They state that people living in damp or moldy buildings have a 75% greater risk of respiratory problems and asthma. This really underscores the health risks of ignoring a potential mold problem.
When a Visual Check Isn't Enough
Sometimes the clues are more subtle. Things like peeling paint, warped floorboards, or constant condensation on your windows can all point to trapped moisture—which is basically a five-star resort for mold.
If you've recently dealt with a water event—a flood, a leaky pipe, a roof issue—testing is a very smart move, even if you don't see or smell anything yet. It only takes 24-48 hours for mold to start growing after water exposure.
Not sure if your situation warrants a professional look? Here's a quick cheat sheet to help you decide.
Key Signs You Might Need to Test for Mold
| Indicator | What to Look For | Recommended First Action |
|---|---|---|
| Visible Growth | Black, green, or white patches on walls, ceilings, or furniture. | Document with photos and call a professional for assessment. |
| Musty Odor | A persistent earthy or damp smell, especially in enclosed areas. | Try to locate the source of the smell; check for hidden leaks. |
| Health Symptoms | Unexplained allergies, coughing, sneezing, or headaches at home. | Consult a doctor and consider an indoor air quality test. |
| Water Damage | Stains, peeling paint, warped wood, or recent floods/leaks. | Fix the moisture source immediately and monitor the area closely. |
This table should help you connect the dots. If you're checking off one or more of these boxes, it’s probably time to stop guessing and get some real answers.
Performing a Thorough Visual Inspection Yourself
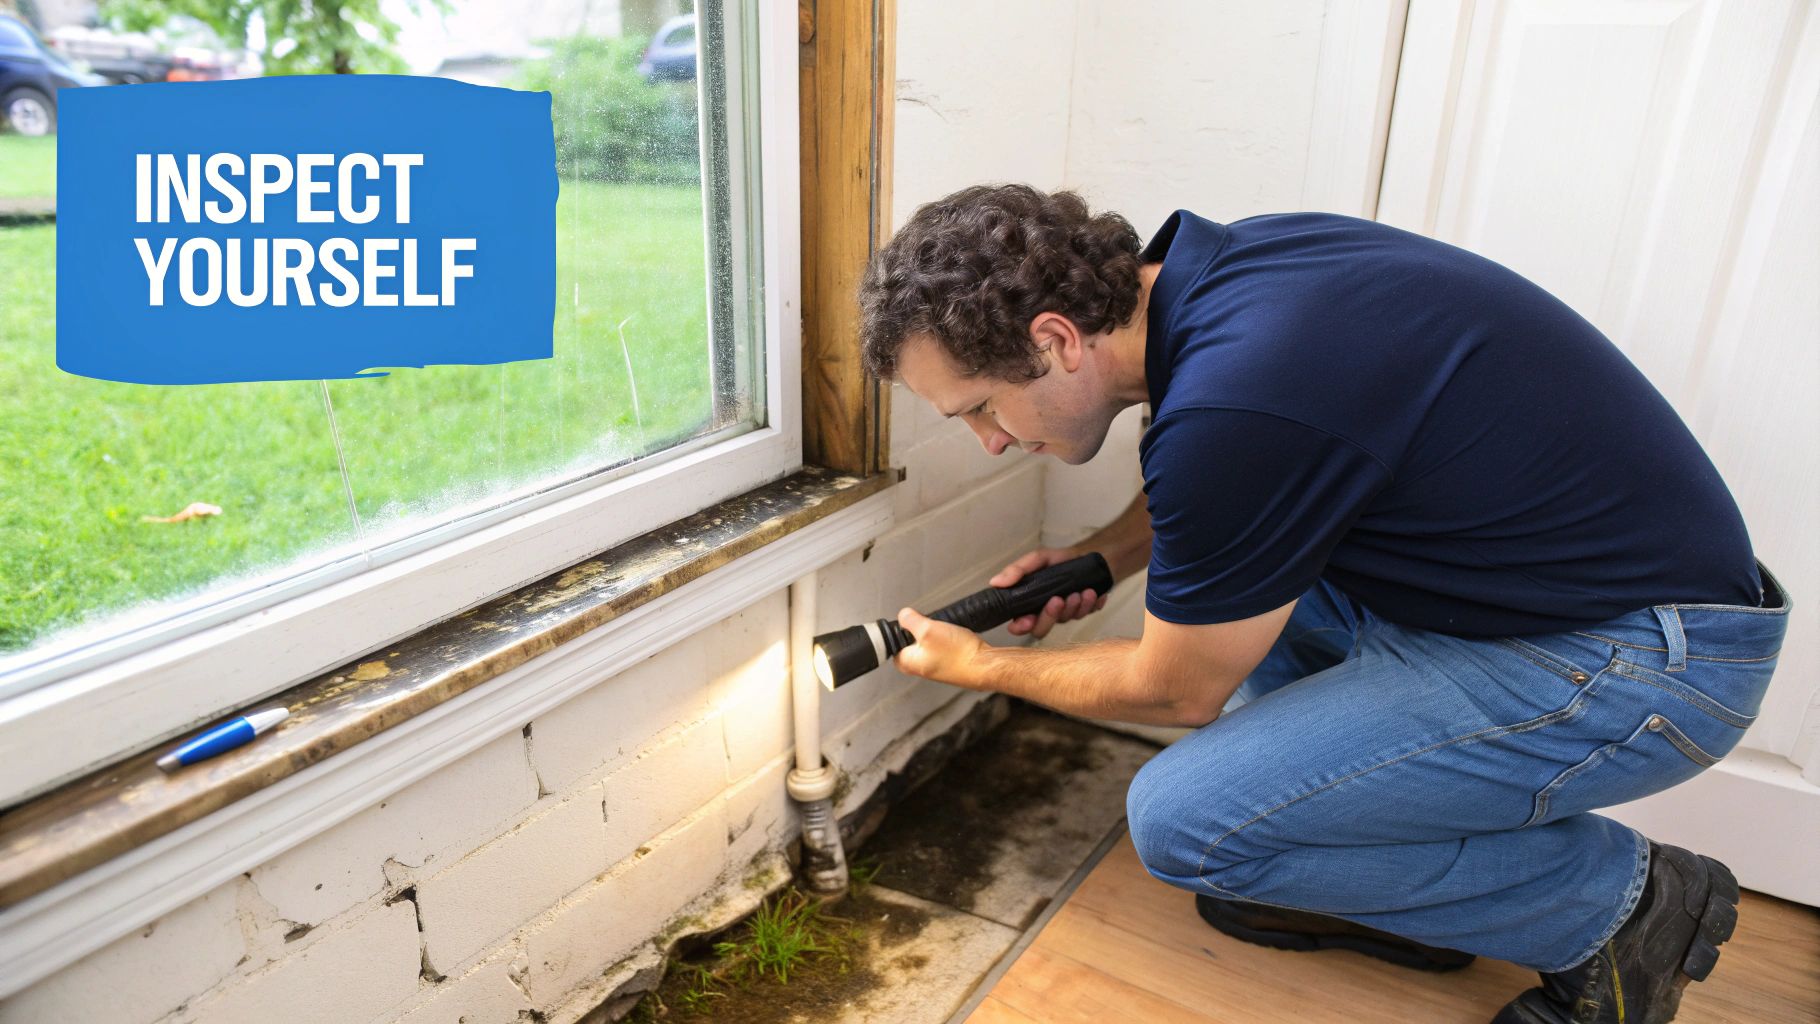
Before you ever spend a dime on professional testing, your own senses are the best tools you have. A good, old-fashioned visual inspection is the first step in uncovering a potential mold problem, and it's surprisingly effective.
Think of it as playing detective in your own home. You're looking for clues that moisture has overstayed its welcome, because wherever you find persistent moisture, mold is never far behind. With a powerful flashlight and a bit of curiosity, you can start to connect the dots.
Trust Your Nose: The Smell Test
Long before you see it, you can often smell it. Mold produces gases called Microbial Volatile Organic Compounds (MVOCs), which create that distinct, earthy odor—like damp soil or a pile of wet laundry left too long.
This musty smell is your body's built-in mold detector. If you notice it’s stronger in a specific room, like a bathroom or basement, you've just narrowed your search area significantly. Don't ignore it, even if it's faint. That subtle scent could be coming from behind a wall or under the floorboards.
If you're having trouble pinpointing the source, our guide on how to know if that musty smell is mold can help you figure it out.
Common Mold Hotspots Professionals Always Check
From years of experience, we know mold loves to hide. It thrives where moisture, a food source (like drywall), and stagnant air come together. These spots are the usual suspects we check first in any inspection.
- Under Sinks and Around Plumbing: Pop open those kitchen and bathroom cabinets. Look for drips, water stains, warped wood, or that musty smell. Run your hand along the pipes—do you feel any dampness?
- Around Windows and Doors: Condensation is a big red flag. Check for moisture on the panes, discolored sills, or paint that’s starting to peel or bubble around the frames.
- In Basements and Crawl Spaces: These areas are notorious for dampness. Shine your flashlight along the corners, foundation walls, and around any pipes or sump pumps.
- Attics and Near the Roofline: Look up. Dark stains on the underside of the roof sheathing or around vents often mean poor ventilation is trapping warm, moist air.
A key takeaway from professional inspectors is that mold rarely grows in the middle of a well-ventilated room. It almost always starts in a corner, a crevice, or a hidden area where moisture is trapped and air doesn't circulate.
Looking Beyond the Obvious Spots
Sometimes, the clues are more subtle than a big, fuzzy patch of black mold. You have to train your eye to spot the secondary signs of a water issue, which will almost always lead you to a hidden colony.
Bubbling or peeling paint is one of the biggest giveaways. Water is getting trapped behind the paint, causing it to separate from the wall. Also, get down low and check your baseboards and flooring, especially in kitchens and bathrooms. Any warping or dark discoloration is a bad sign.
Another clue is persistent condensation. If your windows, pipes, or toilet tank are always "sweating," the humidity in your home is too high. This creates a five-star resort for mold.
Finally, take a close look at the grout in your shower. A little mildew is normal, but if you have dark staining that comes back no matter how often you clean, you could have a bigger moisture problem hiding behind the tile. A solid visual check, combined with that initial smell test, will give you a very clear picture of whether it's time to call in the pros.
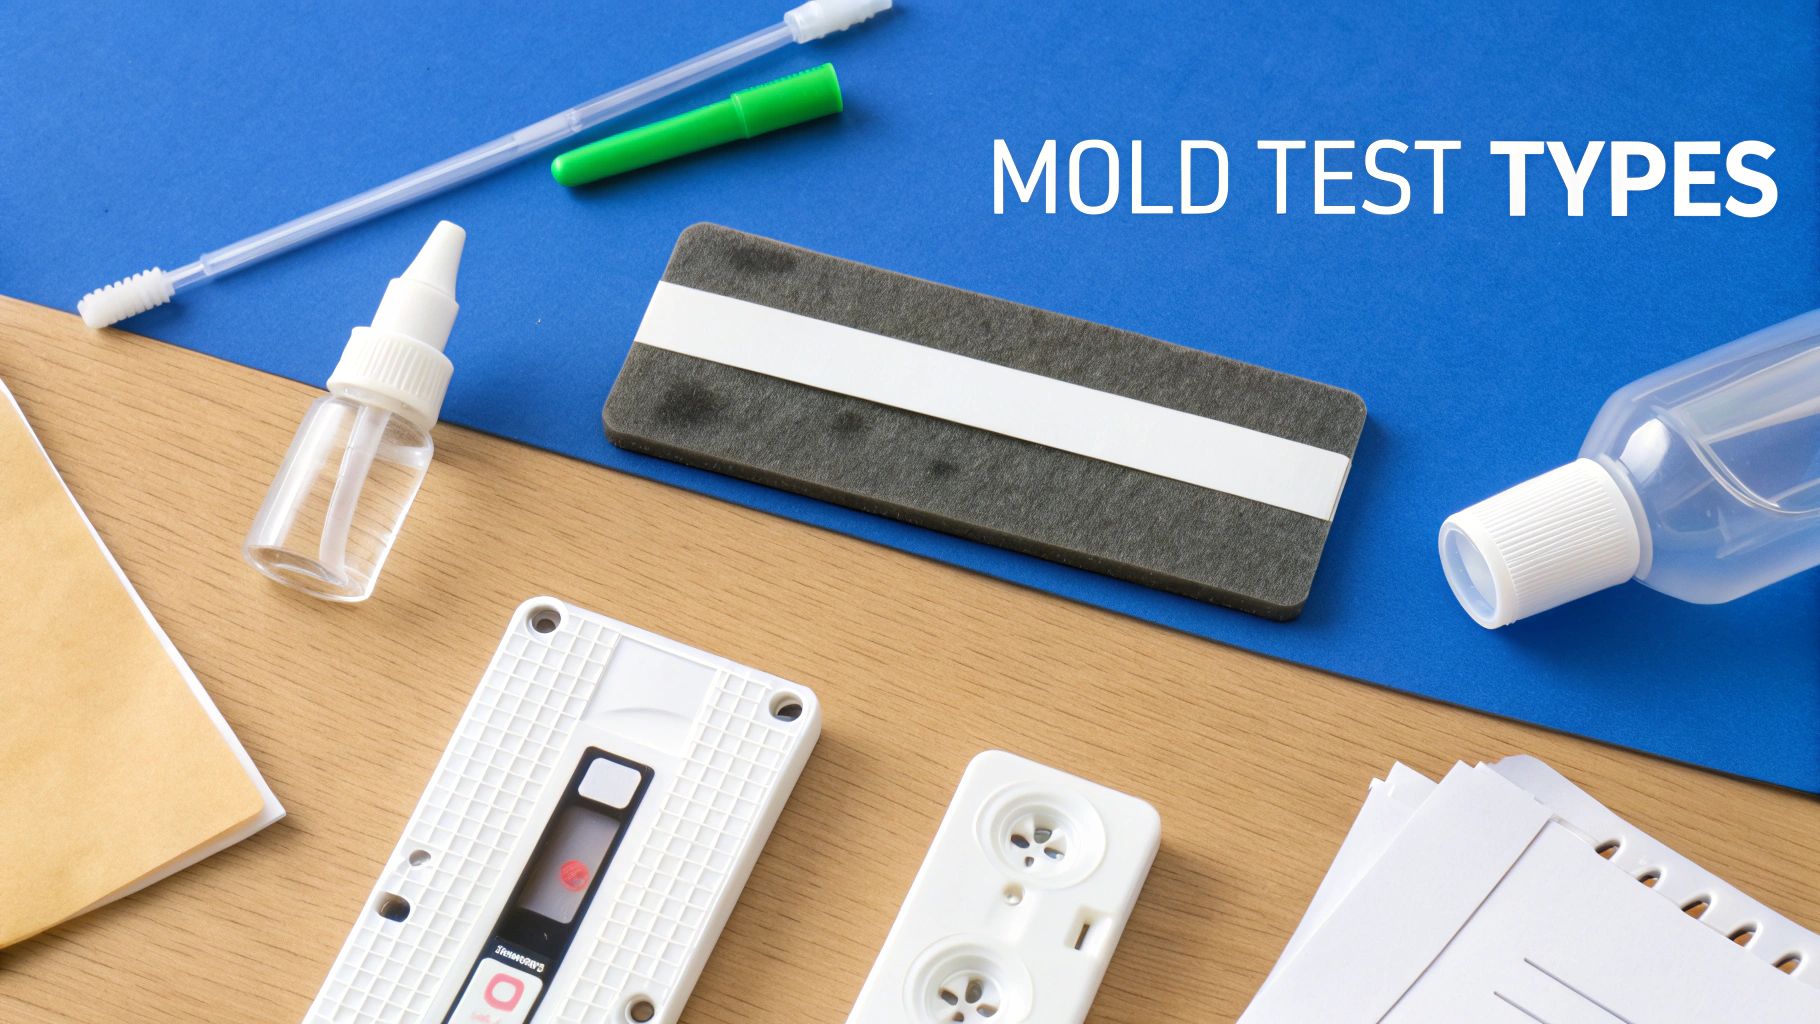
Decoding the Different Types of Mold Tests
So, your visual check has turned up some suspicious spots, or maybe that musty smell just isn't going away. At this point, you need to move past the guesswork. This is where mold testing comes in—it’s the scientific part of the investigation that gives you hard data on what you're up against.
Knowing how to test for toxic mold isn’t about a single, one-size-fits-all method. We actually use a combination of sampling techniques to build a complete picture of your home’s indoor environment. Each test has a specific job, whether it’s identifying a visible colony or figuring out what’s floating unseen in the air you’re breathing. Using multiple tests is how we get the most accurate and actionable results.
Surface Sampling for Visible Growth
When you can see a discolored patch on a wall, you're looking at a physical colony. The first question on everyone's mind is, "What kind of mold is it?" That's what surface sampling is for, and it's one of the most direct ways to get an answer.
This method involves taking a direct sample from the visible growth and sending it off for lab analysis. It’s a highly targeted approach that identifies the specific mold species growing in that exact spot.
We typically use two techniques for this:
- Tape Lifts: An inspector will press a small piece of special, sterile tape right onto the suspected mold. The sample is then sealed and sent to a lab where a microbiologist can put it under a microscope and tell you exactly what it is.
- Swab Samples: For this, we use a sterile cotton swab—kind of like a Q-tip—to collect a sample from the surface. This is really useful for getting into tight corners or testing rough surfaces where a tape lift just won’t work.
Surface sampling is perfect for confirming the identity of something you can see. Let's say you have a blackish patch under a leaky sink. A tape lift can confirm if it’s the dreaded Stachybotrys chartarum (black mold) or a less concerning species. The only catch is that it only tells you about the spot you tested, not what might be circulating in the air.
Air Sampling for Airborne Spores
What about the mold you can't see? It’s common for a room to smell musty and trigger allergies without any visible signs of growth. This is where air sampling, also called spore trap analysis, is absolutely essential. It’s the best way to find out the concentration of mold spores in your indoor air.
During an air test, we use a calibrated pump that pulls a specific volume of air through a special cassette containing a sticky slide. Any airborne particles, including mold spores, get stuck on this slide. We always take a baseline "control" sample outdoors to see what normal, local spore levels look like for comparison.
The lab then analyzes these samples to:
- Identify the types of mold spores present inside.
- Count the number of spores per cubic meter of air.
- Compare the indoor spore counts and types to the outdoor sample.
Here's the key takeaway: In a healthy home, the indoor spore count should be lower than the outdoor count, and the types of spores should be similar. If your indoor counts are way higher, or if we find species like Stachybotrys indoors that aren't outside, it’s a huge red flag for an active, hidden mold source.
Environmental sampling, which includes both air and surface methods, is a cornerstone of any professional mold assessment. You can dive deeper into these scientific approaches by checking out the CDC's information on environmental mold sampling on the CDC's website. One thing to remember is that air quality can be influenced by daily conditions—a test on a dry, still day might look different than one right after a rainstorm.
Dust Sampling for a Historical Record
Sometimes, we need to get a longer-term view of a property's mold history. Dust sampling is perfect for this. Over time, dust acts like a sponge, collecting and trapping mold spores, heavy metals, and other particulates. It essentially creates a historical record of your indoor environment.
The most well-known dust test is the ERMI (Environmental Relative Moldiness Index). It uses powerful DNA analysis to identify 36 different mold species from a single dust sample. This test is incredibly sensitive and can reveal a history of mold issues, even long after a cleanup has been done.
While ERMI is a great tool, it's typically reserved for more complex cases, like for people with chronic health issues or when other tests are inconclusive. For most initial investigations, a solid combination of a visual inspection, surface sampling, and air sampling gives us the clarity we need.
Understanding which testing method makes sense for your situation is a huge part of the process. You can learn more about how professionals conduct a thorough mold inspection and testing service in Santa Barbara. By using the right tools for the job, you get reliable answers and a clear path forward to a healthier home.
When you think you have a mold problem, you're standing at a crossroads. Do you head to the hardware store for a DIY mold kit, or do you call in a certified professional? This one decision will make all the difference in getting accurate results and actually solving the problem for good.
A DIY kit can seem like a cheap and easy fix. The low price tag is definitely tempting, promising a quick answer to the question, "Is this mold?" The reality, though, is that these kits often create more confusion than they clear up, and their results can be dangerously misleading.
Why DIY Mold Kits Fall Short
Most of the kits you'll find on a store shelf are just a petri dish you leave out to collect airborne spores or a swab for a visible spot. Sure, they'll probably grow some mold, but they don't give you any of the context you actually need to understand what's happening in your home.
Here’s where they miss the mark, every time:
- They Almost Always Find Mold: This is their biggest flaw. Mold spores are literally everywhere—inside, outside, in the cleanest homes. A petri dish left open is practically guaranteed to capture some spores and grow something. This "positive" result doesn't mean you have a problem; it just confirms that mold exists. We already knew that.
- No Control Sample, No Context: A professional test always starts with an outdoor "control" sample. This sets a baseline for what's normal in your specific area. DIY kits skip this entirely. Without that comparison, you have no way of knowing if your indoor spore levels are perfectly normal or ten times higher than they should be.
- Inaccurate Sampling Methods: Waving a plastic dish around is not a scientific method. Professionals use carefully calibrated pumps that pull a specific volume of air over a collection slide. This precision is the only way to get a reliable count of spores per cubic meter. The DIY approach is just a random guess.
- They Can't Find the Source: This is the most critical failure. A DIY kit can't tell you why you have mold. A real inspector uses tools like thermal imaging cameras and moisture meters to find the hidden leak inside a wall that's feeding the growth. A kit only points out a symptom; it completely ignores the disease.
A DIY kit might confirm that a weird spot on the wall is, in fact, mold. But it can't tell you if it's the highly toxic Stachybotrys, if spores are floating through your air at dangerous levels, or if the real issue is a slow pipe leak behind your shower. It gives you one tiny piece of the puzzle, but never the whole picture.
The Real Value of a Certified Mold Inspector
Hiring a professional isn't just about getting a test done; it's an investment in getting a definitive diagnosis and a clear action plan. A certified inspector performs a full-blown investigation into your home's environmental health. It's the difference between a simple quiz and a comprehensive final exam.
To give you a real-world example, we often use different sampling methods depending on the situation. Dust sampling can give us a much better long-term history of a home's mold exposure than a single air sample, which is just a snapshot in time. We're also constantly checking humidity levels, because when they stay above 60-70%, it’s a recipe for disaster.
Here’s a look at what a professional brings to your home:
- Advanced Diagnostic Tools: We use thermal imaging to "see" temperature changes behind walls that signal hidden moisture. Moisture meters give us exact readings on building materials, telling us what's wet and what's not.
- Accredited Lab Analysis: Samples aren't just grown in a dish. They're sent to a third-party, accredited laboratory that provides a detailed report identifying the exact mold species and their concentrations. This is scientifically valid data you can count on.
- Finding the "Why": This is our main job. An inspector's primary goal is to find the water source. Without fixing the leak or moisture issue, any mold cleanup you do is guaranteed to fail.
- A Clear Remediation Blueprint: You’ll get a final report that outlines a clear scope of work for remediation. This ensures you know exactly what needs to be done to fix the problem correctly and completely.
Making the right choice from the start is crucial. We've laid out the key differences below to make it even clearer.
DIY Mold Kits vs Professional Mold Testing
| Feature | DIY Mold Test Kits | Professional Mold Inspector |
|---|---|---|
| Accuracy | Low. Prone to false positives and cannot quantify the problem. | High. Uses calibrated equipment and accredited lab analysis. |
| Cost | $10 – $50 initially, but often requires extra lab fees. | $500 – $1000+ on average, providing a complete assessment. |
| Scope | Extremely limited. Can only confirm the presence of mold spores. | Comprehensive. Includes visual inspection, moisture detection, and source identification. |
| Source Identification | None. Cannot find the underlying moisture problem. | Primary goal. Uses tools like thermal imaging to locate hidden water sources. |
| Context | No context. Lacks a control sample for comparison to outdoor levels. | Provides full context with outdoor baseline samples and detailed reports. |
| Actionable Plan | None. Leaves you guessing about what to do next. | Delivers a clear remediation plan and scope of work. |
| Reliability | Poor. Results are often misleading and not scientifically valid. | Excellent. Provides certified, legally defensible data. |
Ultimately, a professional inspection saves you from the expensive and frustrating mistakes that come from bad information. While a DIY kit feels like you're saving money, it often leads to either unnecessary panic or a false sense of security.
Choosing a professional ensures you move beyond guesswork. You can see exactly how we approach this by exploring our professional mold inspection process in Santa Barbara. Our methodical approach is designed to give you certainty and a clear path forward to a healthy home.
How to Read Your Mold Test Results
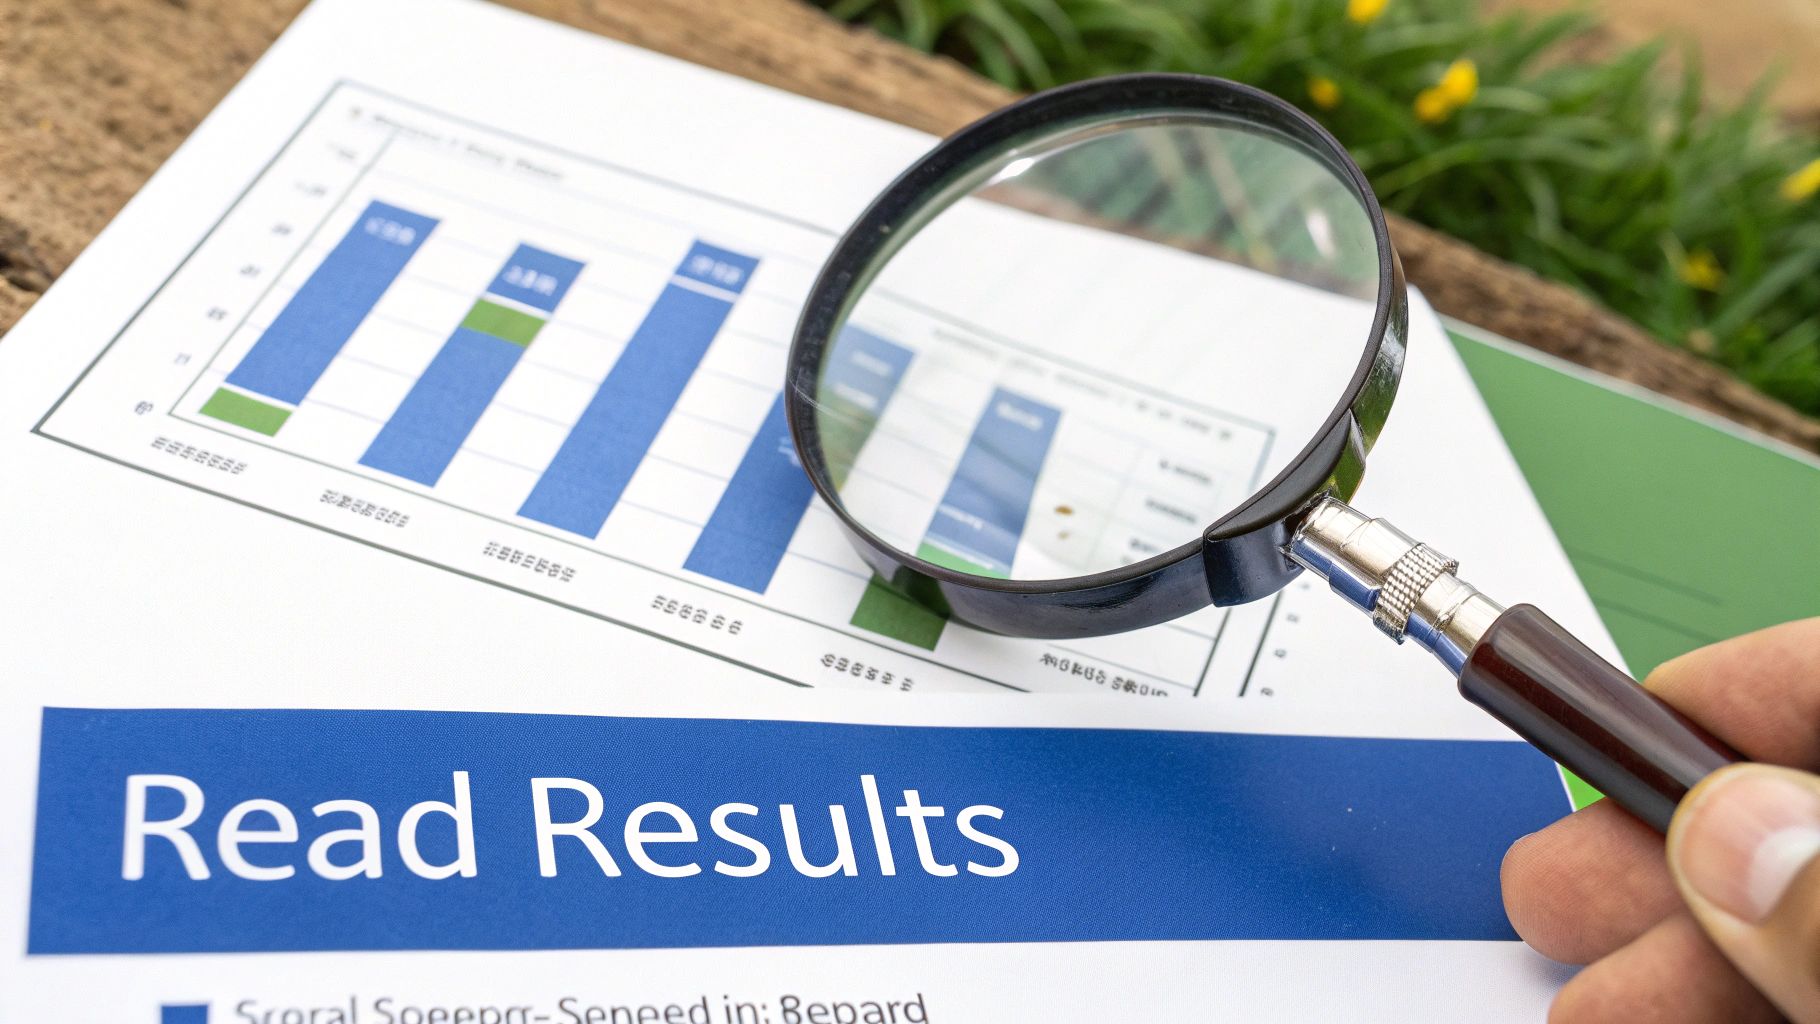
After the samples have been collected and shipped off, the waiting game begins. When that lab report finally hits your inbox, it can feel like trying to decipher a foreign language. It’s loaded with scientific names, strange units of measurement, and numbers that can feel overwhelming.
But don’t worry. Understanding this data is the last crucial step in figuring out what you’re dealing with. This report is your roadmap—it tells you not just if you have mold, but what kind, how much of it is in the air, and often, where it’s coming from. Let’s break it down so you can read your results like a pro.
The Indoor vs. Outdoor Comparison
This is the single most important piece of the puzzle. Mold is everywhere in nature, so spores are always floating around in the outside air. The goal is never to have a zero mold count inside your home—that’s just not possible.
Instead, a healthy indoor environment should look a lot like the outdoor environment. The types of mold spores found inside should be the same ones found outside, and the concentration of those spores should be significantly lower indoors.
When we see a huge imbalance, that’s a massive red flag. For instance, if the outdoor control sample shows 1,000 spores of Cladosporium per cubic meter but your basement sample shows 20,000, it points directly to an active mold colony growing down there.
Spore Counts and What They Mean
Your lab report will list different mold species and their concentrations, usually measured in spores per cubic meter of air (spores/m³). While there are no official federal standards for what’s “safe,” experienced inspectors have well-established guidelines based on thousands of real-world tests.
Here’s a general breakdown:
- Low Levels (Under 2,000 spores/m³): This is generally considered normal, especially if the types of mold match what’s found outside.
- Moderate Levels (2,000 – 5,000 spores/m³): We call this the gray area. It might suggest a small, contained issue or be the first sign of a bigger problem that’s just getting started.
- High Levels (Over 5,000 spores/m³): This is a strong indicator of an active indoor mold source that needs immediate attention.
- Very High Levels (Over 10,000 spores/m³): At these levels, we expect to see significant contamination. People in the home are often experiencing noticeable health symptoms.
Remember, it’s not just about the total count. The type of mold is just as important, as some species are more concerning than others, even at lower numbers.
Identifying Key Mold Species
Seeing names like Aspergillus or Stachybotrys on your report can be alarming, but context is everything. Here are a few common ones we see and what their presence usually means:
- Aspergillus/Penicillium: These two are extremely common and are almost always found both indoors and out. When we see high indoor concentrations, however, it’s a classic sign of water damage affecting materials like drywall, insulation, and carpet.
- Cladosporium: This is one of the most widespread molds on the planet. It gets inside easily, but elevated indoor levels often point to a problem in an HVAC system, on damp window sills, or in poorly ventilated bathrooms.
- Stachybotrys chartarum: This is the infamous "black mold." It’s a heavy, sticky mold that needs a lot of constant moisture to grow. Finding any Stachybotrys spores in an indoor air sample is a serious concern because it doesn't travel easily through the air. Its presence almost always confirms a significant, active water leak somewhere nearby.
The presence of certain "water damage indicator" molds like Stachybotrys or Chaetomium is a critical finding. These molds simply don't belong in a healthy indoor environment. Their discovery immediately tells an inspector that there is a serious moisture problem that must be found and fixed.
Putting It All Together for Actionable Next Steps
Once you understand the numbers and the names, the whole picture comes into focus.
Let’s imagine your report shows high levels of Aspergillus in the master bathroom’s air sample and a few spores of Stachybotrys in the adjacent bedroom. During the visual inspection, a small water stain was noted on the ceiling below the bathroom.
This data tells a very clear story. There’s almost certainly a slow leak from the bathroom plumbing that has created the perfect conditions for both mold types to grow inside the wall or ceiling. The next step isn’t just to clean the stain—it’s to open up that ceiling, find and repair the leak, and then bring in a professional remediation company to safely remove all the contaminated materials.
If your results confirm a significant mold problem, professional remediation is the only safe and effective path forward. This process involves containing the entire work area to prevent cross-contamination, removing all affected materials, and cleaning the air to ensure your home is truly healthy again.
Got Questions About Toxic Mold Testing? You're Not Alone.
Even after you get the basics down, it’s completely normal to have a few questions lingering. In my experience, getting clear, direct answers to these common concerns is the final step before you can feel truly confident about tackling a potential mold issue.
Let’s walk through the most frequent questions we hear from homeowners and provide the practical insights you need to make the right call.
Can a Blood Test Actually Detect Toxic Mold Exposure?
Yes, in a way. Your doctor can order specific blood work that looks for antibodies your body might create in response to mold, or they can even measure for mycotoxins—the nasty stuff some molds produce.
Think of it like this: a medical test assesses the impact on your health, while a home inspection finds the source of the problem. Both are crucial pieces of the puzzle. A blood test is a valuable tool for your physician to make a diagnosis, but it’s no substitute for finding and stopping the mold growth in your home.
Will My Homeowners Insurance Cover Mold Testing?
This is a notoriously tricky one, and the answer is almost always, "It depends." Most standard insurance policies have very specific limits or outright exclusions for mold.
Coverage often hinges on what caused the moisture in the first place. If the mold grew because of a "covered peril"—like a pipe that suddenly burst—your policy might cover the testing and remediation. But if the source is a slow leak, long-term humidity, or a general maintenance issue, you're almost certainly on your own.
Your best bet? Pull out your policy documents and call your insurance agent directly. Get clarification on what your specific plan covers before you start spending money.
How Long Does a Professional Mold Inspection Usually Take?
The on-site part of a professional mold inspection is surprisingly quick, usually lasting between one and three hours. Of course, this depends on the size of your home and how complex the issues appear to be.
During that window, an inspector will be busy doing a detailed visual check, using tools like moisture meters and thermal cameras, and taking any air or surface samples needed.
Those samples then head off to an accredited lab. You can typically expect a comprehensive report with the lab results and clear, actionable recommendations within two to four business days. If you want a better sense of the process, you can learn more about our straightforward mold inspection pricing in Santa Barbara.
What Exactly Is an ERMI Test and Do I Need One?
ERMI stands for Environmental Relative Moldiness Index. It’s a highly sophisticated, DNA-based test that analyzes a single dust sample to identify 36 different mold species and then gives your home a "moldiness" score.
While the ERMI is incredibly sensitive, the EPA still considers it a research tool, so it’s not something we do in a standard inspection. This advanced test is usually reserved for very complex situations—for instance, when a resident has a severely compromised immune system or when other testing methods just aren't giving us a clear picture. A certified inspector can tell you if an ERMI test is a logical next step for your specific situation.