So, what's the bottom line for getting your home's air tested? For a typical residential property, the indoor air quality testing cost lands around $437. Most homeowners find themselves paying somewhere between $292 and $584. Think of it as an investment in your health—a way to find out what's really going on with the air you breathe every day.
What Is the Real Cost of an IAQ Test
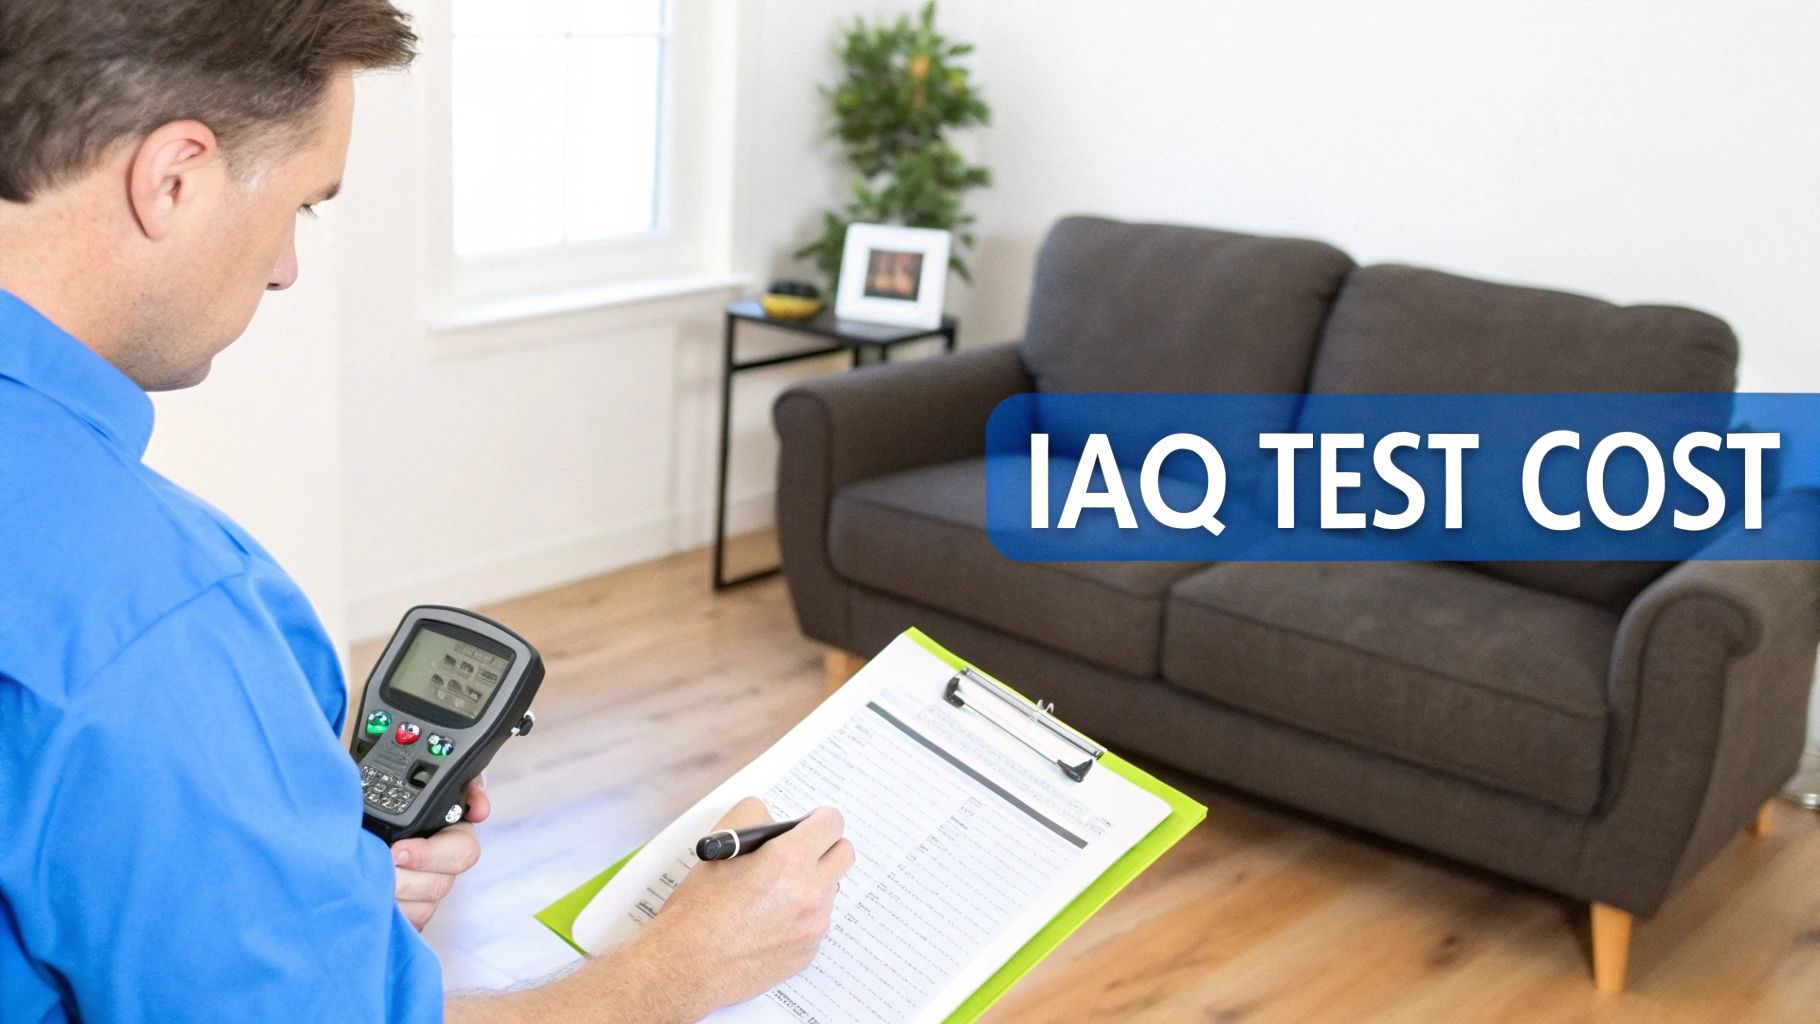
When you keep catching a whiff of that musty smell, your allergies won't quit, or you spot some concerning water stains, your mind naturally goes to the air in your home. An indoor air quality (IAQ) test is like a diagnostic check-up for your house, giving you a clear picture of what’s floating around unseen. But just like a visit to the auto shop, the final bill isn't just one flat fee.
The total cost is really a combination of several critical services that all work together to give you an accurate, actionable report. You're not just paying for a technician to show up with a gadget; you're investing in their expertise, the advanced technology they use, and precise lab analysis.
Deconstructing the Price Tag
The total indoor air quality testing cost is built from a few key components. Knowing what they are helps you understand exactly what you're paying for and why one quote might differ from another.
- Initial On-Site Assessment: This covers the certified inspector's time and know-how to visually inspect your property, pinpoint potential trouble spots, and map out the right testing strategy.
- Sample Collection: This fee is for the physical act of taking air or surface samples. The number of samples really depends on the size of your home and how complex the potential issue seems.
- Laboratory Analysis: Each sample is carefully packaged and sent to an accredited third-party lab. This is the most crucial step, where scientists identify the specific types of contaminants and measure how concentrated they are.
Think of it like this: The on-site assessment is the doctor's initial examination, the samples are the bloodwork, and the lab analysis is the detailed report that reveals what's really going on inside.
These elements are what make up the final price. While many companies bundle them into a package, understanding the breakdown helps you compare quotes intelligently. If you have a specific concern like mold, it often requires specialized sampling. You can learn more about those factors in our detailed guide on the cost of a mold inspection.
A Quick Financial Overview
To give you a clearer idea of what to expect, here’s a table breaking down the typical costs for IAQ testing services.
Quick Overview of Typical IAQ Testing Costs
| Service Component | Average Cost Range | What It Covers |
|---|---|---|
| Initial Assessment & Site Visit | $150 – $300 | Inspector's time, travel, visual inspection, and creating a testing plan. |
| Air & Surface Samples | $75 – $150 per sample | Physical collection of samples using specialized equipment (cassettes, swabs). |
| Lab Analysis Fees | $50 – $100 per sample | Third-party laboratory fees for identifying and quantifying contaminants. |
| Comprehensive Final Report | Included in assessment | A detailed summary of findings, lab results, and professional recommendations. |
While these figures can vary, they provide a solid benchmark for budgeting. National averages confirm that most residential IAQ tests land in a predictable range. The average cost for indoor air quality testing in the U.S. is right around $437, which typically covers testing for common culprits like mold, radon, and other general pollutants.
Decoding Your Bill: What Your Money Actually Covers

When you get a quote for indoor air quality testing, the total can feel like just a number. But that final figure is really a sum of several distinct, critical services, and each one plays a vital role in diagnosing the health of your home’s air.
Understanding this breakdown transforms the indoor air quality testing cost from a simple price tag into a clear investment in your well-being. Think of it like a receipt from your mechanic. You wouldn’t just see "car fixed"—you'd see line items for parts, labor, and specific diagnostics. An IAQ invoice is no different; it reflects the professional expertise, high-tech equipment, and scientific analysis needed for a truly accurate assessment.
The On-Site Professional Inspection
First up is the hands-on inspection by a certified professional. This isn't just a quick walk-through. It’s a methodical investigation where the inspector’s training and experience are everything. They know exactly what to look for, from the subtle signs of water intrusion to hidden ventilation issues you'd almost certainly miss.
This part of the fee covers:
- Inspector's Time and Expertise: You’re paying for years of training that allow an inspector to spot potential contamination sources right away.
- Visual Assessment: A top-to-bottom examination of your property, hitting all the usual suspects like attics, crawl spaces, and HVAC systems.
- Strategic Planning: The inspector uses their findings to decide where and how to collect samples, making sure no time or money is wasted.
The Cost of Air and Surface Samples
Once the initial look-around is done, the inspector will start collecting physical samples. Each sample taken adds to the total cost because it represents a specific data point that needs to be analyzed by the lab.
The number of samples isn't random—it’s based on your property’s size and the complexity of the potential problem. For instance, an inspector will almost always take a "control" air sample outside to set a baseline, then collect more samples inside the rooms where issues are suspected. They might also use swabs or tape lifts on any visible spots to find out if it’s active mold growth.
The goal isn't to take as many samples as possible, but to take the right samples. A skilled inspector uses a strategic approach to gather the most meaningful data with the fewest samples, which helps keep your overall cost in check.
Advanced Diagnostic Tools and Lab Fees
Modern IAQ inspections often rely on technology that sees what the naked eye can’t. Professionals use advanced tools to uncover hidden problems, and the use of this gear is factored into the cost.
- Thermal Imaging Cameras: These devices spot temperature differences inside walls and ceilings, often revealing hidden moisture pockets that could be feeding mold. Paying for this can save you thousands in invasive drywall removal later on.
- Moisture Meters: These tools give precise readings of moisture in building materials, confirming the presence of water that helps microbes grow.
After collection, every sample is carefully packaged and shipped to an accredited, third-party laboratory. This lab analysis fee is a big part of the cost, as it covers the scientific process of identifying and counting pollutants. This step is absolutely non-negotiable for accurate, unbiased results. To see how we ensure accuracy from start to finish, you can learn more about our comprehensive indoor air quality inspections.
The Final Report and Hidden Costs
Finally, a portion of the cost covers creating your detailed report. This isn't just a spreadsheet of raw data. It’s a plain-English summary of the findings, an interpretation of the lab results, and most importantly, a clear, actionable roadmap for what to do next if a problem is found.
You should also be aware of a few other charges that might pop up. These can include travel surcharges if you're outside the standard service area or fees for rushing the lab samples. A transparent company will always lay these potential costs out upfront, so you aren't hit with any surprises on the final bill.
Key Factors That Drive Your Final Testing Cost
Ever wonder why one homeowner pays $300 for an air quality test while their neighbor gets a bill for over $900? It’s a fair question, and the answer is simple: no two homes—and no two air quality problems—are exactly alike. The final indoor air quality testing cost isn’t a flat fee but a flexible figure that shifts based on a few key variables.
Think of it like planning a road trip. The final cost depends on how far you’re going, the kind of car you’re driving, and how many detours you take. In the same way, the price of an IAQ test is shaped by your home's unique layout and the specific concerns you're trying to solve.
Property Size and Layout
The most straightforward factor is the size of your property. A bigger home simply takes more time to inspect thoroughly and often needs more samples to create a complete and accurate picture of what's going on inside. Assessing a 900-square-foot condo is a much quicker job than inspecting a 3,500-square-foot, multi-story house with a complex HVAC system.
Here’s why size really matters:
- More Ground to Cover: A larger footprint means more rooms, more potential moisture spots, and just more square footage for the inspector to walk through and visually assess.
- More Samples Needed: To get the full story, an inspector might need to take air samples from different zones—like the basement, the main living area, and an upstairs bedroom—to compare readings and zero in on problem areas.
- Longer Inspection Time: A bigger, more complicated home naturally takes up more of the inspector's time on-site, and that time is a core part of the service fee.
The Complexity of the Problem
The scope of the suspected issue also plays a huge role. A simple, straightforward investigation is a world away from a deep dive into a mysterious, house-wide problem.
For instance, testing a small, visible patch of what looks like mold on a bathroom wall is relatively simple. The inspector can grab a direct surface sample and maybe one or two air samples to see if spores are floating around. But investigating a stubborn musty odor with no obvious source? That’s a whole different ballgame. That kind of mystery hunt might demand a much more extensive inspection, including moisture mapping and thermal imaging, to find a hidden leak inside a wall.
A simple, visible issue is like fixing a flat tire—the problem is obvious and the solution is direct. A hidden, ambiguous problem is more like tracking down a mysterious engine rattle; it takes more diagnostic work to find the root cause before you can even think about a solution.
Type of Contaminants and Technology Used
What are we actually testing for? The answer to that question will definitely adjust the cost. A basic mold test is priced differently than a comprehensive panel that screens for things like Volatile Organic Compounds (VOCs), radon, or other allergens. Every additional contaminant requires specific sampling gear and different lab analyses, each adding to the final bill.
The technology used during the inspection also moves the needle on price. While a basic visual inspection is always part of the process, advanced tools give us deeper insights and a far more accurate diagnosis. When an inspector brings out a high-resolution thermal imaging camera to spot hidden moisture or a laser particle counter for real-time data, they're delivering more value—and the cost reflects that specialized equipment.
This isn't just our approach; it's an industry-wide trend. The global market for IAQ monitoring systems was valued at around $2.33 billion in 2025 and is projected to hit $3.92 billion by 2032. You can dig into the numbers on the growing demand for advanced IAQ monitoring technology on fortunebusinessinsights.com. This growth just goes to show how better technology is helping deliver more precise, reliable results for homeowners everywhere.
Real-World Cost Scenarios for Homeowners

Understanding the line items on a quote is one thing, but it's a lot easier to see how they come together in a real-life situation. Abstract numbers start to make sense when you can picture yourself in the story.
To bring the indoor air quality testing cost to life, let’s walk through three common scenarios homeowners run into. From a small, contained issue to a full-blown pre-purchase inspection, these examples show how the scope of the job directly shapes the final price.
Scenario 1: The Renter and the Musty Bathroom
Meet Sarah. She's a renter who's been dealing with a stubborn musty smell in her apartment’s only bathroom for weeks. It's a small, 800-square-foot apartment, and the problem seems confined to that one room, which doesn't have great ventilation. Worried it might be mold, she gets permission from her landlord to call in an inspector.
The goal here is simple: find out if mold is causing the odor and if the air is safe. This is a very targeted job.
- Initial On-Site Assessment: The inspector does a visual check, uses a moisture meter around the shower and sink, and quickly hones in on the likely source.
- Sample Collection: He takes one surface sample from a discolored spot behind the toilet and one indoor air sample in the bathroom. An outdoor control sample is also taken to establish a baseline.
- Final Report: Lab analysis will confirm the mold type and spore count.
This focused approach keeps costs down. The problem is contained, the property is small, and only three samples are needed. People often ask if a DIY kit would work here. While tempting, professional testing gives you far more reliable data. If you're weighing your options, our guide on the best mold test kit for your home helps explain the pros and cons.
Scenario 2: The Family with Unexplained Allergies
Now, let's look at the Miller family. They live in a 2,500-square-foot house, and their two young kids have been dealing with constant allergies for six months—sneezing, coughing, watery eyes—that only seem to flare up at home. There’s no visible mold, so they need a comprehensive, whole-home air quality audit to find the hidden culprit.
This investigation is much more involved than Sarah’s.
- Comprehensive Assessment with Thermal Imaging: The inspector has to search the entire house, using a thermal camera to look for hidden moisture in the basement and attic walls.
- Multiple Air Samples: To pinpoint the issue, samples are taken in the kids’ bedrooms, the main living area, and the basement, plus the outdoor control sample (5 total).
- HVAC System Inspection: The inspector also checks the HVAC system, taking a sample near a vent to see if it's circulating contaminants.
The total cost here is significantly higher because the scope is so much broader. It requires more of the inspector's time, advanced tools like thermal imaging, and nearly double the lab samples to solve the mystery.
Scenario 3: The Cautious Homebuyer
Finally, meet Mark and Jessica. They’re buying a 3,200-square-foot coastal home. The general home inspector noted high moisture readings in the crawl space and signs of an old leak in the attic. To be safe, they're ordering an extensive pre-purchase mold and air quality inspection before closing.
This is the most thorough—and most expensive—scenario. It's designed to uncover any potential deal-breakers or surprise remediation costs. The goal is total peace of mind.
- Extensive Visual and Technical Inspection: This involves a deep dive into the attic, crawl space, and the entire building envelope.
- High-Volume Sampling: The inspector takes multiple air samples across all levels of the home, plus direct surface samples from suspicious areas in the crawl space and attic (7-8 samples total).
- Detailed Remediation Protocol: The final report won't just detail the findings. It will also include a formal protocol outlining the necessary steps and estimated costs for any required cleanup.
This level of detail is a critical investment during a real estate deal. It can easily save a buyer from tens of thousands of dollars in unexpected repairs down the road.
Sample Cost Breakdown for Different Scenarios
To give you a clearer picture, here’s a table showing how the costs for these three situations might break down.
| Service | Scenario 1: Single Room | Scenario 2: Whole Home | Scenario 3: Pre-Purchase |
|---|---|---|---|
| On-Site Assessment | $200 | $350 | $450 |
| Air & Surface Samples | $225 (3 samples) | $375 (5 samples) | $600 (8 samples) |
| Thermal Imaging | N/A | Included | Included |
| Lab Analysis Fees | $150 (3 samples) | $250 (5 samples) | $400 (8 samples) |
| Final Report & Protocol | Included | Included | $150 |
| Estimated Total Cost | $575 | $975 | $1,600 |
As you can see, the indoor air quality testing cost is directly tied to the unique story of your home. A small, defined issue costs less to diagnose than a widespread, hidden problem that requires a lot more detective work.
How to Read Your Lab Report and Understand the Results

After the inspection wraps up and the lab works its magic, you'll get the most important piece of the puzzle: the lab report. At first glance, it can feel a little intimidating. You'll see a lot of scientific terms like Stachybotrys or Aspergillus and measurements that might not make much sense. Don't worry, you don't need a biology degree to get the gist.
Think of it like getting blood test results from your doctor. The raw numbers and medical jargon don't mean much on their own. It’s your doctor’s explanation—what's normal, what's high, and what it all means for your health—that gives you the real picture. Your IAQ report is the exact same; it’s a tool for an informed conversation with your inspector.
Breaking Down the Key Sections of Your Report
Most accredited labs structure their reports in a similar way to keep things clear. While the design might differ slightly from lab to lab, you should always be able to find these three essential parts.
- Summary of Findings: This is your cheat sheet, usually right on the first page. It gives you the bottom line—whether the mold spore counts or other contaminants are considered normal or elevated for your home.
- Identified Contaminants: Here, the report lists the specific types of mold spores or other pollutants found in each sample. This is where you’ll see all those scientific names.
- Concentration Levels: Next to each mold type, you’ll find a number showing its concentration. For air samples, this is typically measured in spores per cubic meter (spores/m³).
The real key to understanding everything is the outdoor control sample. A healthy indoor environment should more or less mirror what's happening outside. If your indoor samples show way higher spore counts—or totally different types of mold than what's found outdoors—that’s a huge clue that you’ve got an indoor growth source.
Understanding What “Elevated Levels” Really Means
Seeing a long list of mold types can set off alarm bells, but it's important to remember that mold is everywhere in our natural environment. The concern isn't just the presence of mold, but its concentration. “Elevated levels” simply means the indoor spore count is significantly higher than the outdoor baseline, pointing to an active mold colony inside your home.
For example, finding 500 spores/m³ of Cladosporium inside might sound like a lot. But if the outdoor sample shows 2,000 spores/m³, your indoor air is actually pretty clean by comparison. On the flip side, finding 1,000 spores/m³ of Stachybotrys (black mold) indoors when there’s none outside is a major red flag that needs attention. For a deeper dive, check out our guide on understanding mold test results.
This kind of detailed analysis is only possible because of highly sophisticated equipment. The demand for precise measurement tools is so high that the global indoor air quality testing instrument market was projected to hit $623.3 million in 2025. You can discover more insights about the growth of the IAQ instrument market on datainsightsmarket.com.
Ultimately, your lab report is the final piece of the puzzle that the indoor air quality testing cost covers. It turns your investment into real, actionable knowledge, empowering you to make the best decisions to protect your home and your family’s health.
When you're trying to figure out the cost of indoor air quality testing and deciphering lab reports, it all boils down to one thing: finding a professional you can actually trust to help you. The final price tag always depends on the size of your home, how big the suspected problem is, and which specific tests are needed to get a real answer. Making the right call means partnering with someone who values honesty as much as you do.
At Pacific Mold Pros, we believe an informed homeowner is an empowered one. We're committed to providing clear, upfront pricing with no hidden surprises, making sure you understand the value behind every single line item. We don’t just hand you a bunch of data; we give you a clear path forward.
Your Partner in a Healthy Home
Our certified inspectors use top-of-the-line tools and years of local experience to get to the bottom of your air quality concerns. We take those complex lab reports and translate them into plain English, giving you actionable steps to create a healthier place to live.
We offer:
- Certified and Experienced Inspectors: Our team knows how to spot and assess everything from simple surface mold to tricky HVAC contamination.
- Transparent, Itemized Quotes: You will always know the full indoor air quality testing cost before we even think about starting.
- Clear, Actionable Reports: We provide a roadmap, not just a bunch of numbers. We’ll explain what we found and what you can do about it.
Your peace of mind is our priority. We founded our service on the simple idea that every family in Santa Barbara and Ventura Counties deserves to breathe clean, healthy air, backed by honest, reliable service.
Ready to take the first step toward a healthier home? Our expert team can give you a complete rundown of our mold inspection services and answer any questions you have.
Schedule a no-obligation consultation with Pacific Mold Pros today at (805) 232-3475 and breathe easier.
Your Questions About IAQ Testing Costs, Answered
Alright, let's wrap this up by tackling some of the most common questions we hear from homeowners about the cost of indoor air quality testing. Getting clear, straightforward answers can give you the confidence you need to decide on the best next steps for your home.
Are DIY Mold Test Kits a Good Substitute?
It’s tempting to grab a cheap DIY kit from the hardware store, but honestly, they often cause more confusion than clarity. These kits are usually just a petri dish that collects whatever spores happen to float by. They can't tell you how many spores are in your air, where they're coming from, or if the levels are actually a problem.
A professional inspection is a completely different ballgame. We use calibrated equipment to take precise measurements of the spore count in your air and compare it to a clean outdoor sample. This scientific approach gives you real, actionable data. A DIY kit just tells you what we already know: mold spores are everywhere.
A professional test answers the critical questions: "Do I have an indoor mold problem, how severe is it, and where is it coming from?" A DIY kit simply can't do that.
How Often Should I Get My Indoor Air Quality Tested?
There's no single "right" answer here, but here are some solid guidelines we give our clients:
- When you suspect a problem: If you smell something musty, see signs of water damage, or start experiencing weird allergy symptoms only at home, it’s time to test.
- After a water event: Any time you've had a significant leak, a flood, or a major plumbing disaster, testing is a smart move to ensure mold didn't take root in hidden spots.
- During a real estate transaction: A pre-purchase IAQ inspection is one of the smartest investments you can make. It helps you avoid unknowingly buying a home with a costly, hidden mold issue.
- For ongoing peace of mind: If you have young children, elderly family members, or anyone with allergies or asthma at home, testing every few years is a great proactive step.
Will Homeowners Insurance Cover the Testing Cost?
This is a big one. In most cases, homeowners insurance will not cover the initial cost of air quality testing. Insurance policies are typically written to cover damage from sudden and accidental events, not the investigation or maintenance needed to find a potential problem like mold.
However, there's a key exception. If the testing confirms that a covered event—like a burst pipe that flooded your kitchen—is the source of the mold, your policy might then cover the cost of the remediation that follows.
The best advice I can give is to pull out your policy and call your agent directly. Never assume something is covered. Getting a clear "yes" or "no" from them before you spend a dime is crucial for managing your budget and avoiding any nasty surprises.