The space beneath your home is out of sight, but it should never be out of mind. A crawl space acts as a critical buffer zone between your living area and the ground, yet its dark, often damp environment is a perfect breeding ground for mold. This silent threat can seriously compromise your home’s structural integrity and, more importantly, your family’s health and well-being.
Many homeowners overlook the early warnings, dismissing a faint musty smell or minor dampness as a normal part of a house’s character. However, these seemingly insignificant clues are often the first of many signs of mold in crawl space, indicating a larger, hidden problem that requires immediate and decisive action. Letting these issues fester can lead to expensive structural repairs and persistent indoor air quality problems that affect everyone living inside.
This comprehensive guide is designed to empower you. We will walk you through the 8 most critical signs of a mold infestation, from the obvious to the subtle. You will learn not only what to look for but also how to interpret these findings. This article will equip you with the knowledge to inspect your own crawl space confidently, understand what each sign indicates about the potential severity of the issue, and recognize the clear-cut moments when it’s time to call in certified experts. Let’s illuminate what’s happening in the dark and ensure your home is healthy from the ground up.
1. Sign #1: Obvious Visual Mold Growth
The most direct and undeniable of all signs of mold in a crawl space is seeing it. While other signs require interpretation, visible fungal growth is a clear confirmation that your crawl space has the three key ingredients for an infestation: moisture, a food source (organic material), and darkness.
How to Check for Visual Growth
To properly look for visible mold, you’ll need a powerful flashlight, protective gear (gloves, a mask, and old clothing), and a keen eye. Carefully scan all surfaces within the crawl space, paying close attention to:
- Wooden Surfaces: Floor joists, support beams, and subflooring are prime real estate for mold. Look for fuzzy, powdery, or slimy patches that can be black, white, green, yellow, or even orange.
- Insulation: Fiberglass or foam board insulation can trap moisture, creating a perfect habitat. Check for dark staining or fuzzy growth on the paper backing or directly on the insulation material itself.
- Ductwork and Pipes: Condensation on cold pipes or HVAC ducts provides a consistent water source. Inspect these surfaces for spots or streaks of growth.
- Concrete Foundation Walls: While mold doesn’t eat concrete, it feeds on the organic dust and debris (efflorescence) that accumulates on its surface. White, crystalline patterns are often mineral deposits, but fuzzy or colored growth is likely mold.
What It Indicates About the Problem
The appearance and location of visible mold offer critical clues about the underlying moisture issue. Streaks on foundation walls may point to a groundwater leak or poor exterior drainage. Patches on subflooring directly below a bathroom or kitchen could indicate a slow plumbing leak. Widespread, uniform growth on joists often suggests a humidity problem from poor ventilation rather than a single-point leak.
Expert Insight: A common mistake is to dismiss a small patch of mold as insignificant. In reality, a visible spot is often just the “fruiting body” of a much larger, more established colony hidden within the wood or behind insulation. What you see could be the tip of the iceberg.
Quick Mitigation and When to Call a Professional
If you find a very small, contained spot (less than a few square feet) on a non-porous surface, you might consider cleaning it yourself with appropriate safety precautions. However, this is rarely the case in a crawl space where most materials are porous.
You should contact a certified inspector immediately if:
- The growth covers an area larger than 10 square feet.
- The mold is on porous materials like wood or drywall.
- You suspect the growth is linked to a systemic moisture or ventilation problem.
Attempting a large-scale DIY cleanup without addressing the root moisture cause will only result in the mold returning. A professional from Pacific Mold Pros can perform a thorough assessment, conduct air and surface sampling to identify the mold type and concentration, and provide a detailed report outlining a safe and effective remediation plan. This professional approach ensures the problem is fully resolved, not just temporarily hidden.
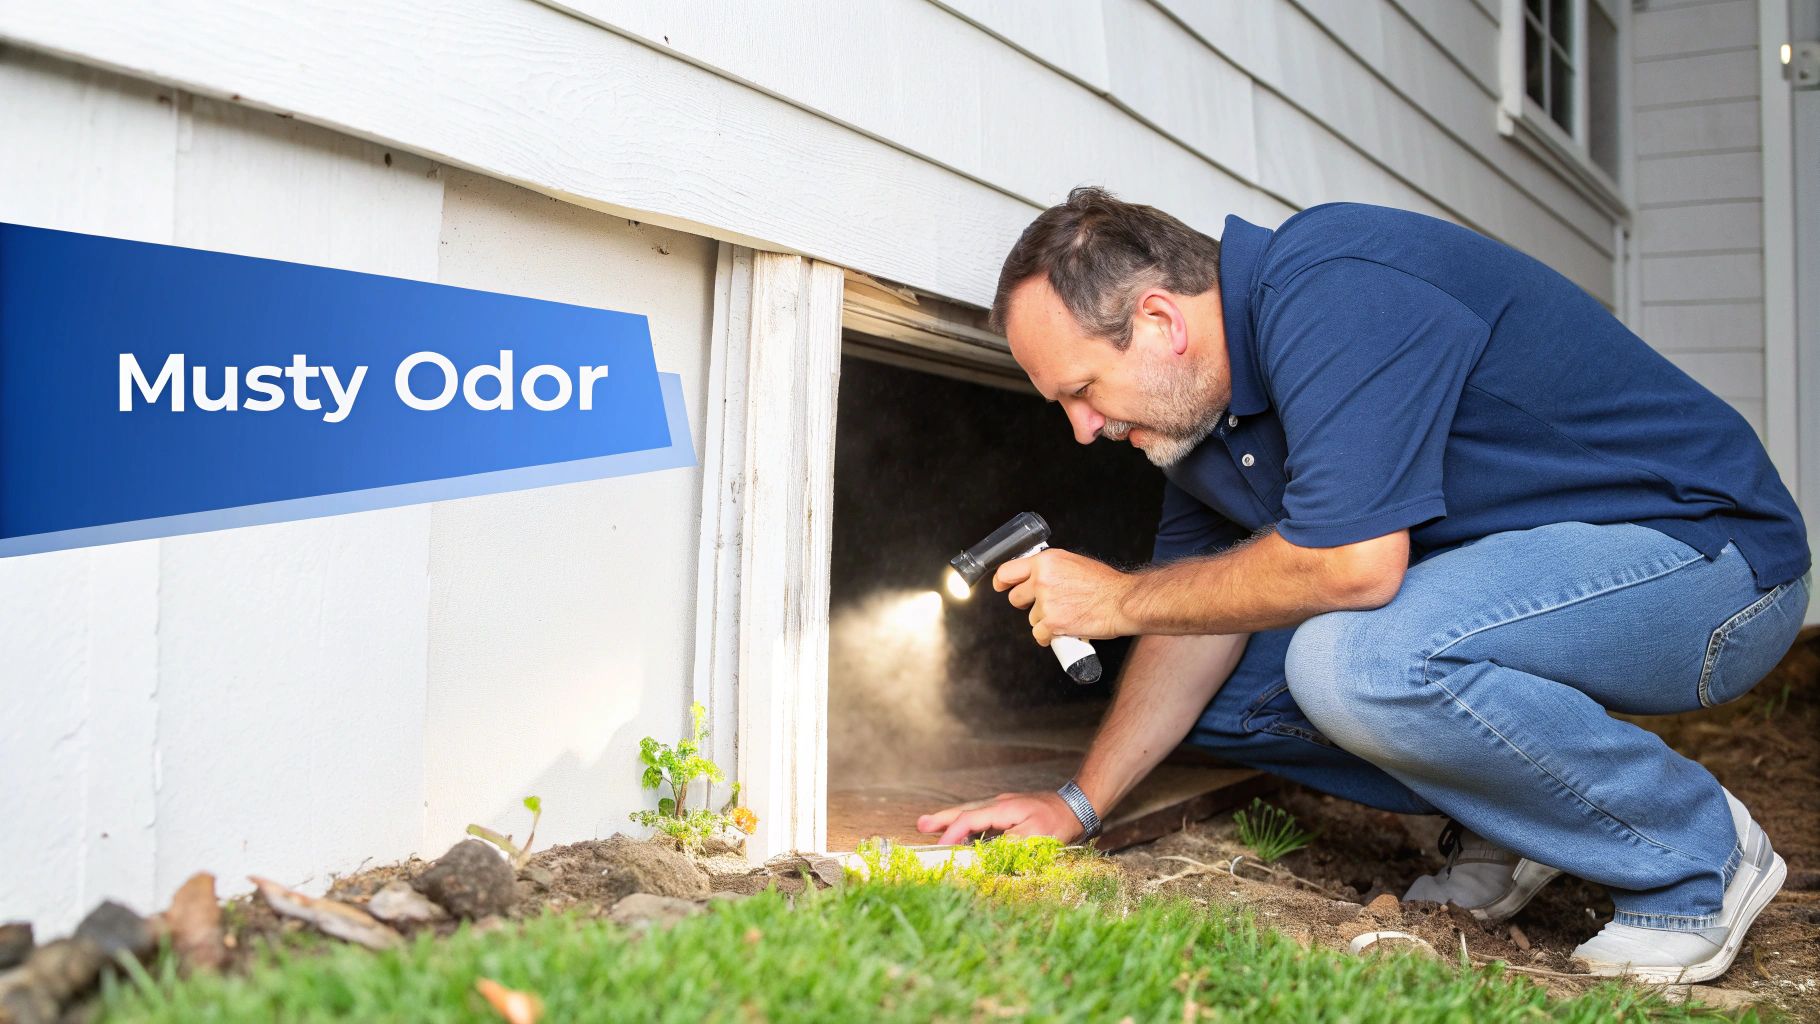
2. Musty Odor
Often the first and most pervasive of all the signs of mold in a crawl space, a distinctive earthy or musty smell is a major red flag. This odor is caused by Microbial Volatile Organic Compounds (MVOCs), which are gases released by mold during its metabolic process. Because air from the crawl space naturally rises into the home, you might notice this smell in your living areas long before any mold is visibly discovered below.
How to Check for Odors
Your nose is the primary tool for this investigation. Since smells can be subjective and you might become accustomed to them over time, a systematic approach is best.
- Trace the Scent: Note where the smell is strongest. Is it concentrated near a specific floor vent, a particular room, or closets on the first floor? This can help pinpoint the problem area directly below.
- Time of Day/Weather: Pay attention to when the odor is most noticeable. It often intensifies after heavy rain, during humid weather, or when the HVAC system kicks on, which pulls air up from the crawl space.
- Get a Second Opinion: Ask a friend or family member who doesn’t live in the home to walk through and note any unusual smells. A fresh nose can detect odors you may have gone “nose-blind” to.
- Direct Sniff Test: If you can safely access the crawl space entry, open it and take a direct sniff. A significant increase in the musty smell confirms the source is likely within that area.
What It Indicates About the Problem
A musty odor is a direct indicator of active mold growth. Unlike visible growth, which tells you where mold is, an odor tells you that mold is actively consuming materials and releasing byproducts into the air. If the smell is distributed throughout the home, it strongly suggests that the HVAC system is circulating contaminated air. If it’s stronger in certain areas, it may point to a localized moisture intrusion, like a leaky pipe or foundation crack, directly below that spot. For a deeper dive, you can learn more about how to know if that musty smell is mold.
Expert Insight: Many homeowners dismiss a faint musty smell as just “the smell of an old house.” This is a critical error. Homes don’t naturally smell musty; that odor is almost always a byproduct of moisture and microbial growth. Ignoring it allows the underlying mold and moisture problem to worsen significantly.
Quick Mitigation and When to Call a Professional
Running a dehumidifier in your home can temporarily reduce the smell, but it does not address the source in the crawl space. Improving ventilation by opening windows can also help, but it’s a short-term fix.
You should contact a certified inspector immediately if:
- The musty odor persists for more than a few days.
- The smell gets stronger over time or after a weather event.
- You or family members begin experiencing unexplained allergy-like symptoms along with the odor.
A professional from Pacific Mold Pros will not only confirm the source of the odor but also use specialized equipment like air quality testing devices to measure the concentration of mold spores in your home. This data-driven approach is essential for creating a remediation plan that eliminates both the smell and the health risks associated with airborne mold, ensuring the problem is solved at its root.
3. Water Stains and Discoloration
Long before mold growth becomes visible, water leaves behind its own tell-tale signs. Water stains and discoloration on crawl space surfaces are critical evidence of past or present moisture problems. These brownish, yellowish, or dark marks are a roadmap, showing exactly where water has pooled, seeped, or evaporated, creating the damp conditions necessary for a future mold infestation.
How to Check for Stains and Discoloration
Using a bright flashlight, methodically inspect all surfaces for signs of water intrusion. These stains are often subtle and can be mistaken for shadows or natural variations in materials, so look closely at:
- Foundation Walls: Scan for “tide lines,” which are horizontal stains indicating how high standing water has risen. These are a classic sign of groundwater intrusion or flooding.
- Wooden Joists and Subflooring: Look for dark, ring-like stains or widespread darkening of the wood. This often points to plumbing leaks from bathrooms or kitchens above, or condensation dripping from pipes.
- Insulation: Check for yellowish or brownish discoloration on the paper backing or the insulation material itself. These stains mark areas where moisture has saturated the material, severely compromising its effectiveness and creating a prime mold habitat.
- Support Piers: Examine the base of wooden or concrete support piers for stains that indicate pooling water on the crawl space floor.
What It Indicates About the Problem
The location and pattern of water stains provide invaluable clues about the source of your moisture problem. Stains concentrated around the perimeter foundation walls strongly suggest issues with exterior grading or failing drainage systems. Discoloration directly beneath plumbing lines is a clear indicator of a slow leak. Widespread, patchy stains on the subfloor can point to high humidity and condensation issues rather than a direct leak.
Expert Insight: Do not dismiss old, dry water stains. While the surface may feel dry to the touch, the underlying material may still hold significant moisture. These stains mark a known vulnerability in your home’s defenses, and it’s often just a matter of time before the next rain or humidity spike reactivates the spot for mold growth.
Quick Mitigation and When to Call a Professional
If you find a new, actively damp stain, try to identify and stop the source immediately, such as a dripping pipe. You can use fans to help dry the immediate area. However, simply drying a stain does not resolve the underlying pathway that allowed water to enter in the first place.
You should contact a certified inspector immediately if:
- The stains are widespread or cover a large area.
- You cannot identify the source of the water causing the stains.
- The stained materials (like wood or insulation) feel soft or spongy.
A professional assessment is crucial for interpreting these signs correctly. The team at Pacific Mold Pros can perform a comprehensive moisture mapping and mold inspection service to pinpoint the intrusion source, determine if the moisture has led to hidden mold growth, and provide a clear plan to fix the root cause. This ensures you are not just cleaning up a symptom but solving the problem for good.
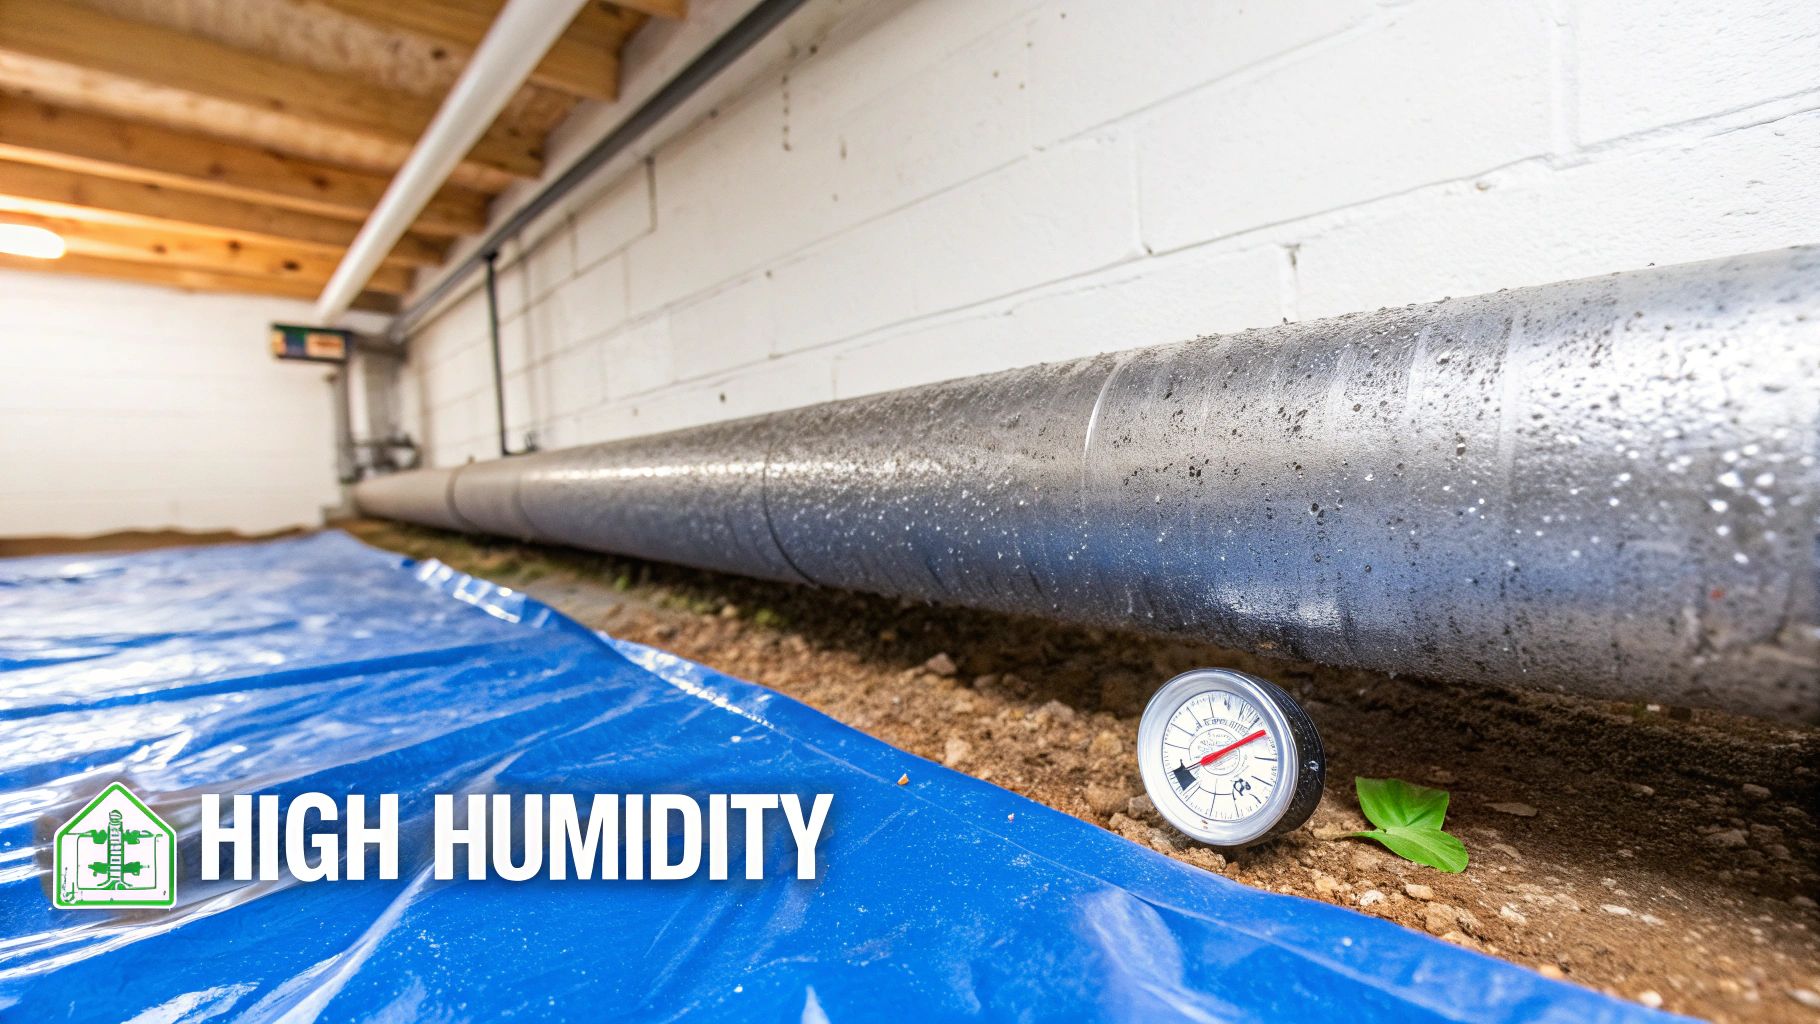
4. High Humidity and Condensation
While not mold itself, high humidity is the essential environmental condition that enables and accelerates mold colonization. A crawl space with consistently high relative humidity (RH) is a ticking time bomb for an infestation, as it provides the airborne moisture that mold spores need to activate and grow on organic surfaces. Condensation is the visible proof that this humid air has reached its dew point and is depositing liquid water directly onto surfaces.
How to Check for Humidity and Condensation
Measuring humidity is a proactive step that requires an inexpensive tool called a hygrometer. To get an accurate picture of your crawl space environment, you should:
- Use a Digital Hygrometer: Place one or more calibrated digital hygrometers in your crawl space to get precise relative humidity readings.
- Check Key Areas: Focus on areas most susceptible to moisture, such as near exterior walls, around cold water pipes, and beneath bathrooms or kitchens.
- Look for Visible Condensation: Scan cool surfaces like HVAC ductwork, copper or PVC pipes, and the plastic vapor barrier for water droplets or a distinct wet sheen. This is a clear sign that the air is saturated.
- Track Readings Over Time: Measure the RH during different seasons and times of day. A reading consistently above 60% indicates a high-risk environment.
What It Indicates About the Problem
Sustained high humidity is one of the most common signs of mold in a crawl space, pointing directly to a ventilation or moisture intrusion issue. Condensation on ductwork in the summer suggests warm, humid air is being drawn into the cooler crawl space. High humidity without an obvious leak often points to moisture evaporating from the soil, which can be caused by an inadequate or missing vapor barrier. It’s a systemic problem that affects the entire space rather than a localized leak.
Expert Insight: Many homeowners in coastal California assume high humidity is just part of the climate. However, a properly sealed and conditioned crawl space should maintain an RH between 30% and 50%, regardless of outside weather. Anything above 60% actively promotes fungal growth.
Quick Mitigation and When to Call a Professional
If your hygrometer shows elevated readings, you can take immediate steps like improving foundation vent screening or ensuring gutters and downspouts are directing water far away from the foundation. Installing a robust vapor barrier can also significantly reduce moisture evaporation from the ground.
However, diagnosing the exact cause of high humidity requires expertise. You should call a professional if:
- Relative humidity consistently remains above 60%.
- You see widespread condensation on multiple surfaces.
- You are unsure if your vapor barrier is properly installed or sufficient.
A professional assessment from Pacific Mold Pros is crucial in these situations. Our technicians use advanced tools to measure humidity, identify air leaks, and pinpoint the source of the moisture imbalance. This is a core part of the comprehensive mold inspection process that allows us to recommend targeted solutions like dehumidifiers or crawl space encapsulation, ensuring the environment is permanently corrected to prevent mold from ever taking hold.
5. Deteriorating Wood and Structural Damage
When mold is allowed to thrive in a crawl space for an extended period, it goes beyond a surface-level nuisance and can cause serious structural damage. As a living organism, mold feeds on the cellulose in wood. This process, combined with the persistent moisture that allows the mold to grow, breaks down the wood’s structural integrity, leading to a condition commonly known as wood rot or decay.

How to Check for Wood Damage
Assessing wood for fungal decay requires a more hands-on approach than just a visual scan. While wearing protective gear, you should use a screwdriver or a wood awl to gently but firmly probe wooden components in your crawl space. Pay special attention to:
- Floor Joists: These horizontal beams are critical for supporting the floor above. Probe the ends where they meet the foundation (the sill plate) and any areas that appear discolored or wet.
- Support Beams and Posts: Check the base of any wooden support posts, as this is where moisture from the ground often wicks upwards.
- Subflooring: The underside of the plywood or OSB subfloor is a common area for decay, especially below bathrooms, kitchens, or laundry rooms.
- Rim Joists: This outer band of wood is highly susceptible to moisture intrusion from the exterior.
Healthy wood will resist the tool’s pressure. Damaged wood will feel soft and spongy, or it may splinter and crumble easily.
What It Indicates About the Problem
Discovering deteriorating wood is one of the most serious signs of mold in a crawl space because it signifies a long-term, severe moisture problem. It tells you that the conditions have been ideal for fungal growth for months, if not years. This level of damage often points to chronic issues like a high water table, failed vapor barrier, consistent plumbing leaks, or extremely poor ventilation that has allowed humidity to remain saturated over time. The structural integrity of your home could be at risk.
Expert Insight: Many homeowners confuse “dry rot” with a non-moisture-related issue. In reality, dry rot is caused by a specific type of fungus that can thrive even when the wood’s moisture content is lower than other molds require. Finding either wet or dry rot is a clear indicator that a serious moisture and fungal problem exists and has caused physical damage.
Quick Mitigation and When to Call a Professional
There is no quick fix for structural wood decay. Applying a topical mold cleaner will not restore the wood’s strength. This issue requires immediate professional intervention to prevent further degradation and potential structural failure.
You must contact a certified inspector and a structural engineer if:
- You can easily press a screwdriver more than a quarter-inch into any load-bearing wood.
- You notice sagging floors, sticking doors, or new cracks in drywall above the crawl space.
- The wood appears warped, shrunken, or is visibly crumbling.
A professional team is needed to assess the full extent of the damage. Pacific Mold Pros can conduct a thorough inspection to identify the source of the moisture and the scope of the mold contamination. This assessment is the first step in a multi-faceted solution that will involve mold remediation, moisture control, and structural repairs. You can explore more information about the cost of a professional mold inspection to understand the investment in your home’s safety and integrity.
6. Insulation Damage and Deterioration
Crawl space insulation is designed to keep your home energy-efficient, but when moisture problems arise, it can become a primary casualty and a perfect breeding ground for mold. Damaged insulation is one of the more subtle but critical signs of mold in a crawl space, as it reveals both an active infestation and a compromised thermal barrier in your home.
How to Check for Insulation Damage
Equipped with a powerful flashlight and appropriate personal protective equipment (PPE), carefully inspect all insulation in the crawl space. Look for deviations from its normal, fluffy, and uniformly colored state.
- Discoloration: Healthy insulation has a consistent color (often pink, yellow, or white). Look for dark stains, black or brown splotches, or streaks, which often indicate water damage and subsequent mold growth.
- Compression and Sagging: Wet insulation is heavy. Check for areas where fiberglass batts are sagging, compressed, or have fallen from the joist bays. This is a clear sign of significant moisture absorption over time.
- Visible Growth: Look for fuzzy or powdery colonies directly on the insulation’s paper backing or embedded within the fibers themselves. These can be black, green, or white.
- Dampness or Odor: Gently feel the insulation in a few spots (with gloves on). If it feels damp, cold to the touch, or releases a musty smell when pressed, it’s holding moisture.
What It Indicates About the Problem
The state of your insulation provides a roadmap to the source of the moisture. Damaged insulation directly below a bathroom or laundry room points to a plumbing leak. If the damage is concentrated along the perimeter walls, it likely signals groundwater intrusion or condensation forming on the cold foundation. Widespread dampness throughout all the insulation is a strong indicator of a chronic high-humidity problem caused by poor ventilation.
Expert Insight: Many homeowners assume that once insulation dries out, it’s fine. However, compressed fiberglass insulation loses its R-value (its ability to resist heat flow) permanently. Even after it dries, its energy efficiency is severely compromised, and dormant mold spores remain, ready to reactivate with any new moisture.
Quick Mitigation and When to Call a Professional
Never attempt to dry or clean moldy insulation yourself. Disturbing it can release a massive cloud of microscopic spores into the air, contaminating the entire crawl space and potentially your home’s living areas.
You must contact a certified inspector immediately if you find any of the following:
- Any visible mold growth or significant staining on the insulation.
- Insulation that is wet, compressed, or sagging.
- A musty odor originating from the insulated areas.
Removing and replacing compromised insulation is a job for remediation professionals. A team from Pacific Mold Pros will not only safely remove the contaminated material according to industry standards but also identify and address the moisture source that caused the damage in the first place. Their comprehensive assessment and detailed report will outline the necessary steps to restore your crawl space to a clean, dry, and energy-efficient condition.
7. Sign #7: Efflorescence and White Crystalline Deposits
Homeowners often spot a white, chalky substance on their crawl space foundation walls and mistake it for a harmless mineral stain or even a type of white mold. This deposit is typically efflorescence, a clear sign that water is moving through your concrete or masonry. It forms when water seeps into the porous material, dissolves natural mineral salts within it, and then evaporates on the surface, leaving the crystalline salt deposits behind.
How to Check for Efflorescence
Identifying efflorescence is a key step in diagnosing moisture issues that lead to mold. When inspecting your crawl space, grab a powerful flashlight and look for these telltale signs:
- Foundation Walls: Examine concrete or brick walls for white, powdery, or crystalline patterns. These often look like salt deposits and may feel crusty to the touch. Pay close attention to corners and the base of the wall where water pressure is highest.
- Concrete Floors: Scan the concrete slab for similar white patches, which can indicate groundwater seeping up from below.
- Piers and Supports: Check any masonry support piers for the same chalky residue, as they are also susceptible to moisture wicking up from the ground.
- The “Wipe Test”: Efflorescence is a mineral salt and will typically dissolve in water. If you wipe it with a damp cloth, it should come off. In contrast, many types of white mold are more resilient and may smear or leave a stain.
What It Indicates About the Problem
While efflorescence itself is not mold and poses no direct health risk, its presence is a significant warning. It is one of the most reliable visual signs of mold in crawl space because it confirms that water is actively infiltrating your foundation. The location of the deposits provides a roadmap to the source of the moisture. Patterns near the top of the wall might suggest grading issues or gutter problems, while deposits at the base point to hydrostatic pressure from saturated soil. This persistent dampness on the concrete surface creates the perfect humid environment where mold can thrive on organic dust and debris.
Expert Insight: Think of efflorescence as the fingerprint left behind by moisture. It proves that water has traveled through your foundation. Where you find this white powder, you can be certain that the conditions are ripe for mold colonization, even if you don’t see any fungal growth yet.
Quick Mitigation and When to Call a Professional
You can scrub away efflorescence with a stiff brush and water, but it will always return unless you stop the water intrusion. Addressing the root cause is essential.
You should contact a certified inspector immediately if:
- You see any suspected mold growth alongside the efflorescence.
- The efflorescence covers large sections of your foundation walls or floor.
- You cannot identify the source of the water causing the deposits.
A professional from Pacific Mold Pros will not just identify the substance but will use its presence to pinpoint the exact pathways of water intrusion. Our comprehensive inspection reports detail these moisture problems and provide a clear plan for waterproofing and mold prevention. This ensures you fix the underlying cause, permanently eliminating the conditions that allow mold to grow.
8. Pest Activity and Insect Presence
Finding pests in a dark, damp space might not seem surprising, but an unusual increase in their activity is a significant red flag. Many insects and rodents are attracted to the same conditions that mold thrives in: persistent moisture and decaying organic material. Their presence is often a secondary sign of mold in a crawl space, indicating a shared, unhealthy environment.
How to Check for Pest Activity
A thorough inspection requires a flashlight and protective gear. While you may see live pests, you are more likely to find the evidence they leave behind. Focus your search on these key indicators:
- Insect Evidence: Look for termite mud tubes along foundation walls, discarded wings, or fine sawdust (frass) below wooden beams, which can indicate carpenter ants. Check damp corners for earwigs, silverfish, and centipedes.
- Rodent Signs: Scan for droppings, gnaw marks on wood or wiring, and nesting materials like shredded insulation or debris. A distinct, unpleasant odor can also signal a rodent infestation.
- Damaged Wood: Probe wooden joists and beams with a screwdriver. Pest-damaged wood will feel soft, spongy, or hollow, and it is often found in the same areas where moisture has led to mold growth.
What It Indicates About the Problem
The type of pest can provide valuable clues about the underlying moisture problem. Termites and carpenter ants are drawn to wood softened by moisture and fungi, meaning their presence directly points to a long-term water issue severe enough to cause wood rot. An abundance of moisture-loving insects like cockroaches or earwigs suggests high humidity and damp surfaces throughout the crawl space. This creates an ecosystem where both pests and mold can flourish together.
Expert Insight: Pests and mold have a symbiotic relationship. Mold breaks down wood cellulose, making it easier for insects like termites to consume. In turn, pests can transport mold spores to new areas, spreading the contamination. Seeing one often means the other is already present or soon will be.
Quick Mitigation and When to Call a Professional
Addressing the pest problem without fixing the moisture source is a temporary fix at best. Sealing entry points and setting traps may reduce the pest count, but new ones will be attracted to the damp conditions until the root cause is eliminated.
You should contact a certified inspector immediately if:
- You find evidence of wood-destroying insects like termites or carpenter ants.
- The pest activity is widespread and not isolated to one small area.
- You see signs of pests alongside other indicators of moisture, such as damp insulation or musty odors.
A professional from Pacific Mold Pros can conduct a comprehensive assessment that goes beyond just looking for mold. We identify the moisture sources that attract pests and create the conditions for fungal growth. Our detailed report will give you a clear understanding of the interconnected problems, enabling you to coordinate an effective remediation and pest control strategy to protect your home’s health and structural integrity.
8-Point Comparison of Crawl Space Mold Signs
| Indicator | Implementation Complexity 🔄 | Resource Requirements ⚡ | Expected Outcomes ⭐ | Ideal Use Cases 📊 | Key Advantages 💡 |
|---|---|---|---|---|---|
| Visible Mold Growth | Low 🔄 — easily observed once established | Low ⚡ — flashlight, PPE, photos | High ⭐ — definitive presence confirmation | Targeted remediation and verification | Immediate visual evidence for contractors and claims |
| Musty Odor | Low 🔄 — subjective detection | Very low ⚡ — occupants, simple checks | Medium ⭐ — early, non-specific warning | Early detection of hidden or inaccessible growth | Non-invasive early alert that prompts inspection |
| Water Stains & Discoloration | Low 🔄 — visual pattern recognition | Low ⚡ — visual inspection, optional moisture meter | Medium ⭐ — documents past/current moisture paths | Locating leaks, insurance documentation, investigations | Permanent markers of water movement; guides testing |
| High Humidity & Condensation | Medium 🔄 — requires measurement and monitoring | Medium ⚡ — hygrometers, moisture meters, logging | High ⭐ — quantifiable risk indicator (actionable) | Preventive monitoring and root-cause analysis | Measurable thresholds to inform remediation (e.g., dehumidification) |
| Deteriorating Wood / Structural Damage | High 🔄 — probing and professional assessment | High ⚡ — tools, structural engineer, repairs | High ⭐ — indicates advanced, costly damage | Structural safety evaluations and prioritized repairs | Reveals severity; necessary for repair planning and claims |
| Insulation Damage & Deterioration | Medium 🔄 — inspection, careful handling | Medium ⚡ — PPE, containment, replacement materials | High ⭐ — shows contamination and energy loss | Energy audits, insulation replacement, containment work | Identifies thermal inefficiency and contamination sources |
| Efflorescence / White Deposits | Low 🔄 — visual + simple wipe test | Low ⚡ — visual inspection, cloth test | Medium ⭐ — indicates moisture migration (not mold) | Locating water intrusion and planning waterproofing | Durable indicator of water flow paths to target fixes |
| Pest Activity & Insect Presence | Medium 🔄 — requires identification and correlation | Medium ⚡ — pest inspection, traps, pest control | Medium ⭐ — indirect indicator of moisture/mold-prone areas | Coordinated pest + moisture remediation efforts | Helps locate damp zones and motivates prompt remediation |
From Detection to Resolution: Your Next Steps to a Healthy Home
Recognizing the subtle and overt signs of mold in crawl space is more than just a home maintenance task; it’s a critical act of protecting your property’s structural integrity and your family’s well-being. Throughout this guide, we’ve explored the diverse indicators that point to a hidden moisture problem, from the unmistakable musty odor and visible growth to less obvious clues like damaged insulation, pest activity, and efflorescence.
Each sign, whether dramatic or discreet, tells a story about the environment beneath your living space. The common thread weaving through all these warnings is one single, powerful culprit: excess moisture. Understanding this is the most crucial takeaway. Your ultimate goal is not merely to remove the existing mold but to fundamentally alter the conditions in your crawl space to prevent its return.
Turning Knowledge into Action
You’ve now equipped yourself with the knowledge to be a vigilant homeowner. You know what to look for, what it means, and why it matters. If you’ve walked through this list and checked off one or more of these signs in your own home, your next step is not to panic, but to proceed with a clear, informed strategy. Ignoring these indicators allows a manageable issue to evolve into a complex and costly problem affecting your home’s air quality and structural soundness.
Your immediate action plan should look like this:
- Document Everything: Take clear photos or videos of any visible signs you’ve found. Note the location, date, and any associated odors or conditions. This documentation is invaluable when you consult with a professional.
- Assess, Don’t Disturb: Resist the urge to scrub or tear out moldy materials yourself. Disturbing a mold colony without proper containment can release millions of spores into the air, potentially spreading the contamination to other areas of your home.
- Control Obvious Moisture: If you can identify and safely address an active source of moisture, such as a minor pipe leak or a downspout discharging right next to the foundation, take temporary measures to mitigate it. This is a stop-gap, not a permanent solution.
- Seek Professional Verification: This is the most important step. A DIY assessment is a great start, but it cannot replace the accuracy and thoroughness of a professional inspection. A certified mold inspector can confirm the presence and type of mold, identify the full extent of the issue (even in hidden areas), and pinpoint the exact moisture sources causing it.
The Power of a Professional Inspection
Mastering the ability to spot these signs empowers you to be proactive rather than reactive. By calling in an expert at the first sign of trouble, you are taking control of the situation. A professional assessment, like the comprehensive testing and reporting services offered by Pacific Mold Pros, provides the definitive roadmap to a solution. It moves you from a state of uncertainty to a position of clarity, armed with a detailed plan for effective remediation.
This is not just about cleaning up a mess. It’s about restoring the health of your home from the ground up. A dry, well-ventilated crawl space supports the entire structure above it, contributes to cleaner indoor air, and prevents a host of future problems. By taking these signs of mold in crawl space seriously, you are making a long-term investment in the safety, value, and comfort of your home. Your vigilance today is the foundation for a healthier living environment tomorrow.